


Affordable Product Photography That Helps Indian Sellers Boost Sales
If you are running an online store in India, you know how much a single photoshoot session can cost. A decent photo of a product can cost anywhere between 10k and 50k rupees.
That's a lot of money to spend on photos for one seller, especially if you are just starting.
If you are a small-scale seller looking to make your mark on Amazon, Flipkart, or Shopify, great news! Affordable product photography is no longer a luxury enjoyed by big brands only. In my experience, while working with Amazon, Flipkart, and Shopify sellers, I've come across numerous small-scale sellers who have managed to get their products photographed as well as big brands, without having to break the bank.
Let me help you understand this in more detail so you can make the right choice for your online store.
What Is AI Product Photography?
In short, what is AI product photography? This is when you create photos of items with a computer program, instead of a camera, studio, and photographer. All you have to do is upload a photo of your item, and instantly you have a nice picture for your catalog.
Imagine not having to spend thousands on a studio and a photographer, just by downloading an AI image editor and editing your photos. Some people use an artificial intelligence image editor to remove backgrounds and change lighting and shadows, instead of using Photoshop and spending hours on one photo.
If you want to try it out, many offer an AI product photo generator free trial, which you can test on your own photos before paying for the service. There is also an AI image generator free for a certain number of photos that you can use, if you just want to test it out, before actually buying the service.
How the AI Actually Works
The process is honestly simpler than most sellers expect.
- You upload a plain photo of your product, even one taken on your phone
- The AI removes the old background automatically
- It adds a new background, whether that is a plain studio look or a lifestyle scene
- It adjusts lighting and shadows so the product looks real, not fake
- Some tools can even place your product on a model, without hiring one
This is exactly how the AI photo generator works behind the scenes, and it takes seconds instead of hours.
A simple AI product image generator can be used for almost anything you can imagine. I saw people using this for jewelry, clothing, home decor, even different types of electronics. The result always looks nice and professional, like it was taken in a photographer's studio, not on someone's cellphone.
AI vs Traditional Product Photography: Real Cost Comparison
Let me show you the actual numbers, because this is where most sellers realize how much they are overspending.
Traditional Studio Shoot Costs for Indian Sellers
A standard photo shoot in India would require you to rent the studio, hire a photographer, and pay editing fees, and sometimes even a model. All together, you are looking at anywhere between 10,000 to 50,000 INR depending on your city and the number of products you want photographed.
This is not an unreasonable expense, but if you are selling 20 or 30 products on your e-commerce site, it can become rather expensive, not to mention the time you will have to spend waiting until your photos are ready.
What an AI Tool Costs Instead
With an AI tool for product photography, most sellers pay a small monthly fee instead of paying per shoot. Here is a simple comparison to make this clearer.
| Factor | Traditional Studio | AI Tool |
|---|---|---|
| Average cost | ₹10,000 to ₹50,000 per shoot | Around ₹600 per month |
| Turnaround time | 2 to 5 days | Under 10 seconds per image |
| Revisions | Extra charges apply | Unlimited, instantly |
| Scaling to more products | Expensive and slow | Same low cost, no extra booking |
I've seen companies reduce their monthly photography budget by more than half by allocating some of their catalog to automated product photography software. It's not about replacing everything, it's about optimizing your workflow and reducing costs on catalog updates and large-scale shoots.
When you compare the two, the differences in what you can achieve with a virtual product photoshoot versus traditional photography are staggering. You're not just saving money, but actually able to achieve much more variety while reducing costs.
A shoot in a studio is usually a fixed package. You pick one background and maybe one or two angles, and that's it. With an automated product photography tool, you can change the background, the camera angle, the lighting, essentially, you can experiment with unlimited variations without any extra costs.
(Insert product photography example here: a comparison between a regular phone photo and a studio image) Alt text example: affordable product photography example for Indian sellers
Best AI Product Photography Tools for Affordable Results
There are many options out there, and it can get confusing fast. So let me break this down the way I would explain it to a friend starting their first online store, drawing on the best AI tools for product photography I've tested with sellers.
Best for Amazon and Flipkart Listings
If your primary concern is the creation of marketplace-ready images that follow white background or image size requirements, then you need the best AI product photo generator for Amazon sellers, which takes care of these issues automatically. The AI Studio tools make sure you get images that adhere to Amazon and Flipkart guidelines without you having to check all the boxes manually.
Best Free or Low-Cost Options
If you are just experimenting, there are also free AI product image generators you can use for product photo editing. They allow you to see how the background removal and editing process works and help you get accustomed to it so that you can later choose the paid option for a better experience.
Best for On-Model Fashion Photos
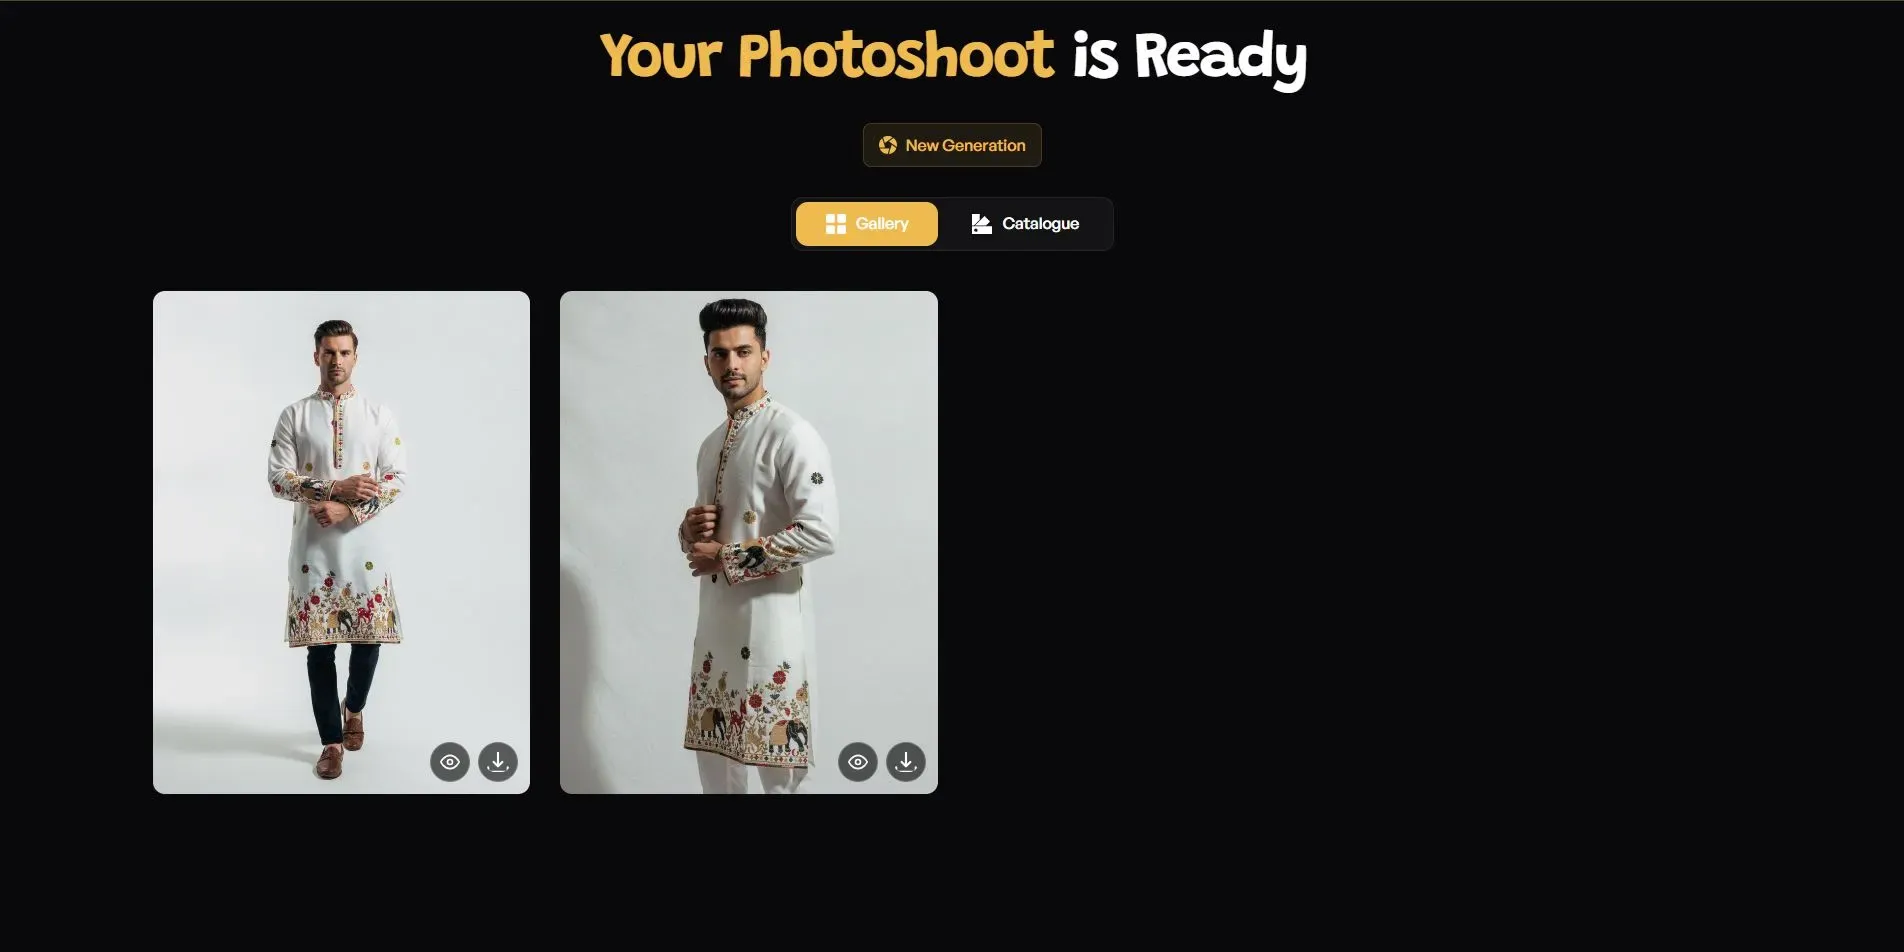
This is where things get really interesting for fashion and clothing sellers. Normally, a product photoshoot with a model means booking a real model, a stylist, and a full day of shooting. Now, AI fashion photography tools that generate on-model photos without models can place your clothing on a realistic virtual model in seconds. I have seen small D2C fashion brands use this to create full catalog shoots without ever renting a studio.
Instead of spending ₹20,000 on the shoot, most of the sellers opt for tools like AI Studio for Shopify to invest only 5% of the cost and spend hours instead of days getting their product shot.
If one makes an AI image generator tool search on Shopify, they might find that most of the tools are made for generic purposes rather than specific price lists like Indian currency and marketplaces. For this occasion, the AI Studio offers its services for a subscription of ₹600 for a whole month, which is more appropriate for a small-scale business than a global marketplace.
For jewelry sellers, the AI jewelry product photography tool is essential due to the products' specifics, which require more accurate light projection than just the regular camera flash. A unique AI jewelry tool would capture all the intricate details and provide the jewelry with the proper reflection without any unwanted shadows.
I have also seen marketing agencies handling multiple client accounts use a virtual product photoshoot for Shopify setup to manage several brands at once, without booking separate shoots for each client. This alone saves a huge amount of coordination time, which matters when you are managing many stores together. This is genuinely one of the better options for AI product photography for small business owners who cannot justify a full-time photographer or studio.
How to Create Studio-Quality Product Photos With AI (Step-by-Step)
You do not need to know anything about design for this. Let me show you how to create product photos with AI, and what goes on in AI Studio. It does not take more than 10 minutes, even if you have never used an AI before.
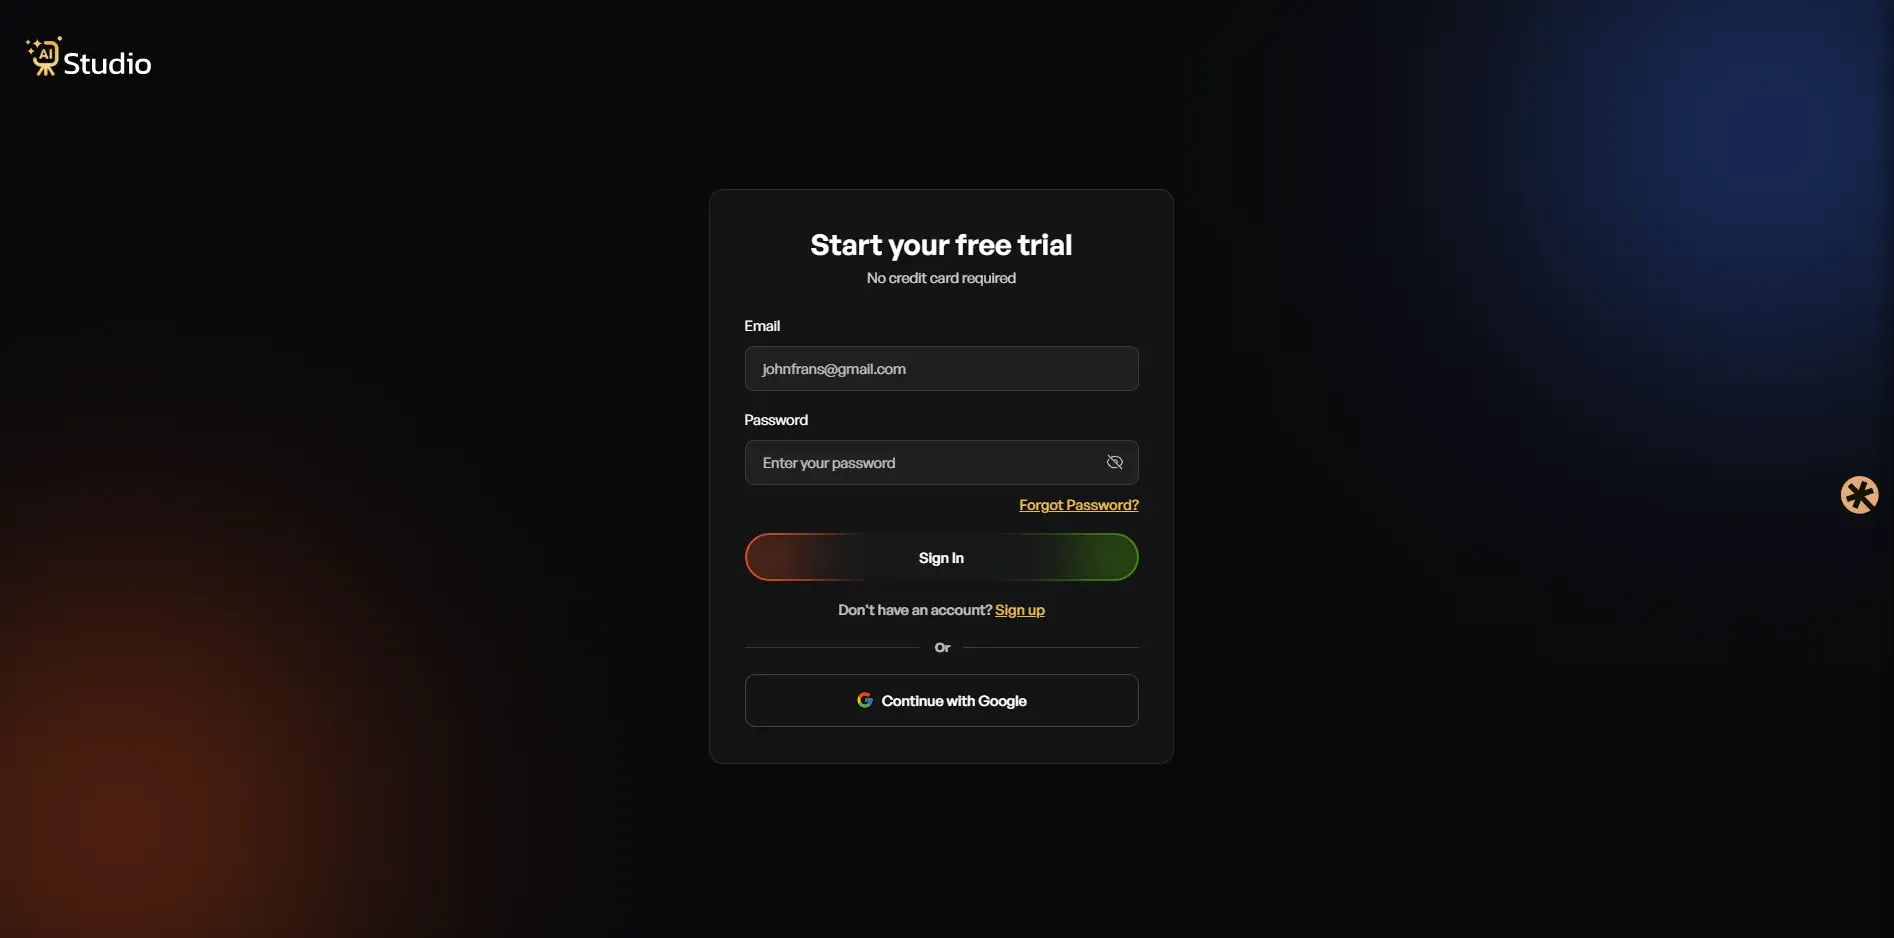
Step 1: Create Your Free Account
Sign up on the platform and log in. No credit card is needed just to get started, so you can explore the dashboard first and decide later.
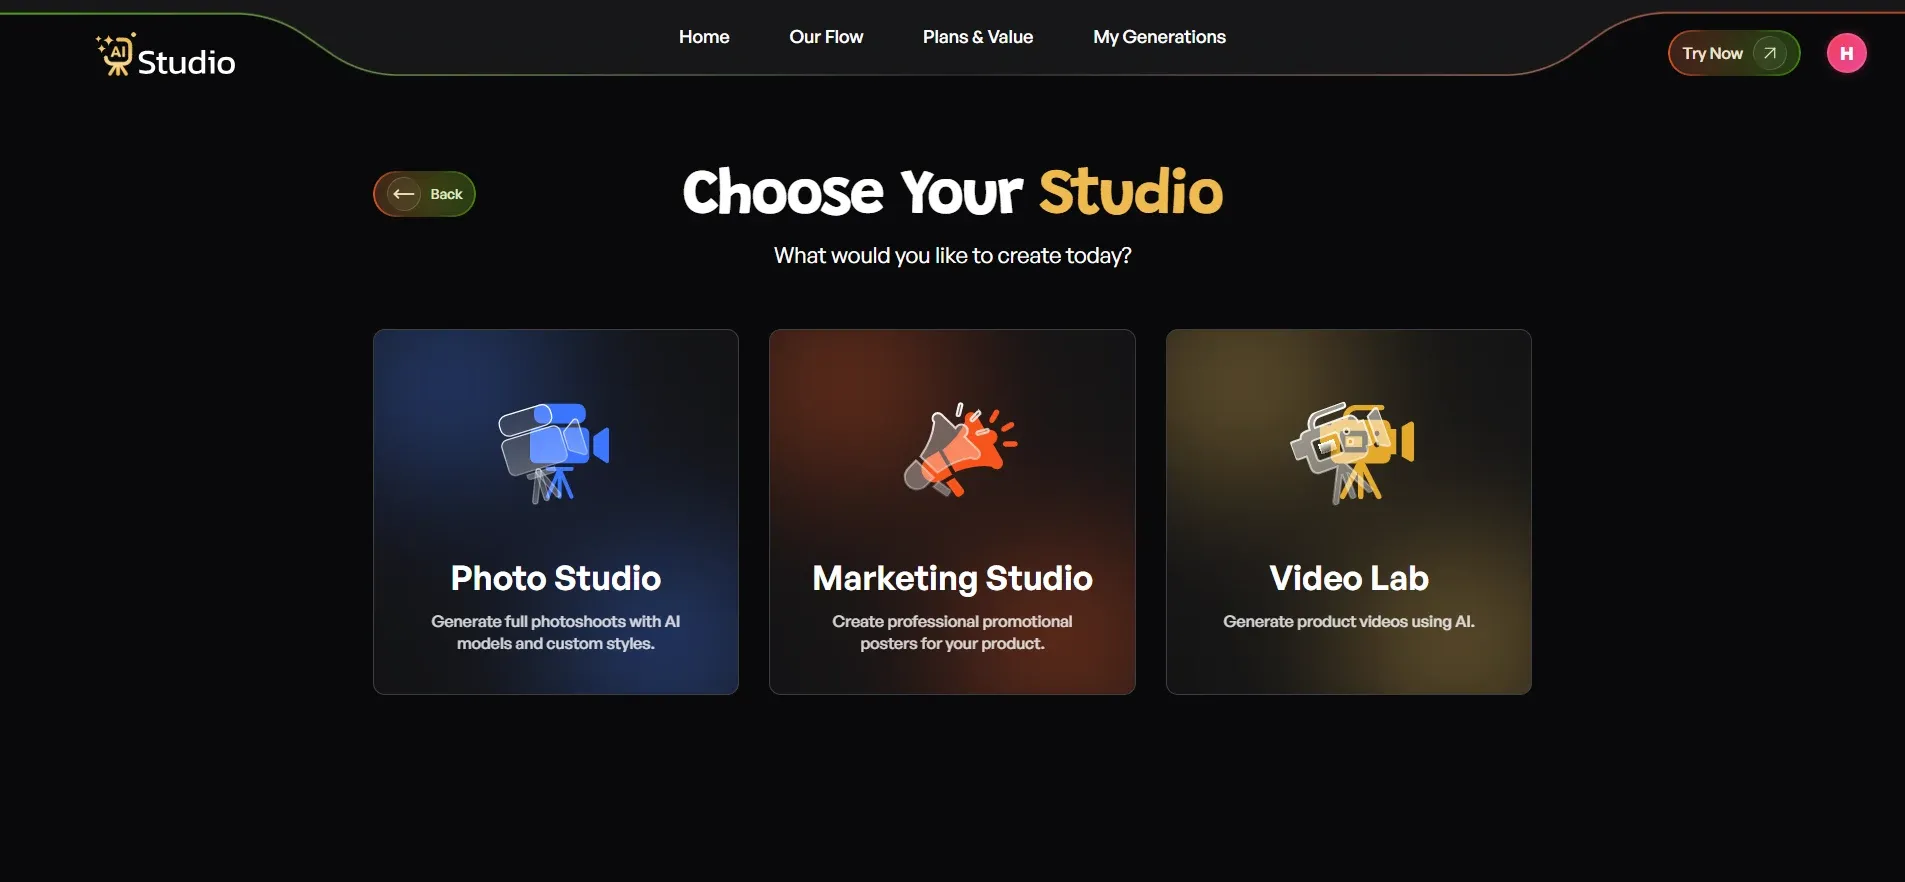
Step 2: Choose Your Studio
Once you are inside, you will usually see a few options like Photo Studio, Marketing Studio, and Video Lab. For product images, Photo Studio is the one you want, since that is where the actual image generation happens.
Step 3: Select Your Category
Next, pick the category that matches what you sell.
- Choose Fashion if you sell clothing like kurtas, t-shirts, dresses, or ethnic wear.
- Choose Accessories if you sell watches, jewelry, bags, belts, or sunglasses.
- Choose E-commerce for general products like electronics, home goods, or beauty items.
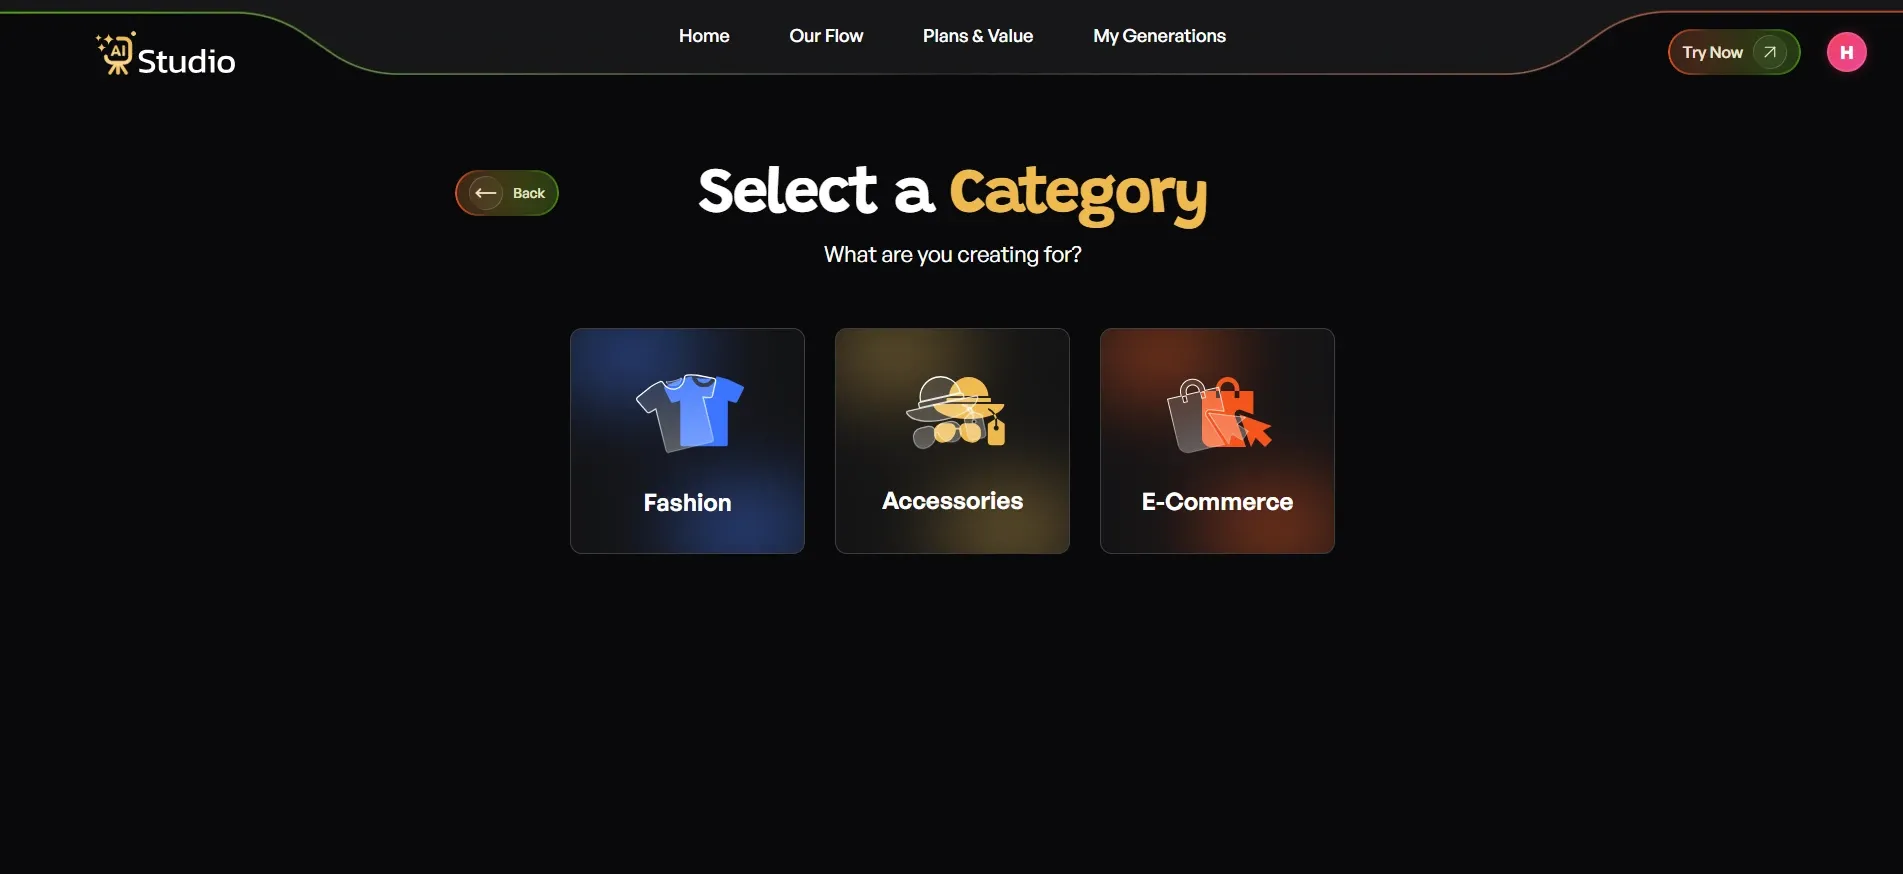
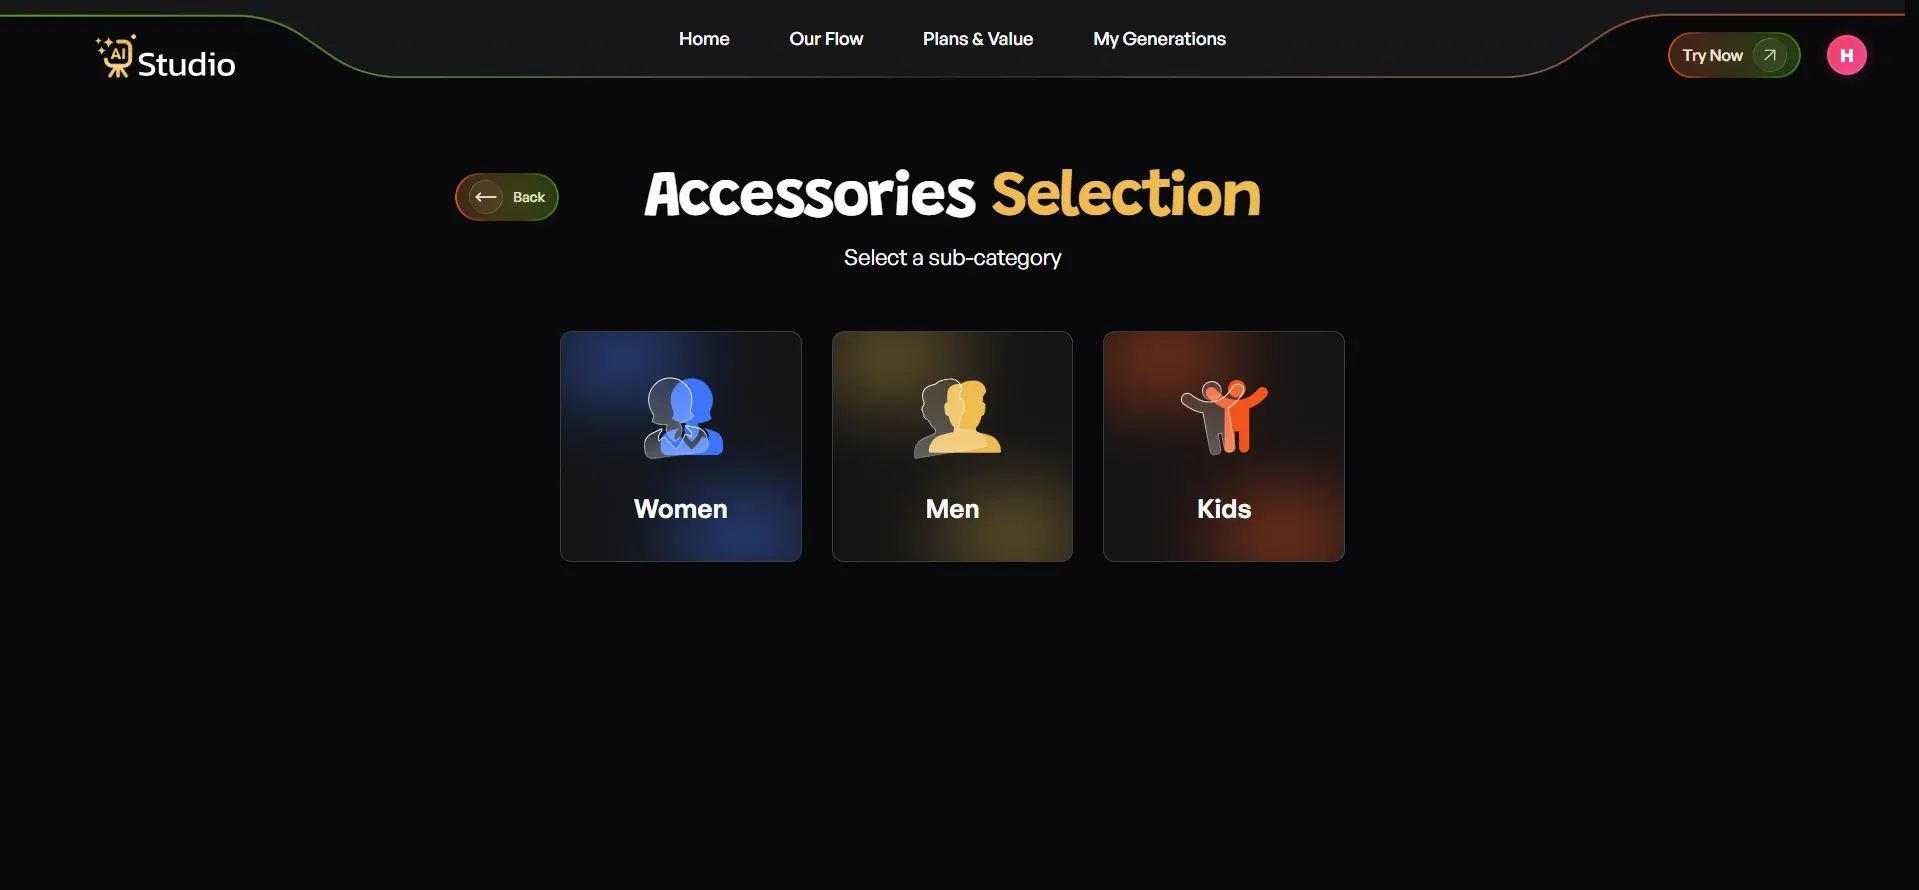
If you pick Fashion or Accessories, you will also be asked whether it is for Women, Men, or Kids, so the tool knows which type of model to generate for your product.
Step 4: Select Your Subcategory
Under your chosen category, pick the exact subcategory that fits your product. This small step helps the AI understand what it is actually working with before you even upload a photo.
Step 5: Upload Your Product Photo
This step decides most of your final image quality.
- Pick your specific product type, for example, Watch, Belt, or Perfume for accessories.
- Upload your Primary Image, which should be a clear, front-facing photo of your product.
- Add a second angle if you have one; this is optional but helpful for accessories.
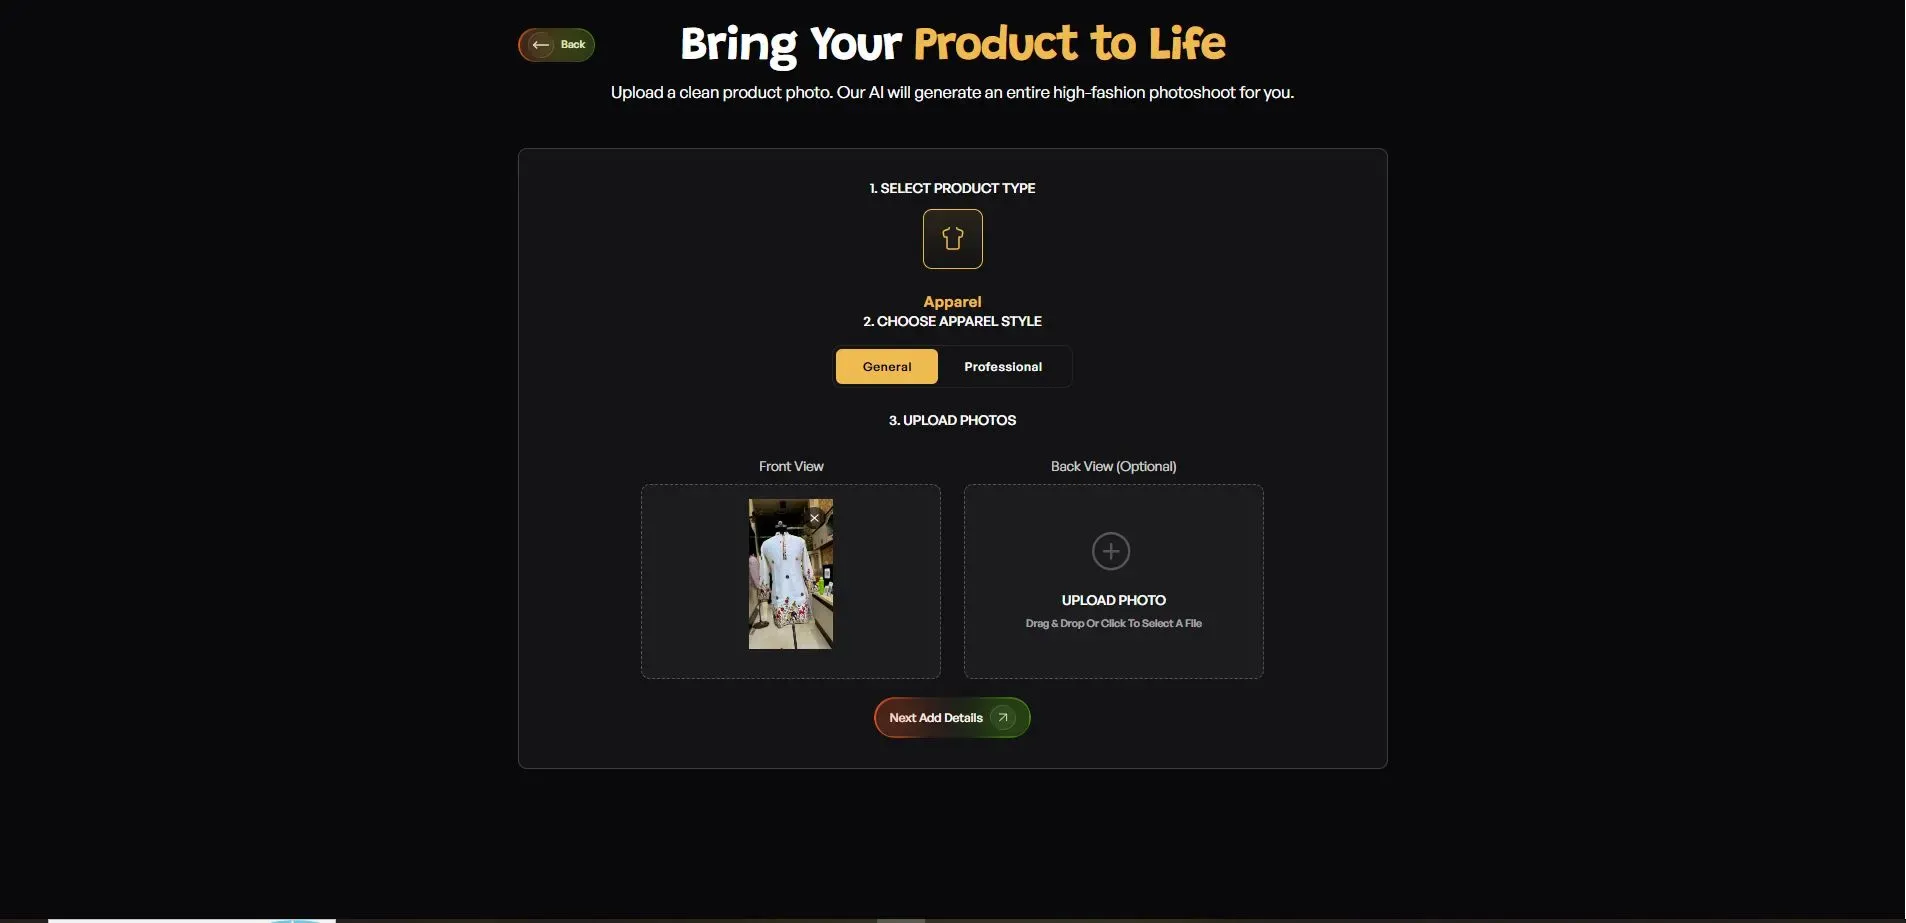
A plain white or light background on your original photo, taken on any phone in decent light, is usually enough to get a clean result. If you want to experiment first, some tools also offer a simple AI product background generator free option so you can test a few looks before picking one for your final listing.
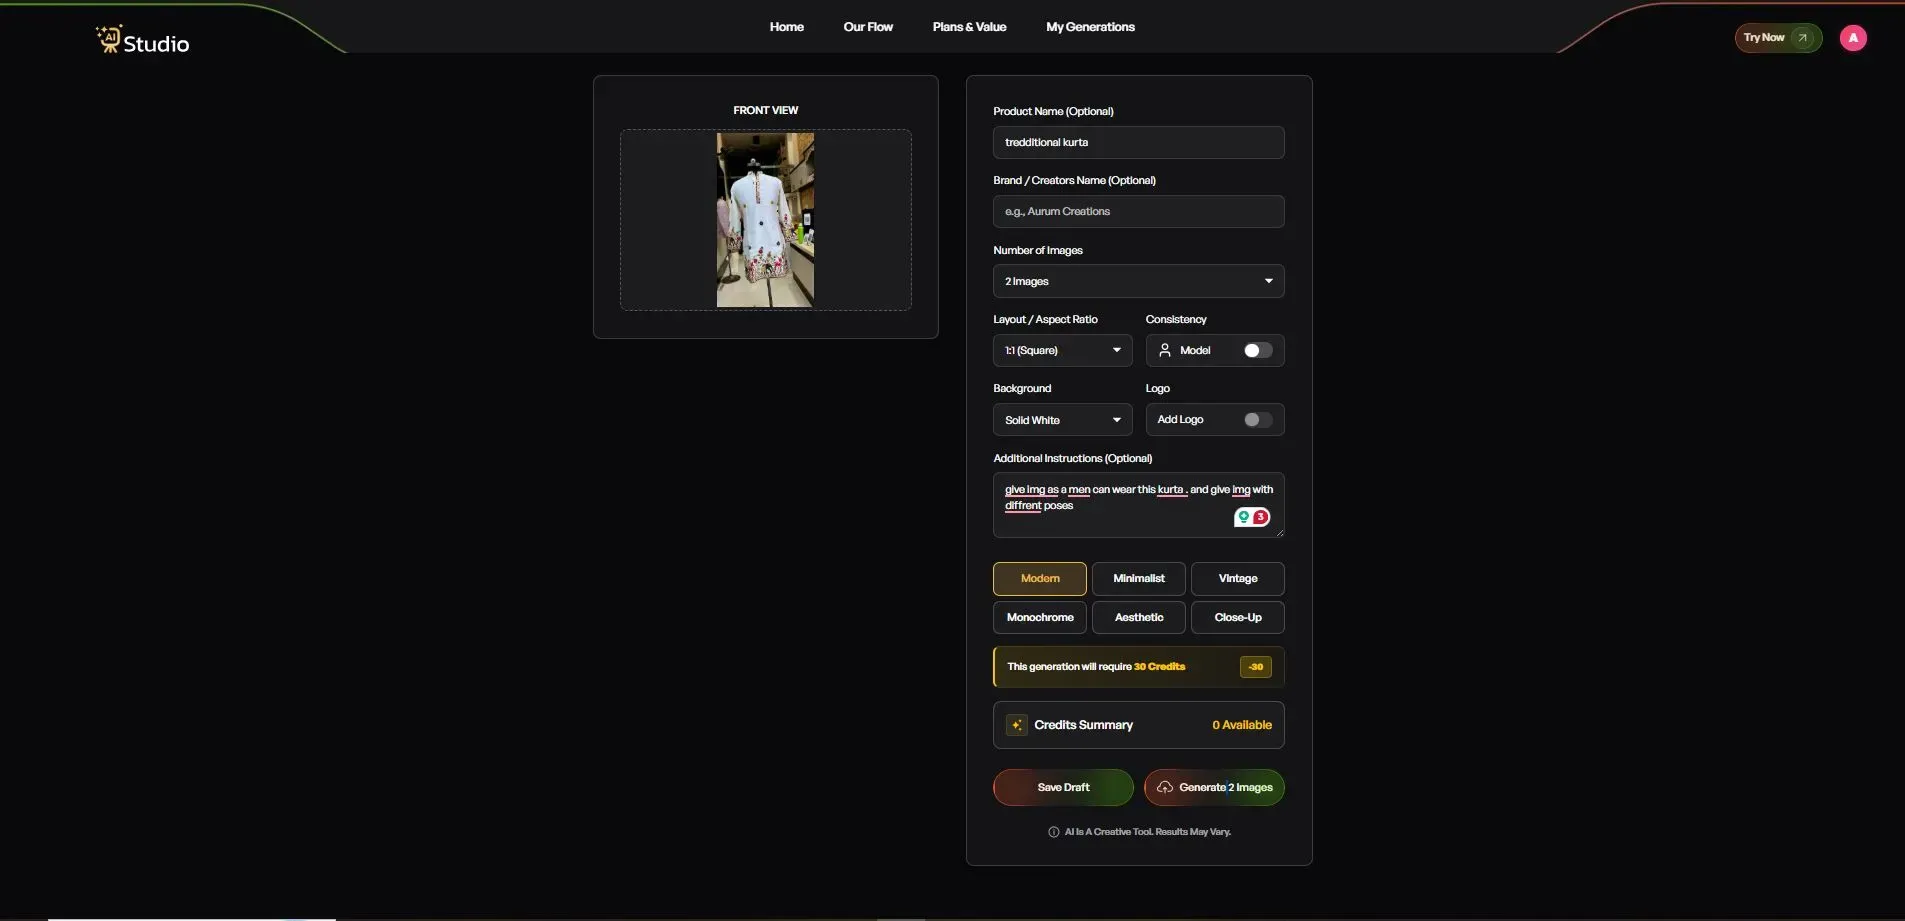
Step 6: Fill In the Final Details
Before generating, you can customize a few things.
- Add your Product Name and Brand Name, which is optional but helps keep things consistent.
- Choose how many images you want, such as 2, 4, or more.
- Pick your layout, like 1:1 square for Amazon and Instagram, or 4:5 for Instagram feed.
- Turn on Model Consistency if you want the same model used across your whole catalog.
- Choose your background; Solid White works well for Amazon's main image, while lifestyle backgrounds suit Shopify and Instagram better.
- Pick a style such as Modern, Minimalist, Vintage, or Close Up.
- Add your logo if you want it visible on the image.
- Add any extra instructions, like "warm lighting, outdoor setting, focus on product details."
Step 7: Download Your Image
Click generate, and your image is usually ready within 10 seconds, in full resolution and with no extra retouching needed. From here, it is ready to upload straight to your Amazon listing, Shopify store, Flipkart catalog, or Instagram page. This is exactly what studio-quality AI product photos without a photographer should feel like: quick, simple, and ready without any manual resizing later.
Improving Your Amazon or Ecommerce Listing Images With AI
If you are wondering how to improve Amazon listing images, small changes usually make the biggest difference, and a few AI product photography tips for ecommerce sellers go a long way.
- Keep your main image on a pure white background, since this is required on most marketplaces.
- Use the same lighting style across your entire catalog, so your store looks consistent.
- Stick to the exact image size Amazon or Flipkart recommends, to avoid rejected listings.
- Add a lifestyle or in-use image alongside your plain product shot, since this often helps buyers decide faster.
Sellers that leverage ecommerce photography AI for these subtle details see much higher click-through rates due to their images being more credible than those of their competitors.
One common question I get from sellers about AI-generated product image quality pertains to image quality itself, specifically if buyers can tell the difference between an AI image and a photo taken by a real photographer.
In my experience, if lighting and shadows are done correctly, no one will be able to tell the difference in most cases, as an AI image can look just as good as a professional image.
Is AI Product Photography Right for Your Business?
To start with, I have to say that I am being completely honest here, as I do not want to exaggerate. AI product photography for ecommerce is, in fact, very good at most of the products, clothing, jewelry, accessories, and other daily-use goods. Most often, the final result looks almost identical to the real photo, provided that the shape of the item is simple and does not require special expertise.
On the other hand, certain highly reflective surfaces, associated with precious metals, or products with an extreme level of detail may require additional editing; thus, a combination of real photos and AI-assisted images would be the best choice.
Thus, you can use AI-generated photos for most of your products and reserve real photography for the most important ones, such as seasonal items or those of higher quality. This approach allows you to maintain a good balance between the quality of images and the money and time spent on them.
Conclusion
Product photography doesn't have to be expensive anymore. For businesses selling their products on platforms like Amazon, Flipkart, and Shopify, affordable product photography using AI can help you get studio-grade images without the long wait of visiting a physical store.
From clothing to accessories to regular products, Indian small businesses have been using some of the best AI tools for ecommerce photos to compete against bigger competitors by reducing the image cost. If you have been hesitating to improve your images due to their price, maybe these tools would be a good starting point.