Virtual Product Photoshoot for Shopify: Create Professional Product Images Without a Studio
Are you running a Shopify store in India? Some facts you need to know:
Whenever you need new product images, a single professional shoot can cost anywhere from ₹10,000 to ₹50,000 or more. Sometimes, add model fees, studio bookings, and post-editing charges, and even a small D2C brand that seems to become a catalog is ready.
I have seen many sellers who delay their product launches simply because they cannot afford another photoshoot.
A virtual product photoshoot for Shopify changes all that. In this blog, you walk through what it is, why Indian sellers are switching to AI-powered image creation, how the step-by-step workflow looks, and what it actually costs compared to traditional photography.
What Is a Virtual Product Photoshoot for Shopify?
A virtual product photoshoot for Shopify is basically the process of using AI software to make professional product images without actually needing a physical studio.
In practice, you upload a simple photo of your product, and the AI handles the rest. It removes the background, drops in a new scene or adds a model, then gives you listing-ready images in just minutes. You don't need a camera, studio rental, or a photographer.
Let me put it like this, in an easy way. Picture you just got a fresh set of kurtis. Usually, you'd have to book a studio, arrange a model, hire a photographer, then wait around for the shoot, and later wait again for editing. Honestly, that whole cycle can take days, and it costs serious money.
With a virtual photoshoot, you snap a basic kurti photo using your phone, upload it to an AI tool, pick a background or model style, and then download the final image in under ten minutes. The result tends to look like it was produced in a real professional studio.
This method works for fashion, jewelry, accessories, home decor, and most ecommerce product categories. It's also super helpful for sellers who want consistent, matching images across a bigger catalog without paying for each product shoot one by one.
Why Shopify Sellers Are Moving Away From Traditional Photoshoots
Here is the reality: traditional product photography was kinda made for brands with huge marketing budgets. For most Indian ecommerce sellers, it has never been a smooth process, not even close. It has been expensive, slow, and sort of hard to redo, every time again.
In my experience, photo shoots can get really expensive really fast. Like, hiring a photographer in India can cost ₹3,000 to ₹15,000 per day, and then a studio rental also adds another ₹2,000 to ₹10,000.
If your product is fashion, say a saree or a lehenga, you end up needing a model too. Model fees in India usually range from ₹5,000 to ₹50,000 per day, depending on experience and the area. By the time the images are edited and delivered, you've basically spent more on the shoot than you would on several months of advertising.
Then the time thing shows up. Booking a photographer, coordinating a studio date, actually completing the shoot, and waiting for edited files can take somewhere between five to fifteen days. If you are launching a new collection for a sale season, that window is often not doable, not workable at all.
For sellers in tier-2 and tier-3 cities like Jaipur, Surat, or Indore, the situation is even tougher. Getting access to professional studios and experienced ecommerce photographers is pretty limited. So traditionally, sellers either travel to bigger cities for the shoot or they settle for lower quality images, which then hurts conversion rates.
So that's why AI product photography is getting traction as a practical solution for small and mid-sized Indian ecommerce brands. It removes almost every friction point from the usual photography process.
Traditional Photoshoot vs Virtual AI Photoshoot: A Side-by-Side Comparison
Think about it this way. If you had to compare two options on paper before choosing one, which one would you pick for a growing Shopify business?
| Factor | Traditional Studio Shoot | Virtual AI Photoshoot |
|---|---|---|
| Cost per session | ₹10,000 to ₹50,000+ | ₹500 to ₹2,000/month |
| Time to first image | 2 to 5 days | Under 10 minutes |
| Studio required | Yes | No |
| Model required for fashion | Yes (₹5,000 to ₹50,000/day) | No (AI model generated) |
| Catalog consistency | Difficult to maintain | Consistent across all products |
| Scalability for 100+ products | Very expensive | Highly scalable |
The comparison makes it kind of clear. Traditional photography still makes sense for certain situations, as a flagship hero shot for a high-margin product, or a brand campaign. But for day-to-day catalog creation, new product launches, and keeping a steady visual consistency across hundreds of SKUs, AI product photography tools end up being a much more practical road.
Tools like AI Studio can generate studio-quality AI product photos without a photographer. Many sellers I have talked with use AI for 80 to 90 percent of their catalog, and then reserve the classic shoot for only their best-selling items.
How to Do a Virtual Product Photoshoot for Your Shopify Store (Step-by-Step)
The practical part starts right here. Let me show you how it actually works, with Try AI Studio. The whole process takes less than 10 minutes. You won't need any photography or design knowledge to get going, not really.
Step 1: Create a Free Account and Log In
Go to tryaistudio.app and create a free account. No credit card is needed to get started. Once you log in, your dashboard opens, and you are ready to begin.

Step 2: Choose Your Studio
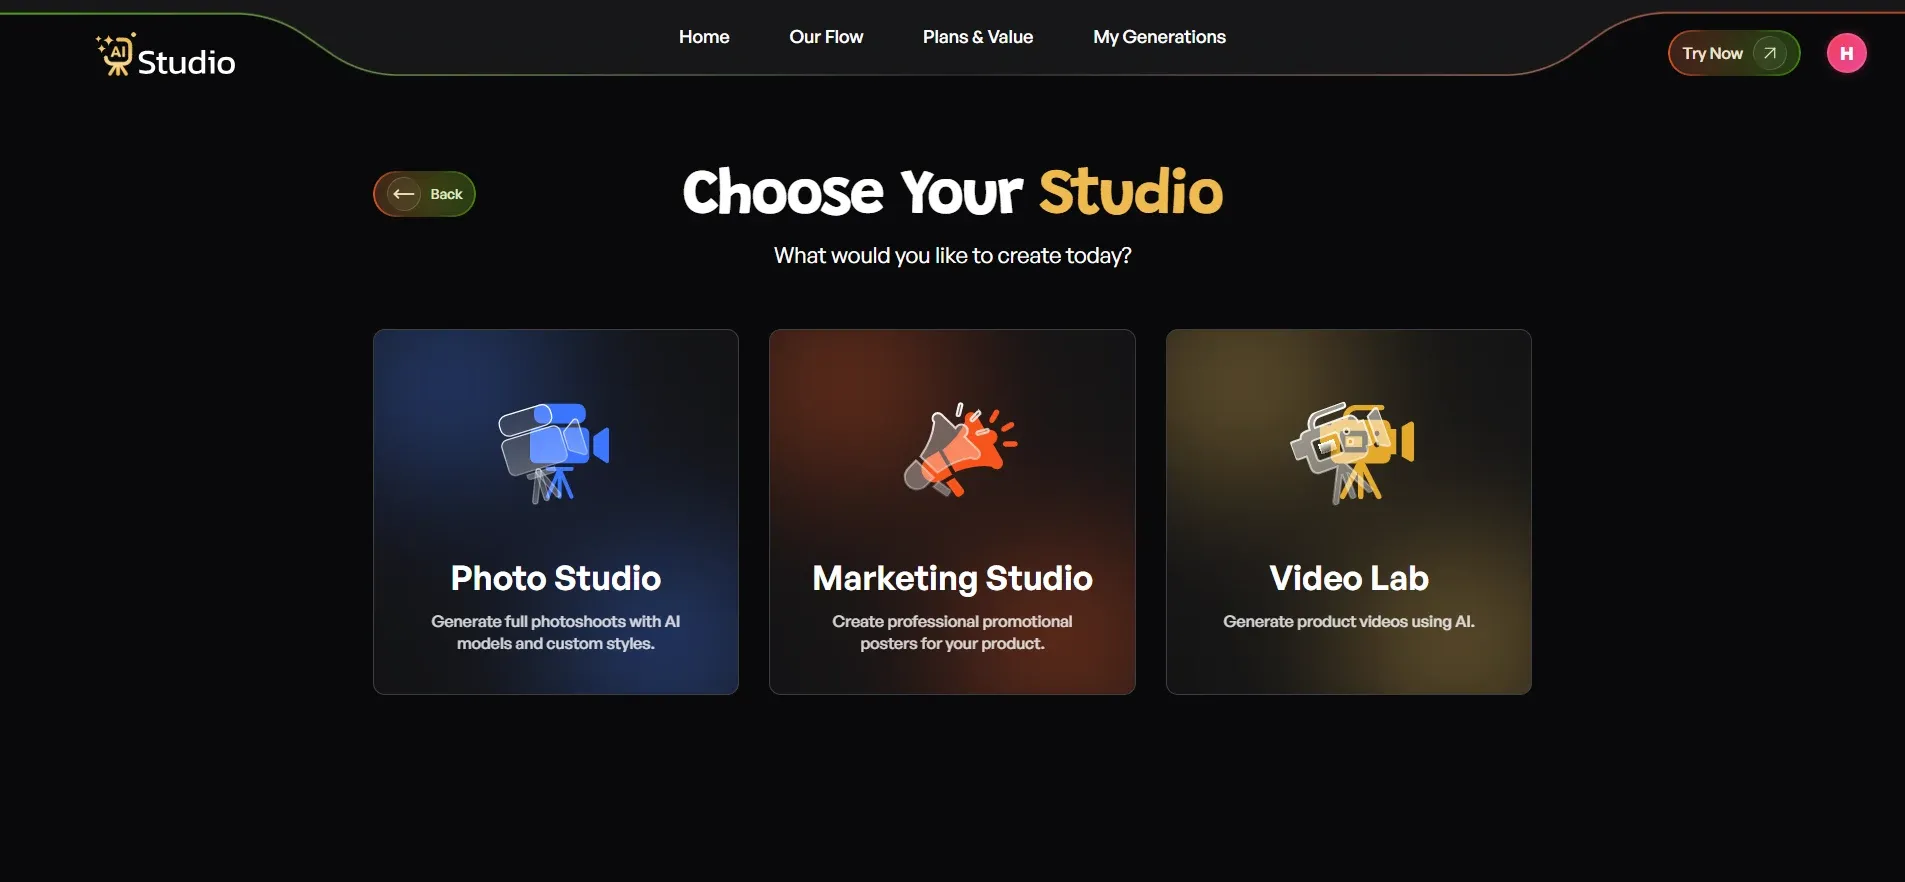
Inside the dashboard, you will see three options: Photo Studio, Marketing Studio, and Video Lab.
For creating product images, select Photo Studio. This is the AI product photography interface where the full virtual photoshoot happens.
(Insert screenshot: AI Studio dashboard showing Photo Studio, Marketing Studio, and Video Lab options)
ALT text: "AI Studio dashboard showing Photo Studio option for Shopify product image generation."
Step 3: Select Your Category
You will be asked what your creation is for. There are three categories:
- Fashion for clothing like kurtas, t-shirts, dresses, sarees, or ethnic wear
- Accessories for watches, jewelry, bags, belts, or sunglasses
- E-Commerce for general listings like electronics, home goods, or beauty products
After selecting your main category, just pick the subcategory. For Fashion and Accessories, you will want Women, Men, or Kids. This is what tells the AI which kind of virtual model to generate for your item, so it can match it better.

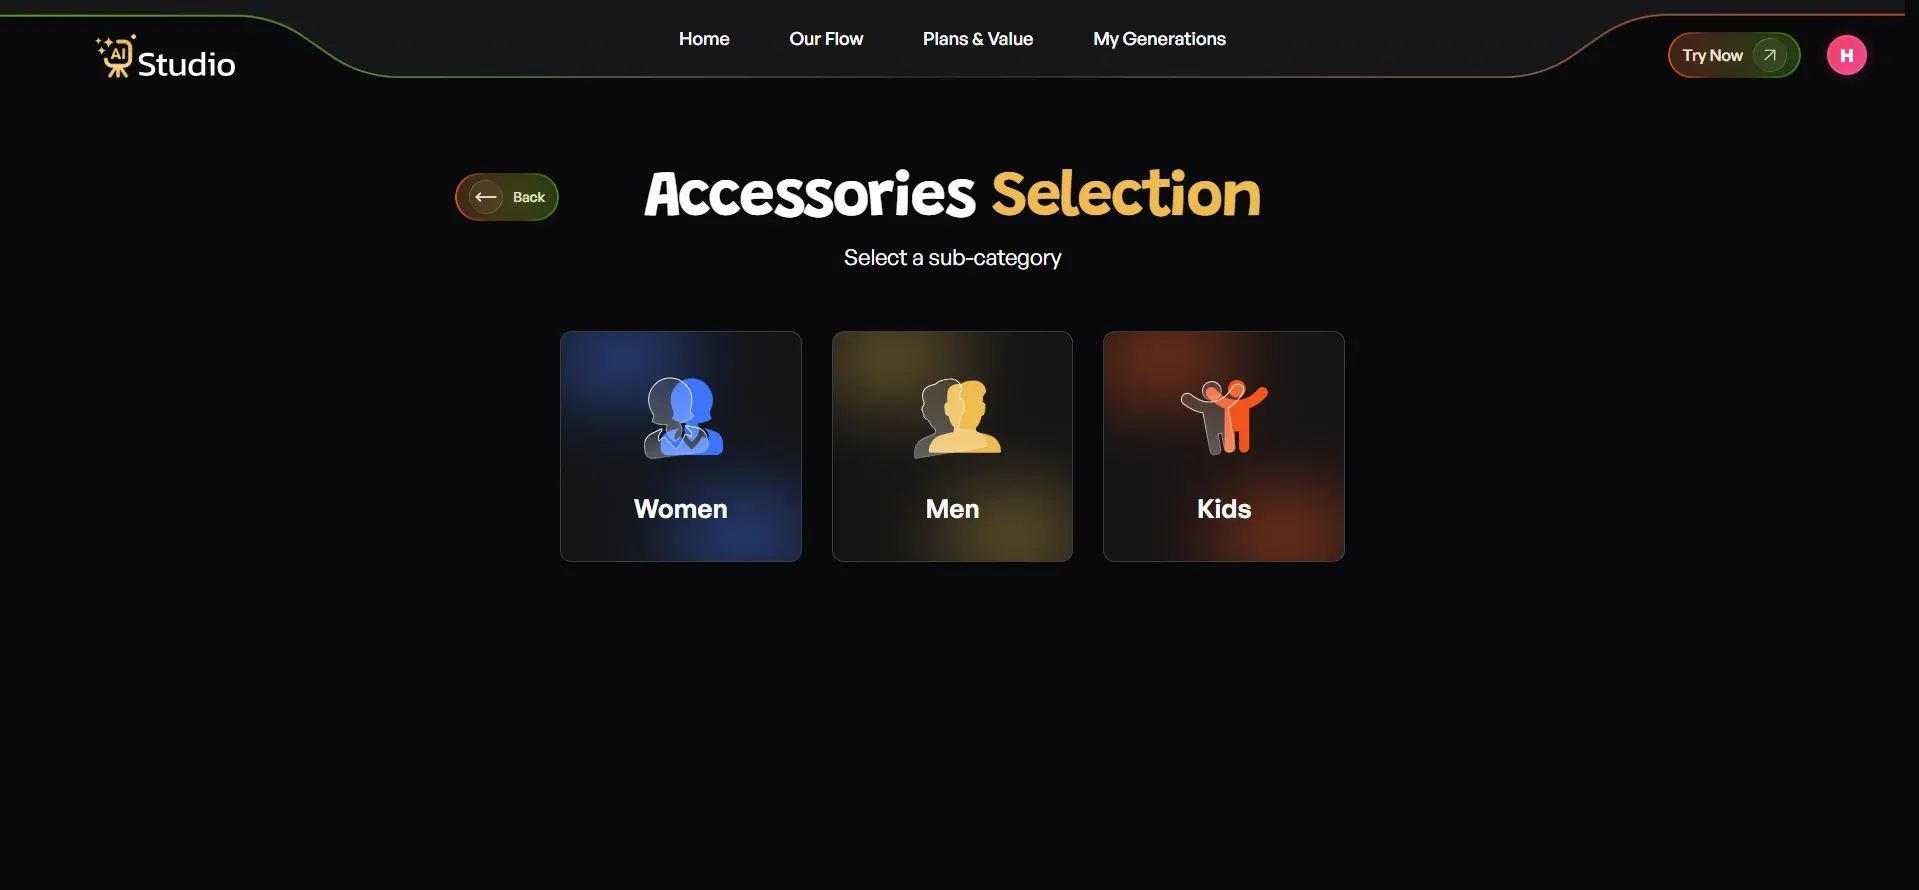
Step 4: Select Your Sub-Category
After you navigate the main section, you need to come on sub-cateogary page also, there are three specific categories like: Women, Men, Kids. You can select based on your specific needs.
Once you choose the selection of your desired categories, the next page says to upload your product photo.
Step 5: Upload Your Product Photo
This is the only thing you need to prepare before starting.
- Upload a Primary Image: a clear, front-facing photo of your product (required)
- Add an Additional Image if you have a second angle (optional but recommended for accessories and jewelry)
Your source photo works best with a plain white or light-coloured background. Any phone photo is suitable as long as the product is in focus and the lighting is reasonable. Click Next: Add Details when done.

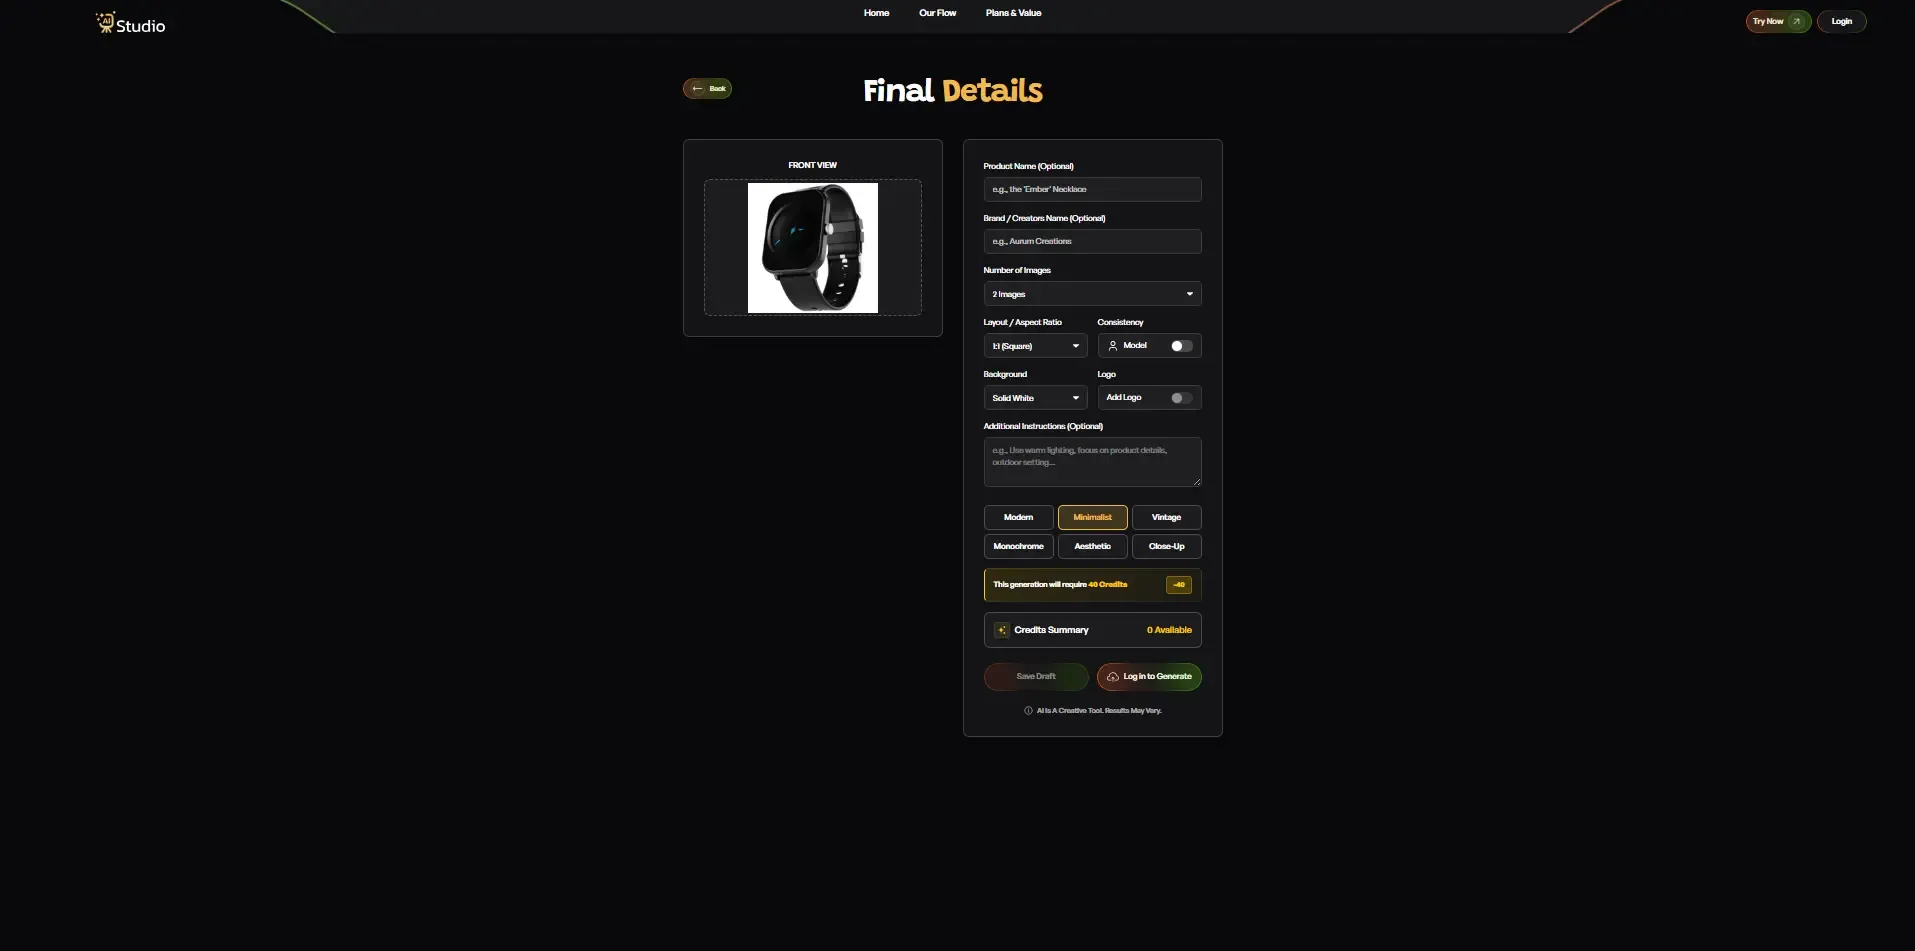
Step 6: Fill In the Final Details
This is where you customise the output before generating.
- Product Name and Brand Name: optional, but helps with consistency across a catalog
- Number of Images: choose how many variations you want generated
- Layout / Aspect Ratio: 1:1 Square for Amazon and Instagram, 4:5 for Instagram feed, 16:9 for banners
- Model Consistency: turn this on to keep the same model across all generated images. This is very useful if you are generating a full catalog
- Background: Solid White works best for Amazon's main images. Other options work well for Shopify lifestyle shots
- Style: choose from Modern, Minimalist, Vintage, Monochrome, Aesthetic, or Close-Up
- Logo: add your brand watermark if needed
- Additional Instructions: write any specific direction, for example, "Use warm lighting, outdoor setting, focus on product detail."
Once everything looks right, click Generate Images.
Step 7: Download and Upload to Shopify
The AI generates your image in under 10 seconds. You'll see a virtual model or something more like a professional scene, depending on the category you picked. Take a moment and review what you get. If you want a different background or a more specific style, just regenerate and let it try again.
Once you're satisfied with the output, download the image at full resolution. Shopify recommends images at 2048 x 2048 pixels for the best zoom look on product pages. AI Studio outputs fit that standard.
Then upload it straight to your Shopify product listing. No retouching, no back and forth with some editor, no waiting around.
After you finish this workflow for just one product, you can just run it again across your whole catalog. A seller with 50 products can end up with a consistent, studio-grade AI product photo set ready in something like a single afternoon, maybe even faster if things cooperate. It's that kind of volume that traditional photography really cannot mirror, not for small businesses that are working with lean teams and tight budgets.
Real-World Use Cases: How Shopify Sellers Are Using Virtual Photoshoots
Here are three real scenarios that show how AI product photography for ecommerce works across different product categories.
D2C Fashion Brand: Apparel and Co-ord Sets
A Shopify fashion brand selling kurtis, co-ord sets, and ethnic wear previously spent around ₹20,000 to ₹30,000 per collection shoot. Every new season meant another booking, a fresh pile of model plus studio-related costs, and then that annoying wait for the edited files to come back.
After the brand switched to a virtual product photoshoot for Shopify, they started uploading flat-lay images for each garment and then generating on-model shots using an AI tool.
The important part is that AI fashion on-model photography works straight from a flat-lay input. You don't have to drape the fabric on a physical model just to get an on-model result. Instead, the AI overlays the product onto a created model, so you basically skip the whole manual fitting step.
What you end up with is a catalog where each garment looks steady and matched, the model vibe and styling stay consistent across all product pages, and the brand doesn't have to coordinate a full day shoot every time a new collection drops.
Jewelry Seller: High-Detail Products
A jewelry brand on Shopify that sells silver earrings, necklaces, and bangles needs clean, high contrast images, where the product details stay visible, you know, really sharp. In an old school setup, this usually means macro lenses, specific studio lighting, and a photographer who actually gets jewelry photography.
Now with an AI jewelry product photography tool, the seller can upload a basic phone photo of each piece, and then it makes white background studio-style shots with clean lighting. They can also generate styled surface images, where the jewelry is placed on marble or wood, which tends to work great for social media and for ads, too.
So there's no macro lens. No bulky lighting rig. No trained photographer doing it the whole time. Just a phone photo and an AI tool, honestly.
Home Decor and Lifestyle Products
So basically, a small Shopify store that sells handmade candles, clay pots, and other home accessories really needs lifestyle-type images, not just the straightforward "here it is on white" kind. Because a clean white background photo kinda just doesn't show the mood or context, and it usually doesn't hint at the vibe the customer is actually buying.
With an AI background generator for product photos, the seller starts from a basic product photo and then puts it into more real-life settings, like a living room shelf, a kitchen counter, or even a quiet, minimalist bedroom scene.
It's like the product gets a little stage, and somehow that helps more than those plain catalogue shots where everything looks the same. These lifestyle images also seem to do much better on Instagram, and they also help inside Shopify collections compared to the standard white-background pictures.
How Much Does a Virtual Product Photoshoot Cost Compared to a Studio?
This is the section most sellers want to read first. Let me give you three real scenarios.
Scenario 1: New Shopify Seller With 20 Products
For a brand new seller with a small catalog, a traditional studio shoot for about 20 products costs roughly ₹10,000 to ₹25,000. It's mostly those basic white-background frames that this range tends to cover, and well, only that. If you want lifestyle visuals or on-model shots, the price usually goes up quite a bit. Also, editing is often charged separately, so the final total can feel a little higher than expected.
Then there's the affordable product photography AI subscription, which usually starts around ₹500 to ₹2,000 per month, depending on how many images you need. In that kind of pricing, a 20-product catalog can be handled fully within the first month's budget, and still leave some credits leftover for social media posts and ad creatives too.
Scenario 2: Fashion Brand With 100+ SKUs Needing On-Model Images
This is where the cost difference starts to matter a lot, like really fast. A full catalog shoot for a fashion brand with 100+ SKUs needs model hire (₹5,000 to ₹50,000 per day), studio rental (₹2,000 to ₹10,000 per day), photographer fees (₹3,000 to ₹15,000 per day), and, of course, editing. A full shoot for a brand this size can easily run ₹1,00,000 or more, before the editing charges even kick in.
Now, if you use an AI product image generator for a Shopify store on a monthly subscription, the same brand can put out on-model style images for all 100+ SKUs without those extra line items. No model fees, no studio, no rebooking cycles when new inventory shows up.
Scenario 3: Ongoing Monthly Catalog Updates
Traditional photography compounds in cost. Every time you add new products or refresh images, you pay for a new shoot. Sellers who launch new collections monthly or run seasonal catalogs face this cost repeatedly throughout the year.
An AI subscription removes that cycle. Pay once per month and generate as many images as your plan allows. New arrivals, seasonal variations, and ad creatives all come from the same subscription.
The numbers are clear. For most small to mid-sized Indian Shopify sellers, AI product photography for ecommerce is the more practical choice at every scale.
Common Mistakes Shopify Sellers Make With Product Photography (And How AI Fixes Them)
I have worked with enough ecommerce brands to know that photography mistakes are pretty common, especially for sellers who are managing everything themself. Like, they try to do it all in one go, and it shows a bit, you know. Anyway, here are five that come up the most, again and again, in real life.
Mistake 1: Using Inconsistent Backgrounds Across the Catalog
When different products are photographed on different days, the background, lighting, and colour tones can end up looking different. Shoppers on a Shopify store usually notice it right away, even if they can't quite tell what it is; it just feels wrong. AI solves this by creating one consistent backdrop style for every single product, no matter when that original photo was captured.
Mistake 2: Skipping Lifestyle Images Because They Are Too Expensive
Lifestyle images usually beat the plain white background ones, in click-through rates and also in social media engagement, you know, those little signals add up. But trying to stage a lifestyle shoot tends to be pricey and takes quite a lot of time, so a good number of small sellers just end up skipping it altogether.
AI for product photography generates lifestyle scenes from a basic product photo. No outdoor location, no set dressing, no props required.
Mistake 3: Using Low-Resolution or Poorly Lit Phone Photos Directly on Shopify
A blurry or poorly lit product image is one of the fastest ways to lose a sale. Buyers just can't trust what they can't see clearly, you know.
AI tools can manage background removal and image enhancement even if the source photo is kinda imperfect. The result comes out clean and crisp, very listing-ready, so it doesn't look like you rushed it.
Mistake 4: Not Refreshing Images When Launching New Collections
Sellers often reuse some old images, or they drop a new item on the site with placeholder photos, because they can't afford to shoot everything right away. It feels like a missed chance every single time, honestly.
With automated product photography software, putting together a fresh set of images for a new release takes minutes, not days.
Mistake 5: Spending Photography Budget Before Validating the Product
Spending ₹15,000 to ₹20,000 on a photoshoot, before even knowing whether a product will sell, is kind of a real risk for small sellers.
AI images cost a small fraction of what a studio shoot would take. So you can test a product's market response with polished, professional-looking images first, before you commit to a full shoot for hero content, and all that.
How Try AI Studio Helps Shopify Sellers Create Catalog-Ready Images
AI Studio is an AI product photography tool built specifically for ecommerce sellers. It's made for folks who maybe don't have design skills, don't own photography gear, and also don't have time to juggle complicated workflows.
In real life, it goes something like this. You upload a product image, and it can be a simple phone shot taken on a plain surface. Then the tool removes the background automatically.
After that, you pick the kind of result you need, like a clean white background for marketplace listings, or a lifestyle scene-based background for social media, or even an on-model style photo for fashion and jewelry. The AI spits out the image in seconds, and you can download it in full resolution, ready to drop straight into your Shopify product page.
It also works across different categories. Fashion sellers, for example, use it for on-model shots and flat lay styling. Jewelry sellers tend to use it for studio clean whites, plus those textured surface scenes. Home decor sellers often go with lifestyle placements that show how a product actually fits into a real space, not just on a random background.
What really helps with growing Shopify stores is the catalog scaling thing. If you have 50 products today and you reach 500 products later in the year, you can keep the visual branding consistent across the whole catalog without having to raise photography costs. Each new item gets the same level of polish as the first one, and you don't need another booking, or another shoot, or any of that headache.
Tools like AI Studio make studio-quality AI product photos feel reachable for sellers who previously had only two choices: accept lower image quality, or pay too much for traditional photography. And pricing starts around ₹600 per month, so it's a reasonable option for small businesses, not only those funded brands.
You can try AI Studio free at tryaistudio.app and generate your first product image today.
Conclusion
A virtual product photoshoot for Shopify is not really a workaround anymore for sellers who are running tight on budgets. It is a practical, scalable alternative to studio photography for any growing Shopify brand, kinda like you know, without all the fuss.
Traditional photoshoots still work well for flagship items and those big brand campaigns. Yet, for the everyday catalog work, new collection launches, and keeping the visual quality consistent across hundreds of SKUs, AI product photography is the smarter way to go for most Indian ecommerce sellers.
If you want to see how this feels for your store, Try AI Studio is a good starting point.