


How to Improve AI Generated Product Images Quality for E-commerce
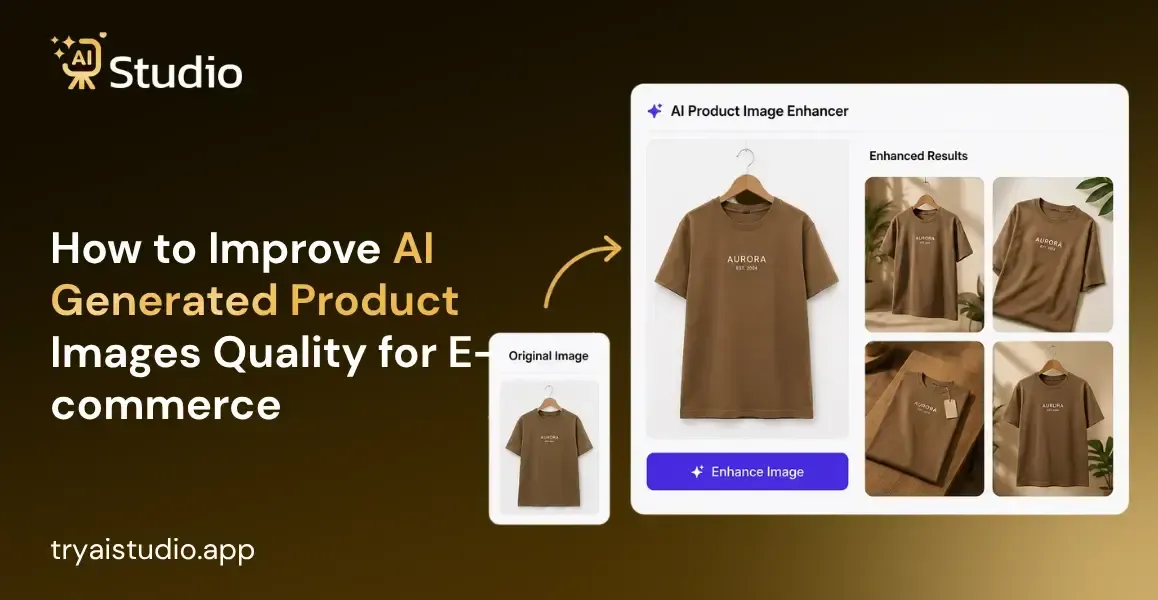
I've seen a lot of sellers get stuck with product photos. One D2C founder told me she was paying ₹35,000 for just one photoshoot, and by the time the next collection came out, she ended up booking the studio all over again, back to square one. If you sell on Amazon, Flipkart, or Shopify, you already know that frustration.
That's exactly why so many sellers are shifting toward AI tools now. But there's still a catch: not every AI photo is actually good enough to post, and not every result is ready for listing.
The thing is, AI generated product images quality can swing a lot depending on the tool you pick and the way you run the workflow. In this piece, I'll walk you through why AI photos sometimes look slightly off, and what you can do to fix that, step by step.
What Is AI Generated Product Image Quality?
Let me explain this simply. When people talk about AI generated product image quality, they mostly mean how close that AI made photo feels to a real studio shot. Is it sharp or a bit fuzzy? Is the lighting believable or slightly off, and are the colors accurate, not washed out or strange?
You also look at the backdrop. If it's clean and tidy, it usually scores higher. In short, a really good AI image should look like it was pulled straight from a professional studio setup, not like something a machine cooked up.
Why Product Image Quality Matters for Ecommerce Sellers
Here's the reality. Your product image is doing all the talking before a customer reads a single word. They can't touch your product, they can't try it on, they can't feel the fabric. The photo is their only proof that your product is worth buying.
Poor quality images hurt you in more ways than one:
- Lower click through rate on Amazon and Flipkart search results
- Higher return rates because the product looked different in person
- Weaker trust, especially for new or small brands
- Lower ranking, since marketplaces like Amazon actually factor in image quality signals
Think about it like this: would you buy a phone cover from a listing with a blurry, dark photo, or from one with a bright, sharp image showing every detail? Most shoppers go with the second option without even pausing.
That's why sellers who work on how to improve Amazon listing images usually see a direct lift in conversions within a couple of weeks. Not some huge overhaul, just a small tweak, but the impact is big.
Traditional Product Photography vs AI Product Photography
I've worked with brands that swore by old school shoots for years, and I get why. There's something comforting about a real photographer, real lighting, and a real studio setup. But let's be honest about what that actually costs in time and money.
What a Traditional Shoot Involves
A traditional shoot usually means booking a studio, hiring a photographer, sometimes hiring a model, then waiting days for the editing to come back. For a jewelry brand or fashion label with dozens of SKUs, this turns into a full time job on its own.
What an AI Workflow Involves
With product photography AI, you just upload one clear photo of your product, pick a background or style, and get results in a few seconds. There's no studio booking, no waiting, and no back and forth with an editor. It's a much smoother process, and if you want a fuller breakdown, this comparison of AI product photography vs traditional photography covers it well.
| Factor | Traditional Shoot | AI Product Photography |
|---|---|---|
| Cost per shoot | ₹10,000 to ₹50,000 | Starts around ₹600/month |
| Turnaround time | 3 to 7 days | Under a minute |
| Model required | Often yes | Not required |
| Consistency across catalog | Depends on photographer | Consistent every time |
Common Reasons AI Generated Product Images Look Low Quality
Now let's get into the part most articles skip. If you've tried a random AI tool and got a weird looking result, it's usually not "AI" that's the problem. It's one of these specific issues.
Poor Lighting or Shadow Mismatch
If your original photo has harsh shadows or mixed lighting, the AI struggles to blend it naturally into a new background. Fix this by using soft, even lighting on your source photo before uploading, and try to reduce strong contrast areas ahead of time.
Low Source Image Resolution
A blurry or low resolution starting photo will always produce a blurry AI output, no matter how good the tool is. Start with a clear photo taken on a decent phone camera in daylight rather than something shaky or dim.
Background Artifacts and Warped Edges
This happens when the product edges are unclear in the original photo, so the AI guesses where the product ends and the background begins. A clean, simple backdrop for your original shot avoids most of this.
Inaccurate Color or Texture Rendering
Fabric texture and jewelry detail are the hardest things for any artificial intelligence image editor to get exactly right. Using a tool trained specifically for ecommerce product types, rather than a general purpose image editor, makes a real difference here.
Step by Step Process to Get High Quality AI Product Images
Let me show you exactly how this works in practice. I'll walk you through the actual process using AI Studio, since it's the fastest way to see how each step affects your final image quality. The whole thing takes under 10 minutes, even if you've never used an AI tool before.
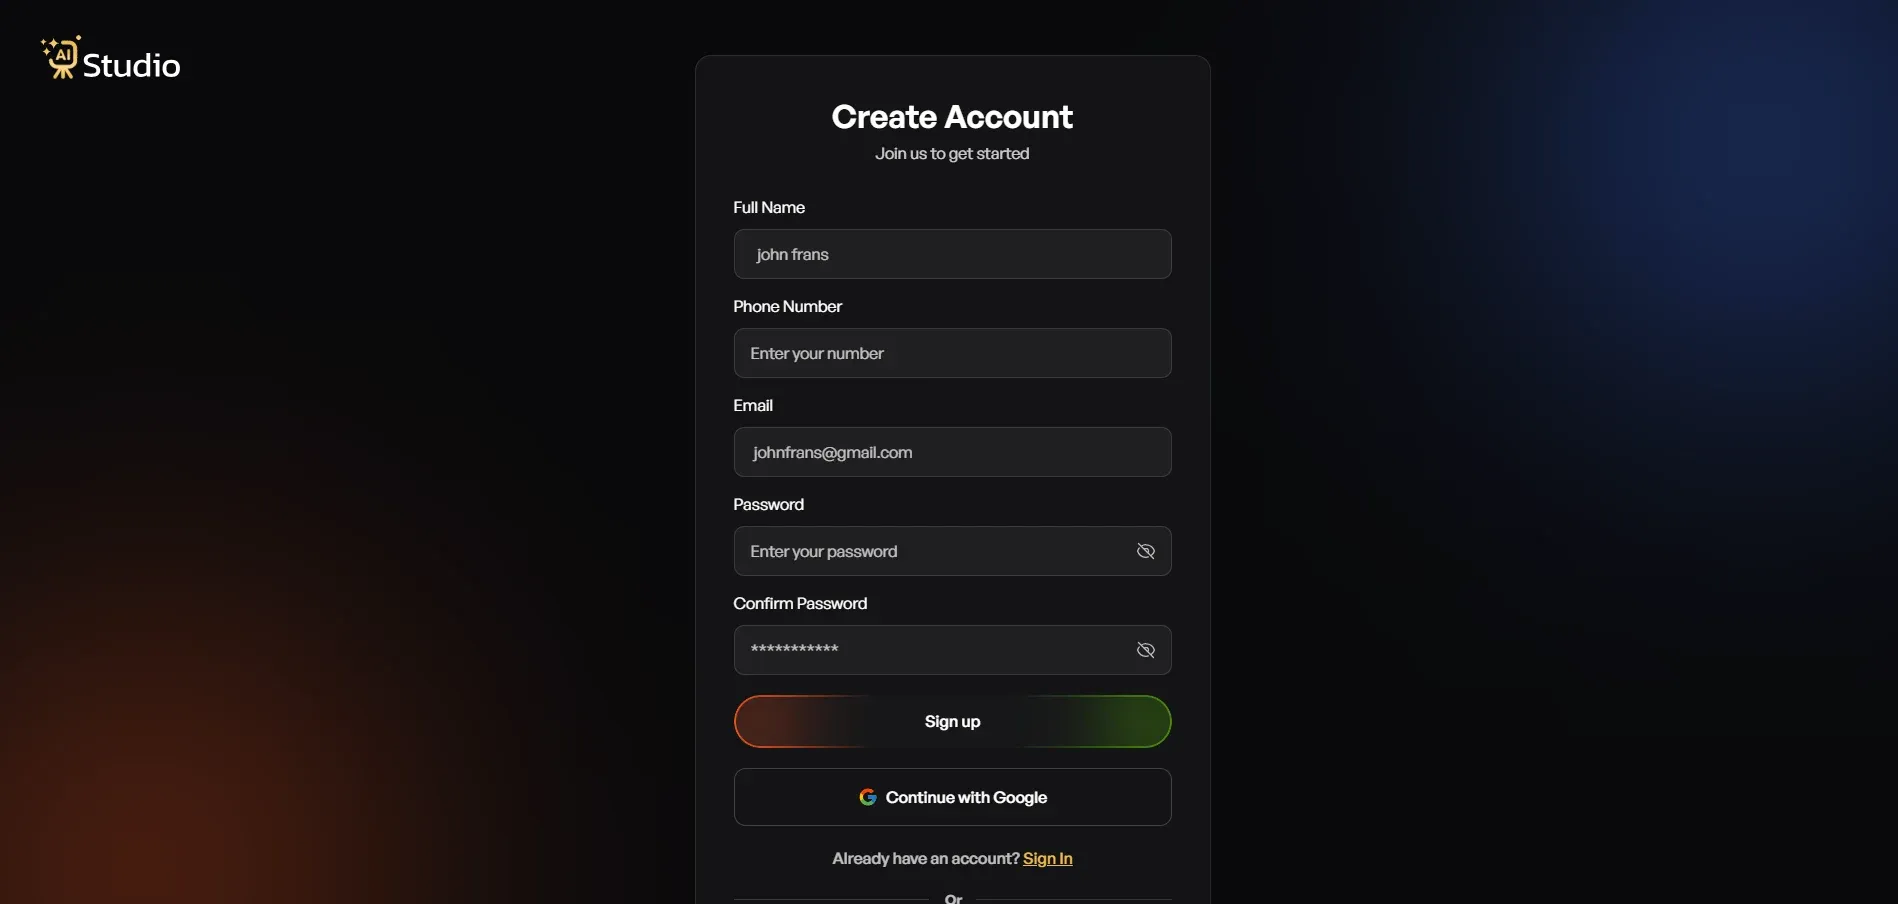
Step 1: Create a Free Account and Log In
Log in to tryaistudio.app and sign up, no credit card needed to get started. Once you log in, your dashboard opens up and you're ready to go.
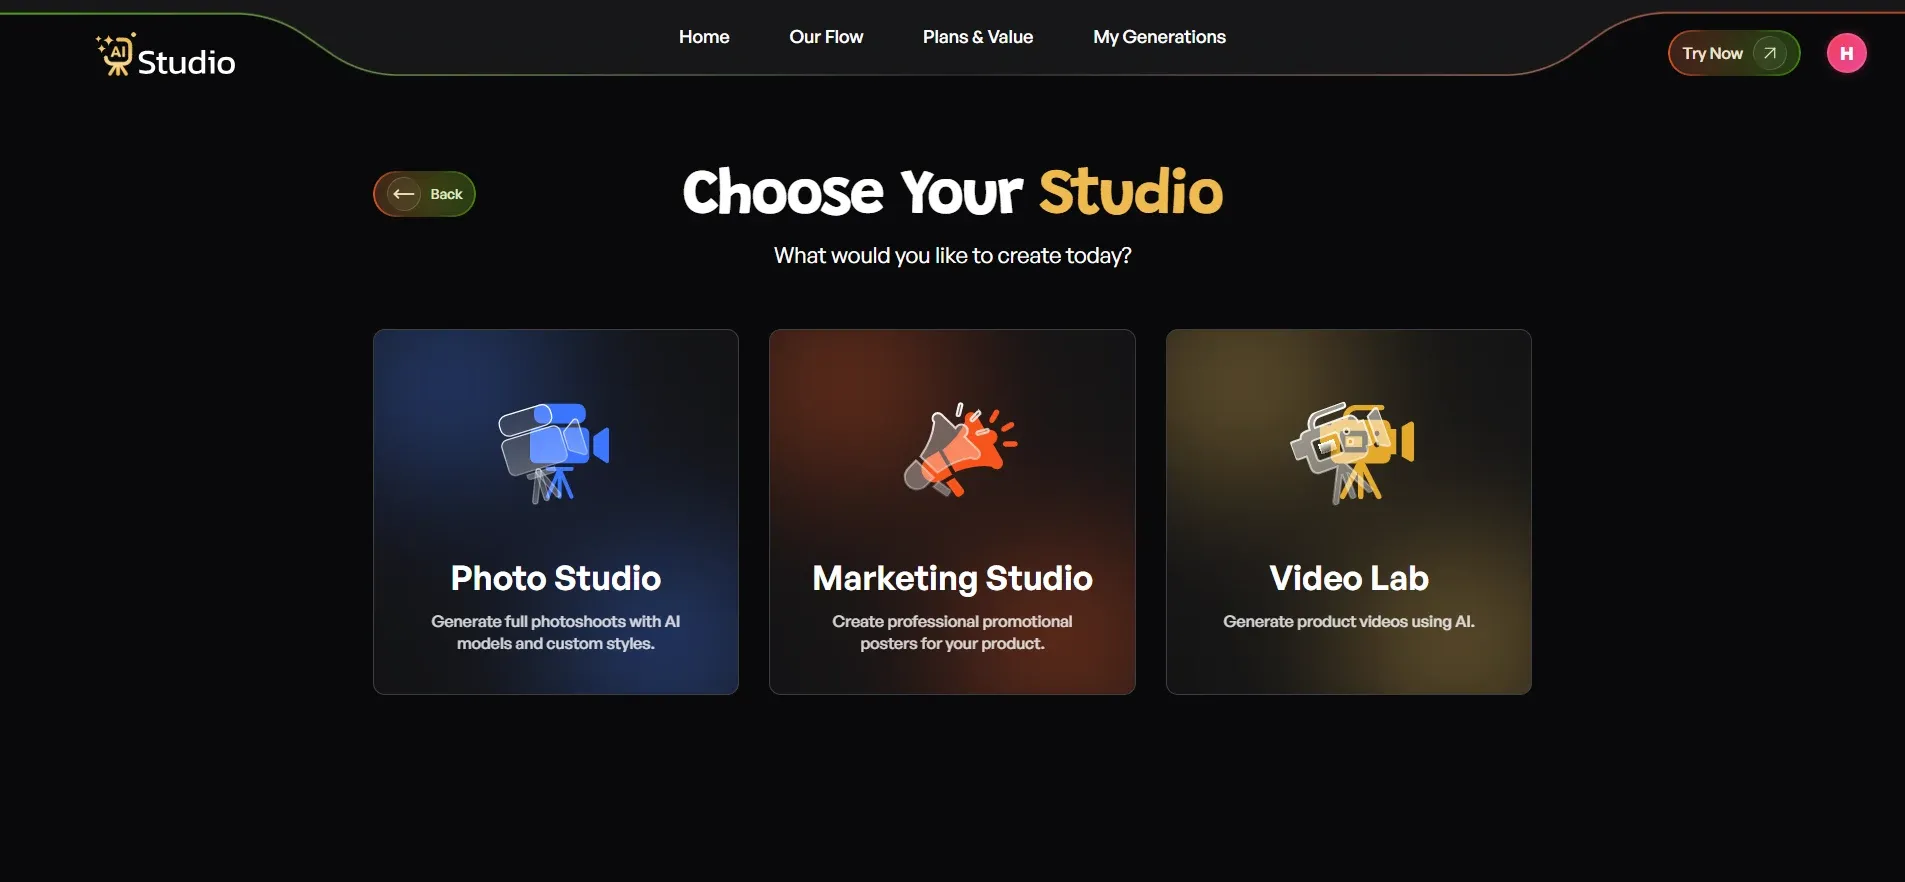
Step 2: Choose Your Studio
Inside the dashboard, you'll see three options: Photo Studio, Marketing Studio, and Video Lab. For product photography AI, you want Photo Studio, since this is where all your image generation happens.
Step 3: Select Your Category
Next, you'll be asked what your creation is for: Fashion, Accessories, or E-commerce.
- Choose Fashion if you're selling clothing like kurtas, t-shirts, dresses, or ethnic wear
- Choose Accessories if you sell watches, jewelry, bags, belts, or sunglasses
- Choose E-commerce for general product listings like electronics, home goods, or beauty products
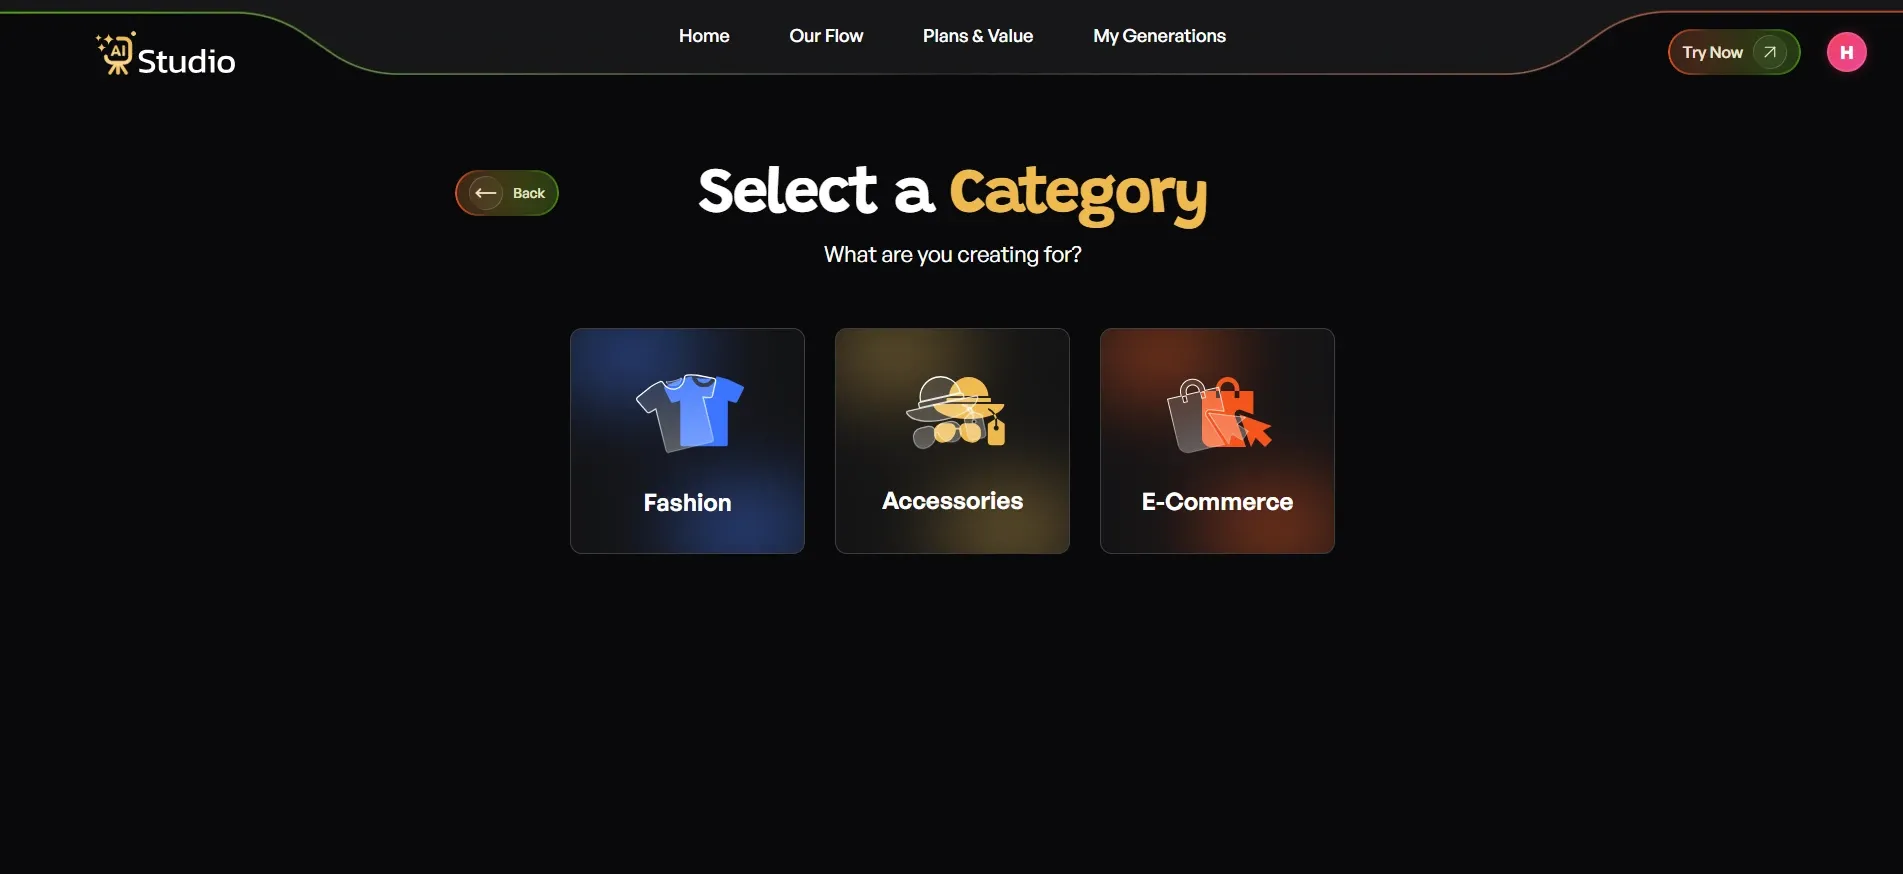
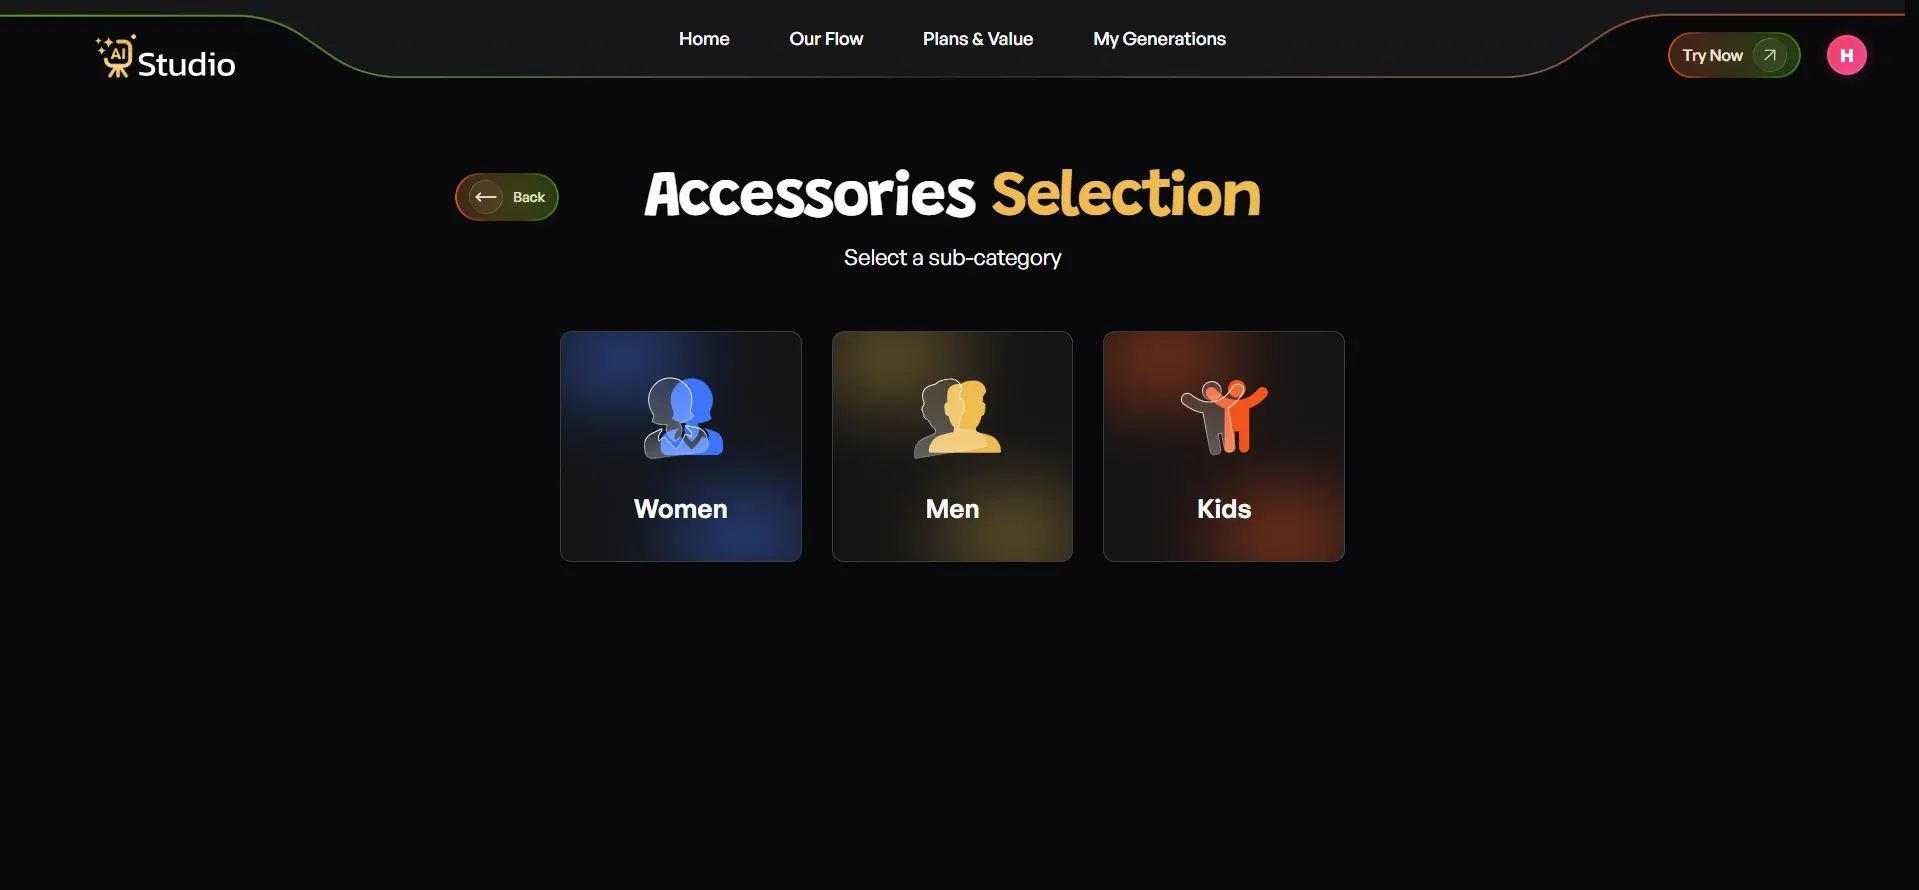
Once you pick your primary category, Fashion and Accessories will also ask you to choose Women, Men, or Kids, so the AI knows which type of virtual model to generate for your product.
Step 4: Select Your Subcategory
Under your chosen category, pick the specific subcategory that matches your product. This helps the AI understand exactly what it's working with before you upload anything.
Step 5: Upload Your Product Photo
This is the step that decides most of your final quality.
- Select your specific product type (for accessories, this could be Watch, Belt, Perfume, and so on)
- Upload a Primary Image, a clear, front facing photo of your product (required)
- Add a second image if you have another angle (optional, but recommended for accessories)
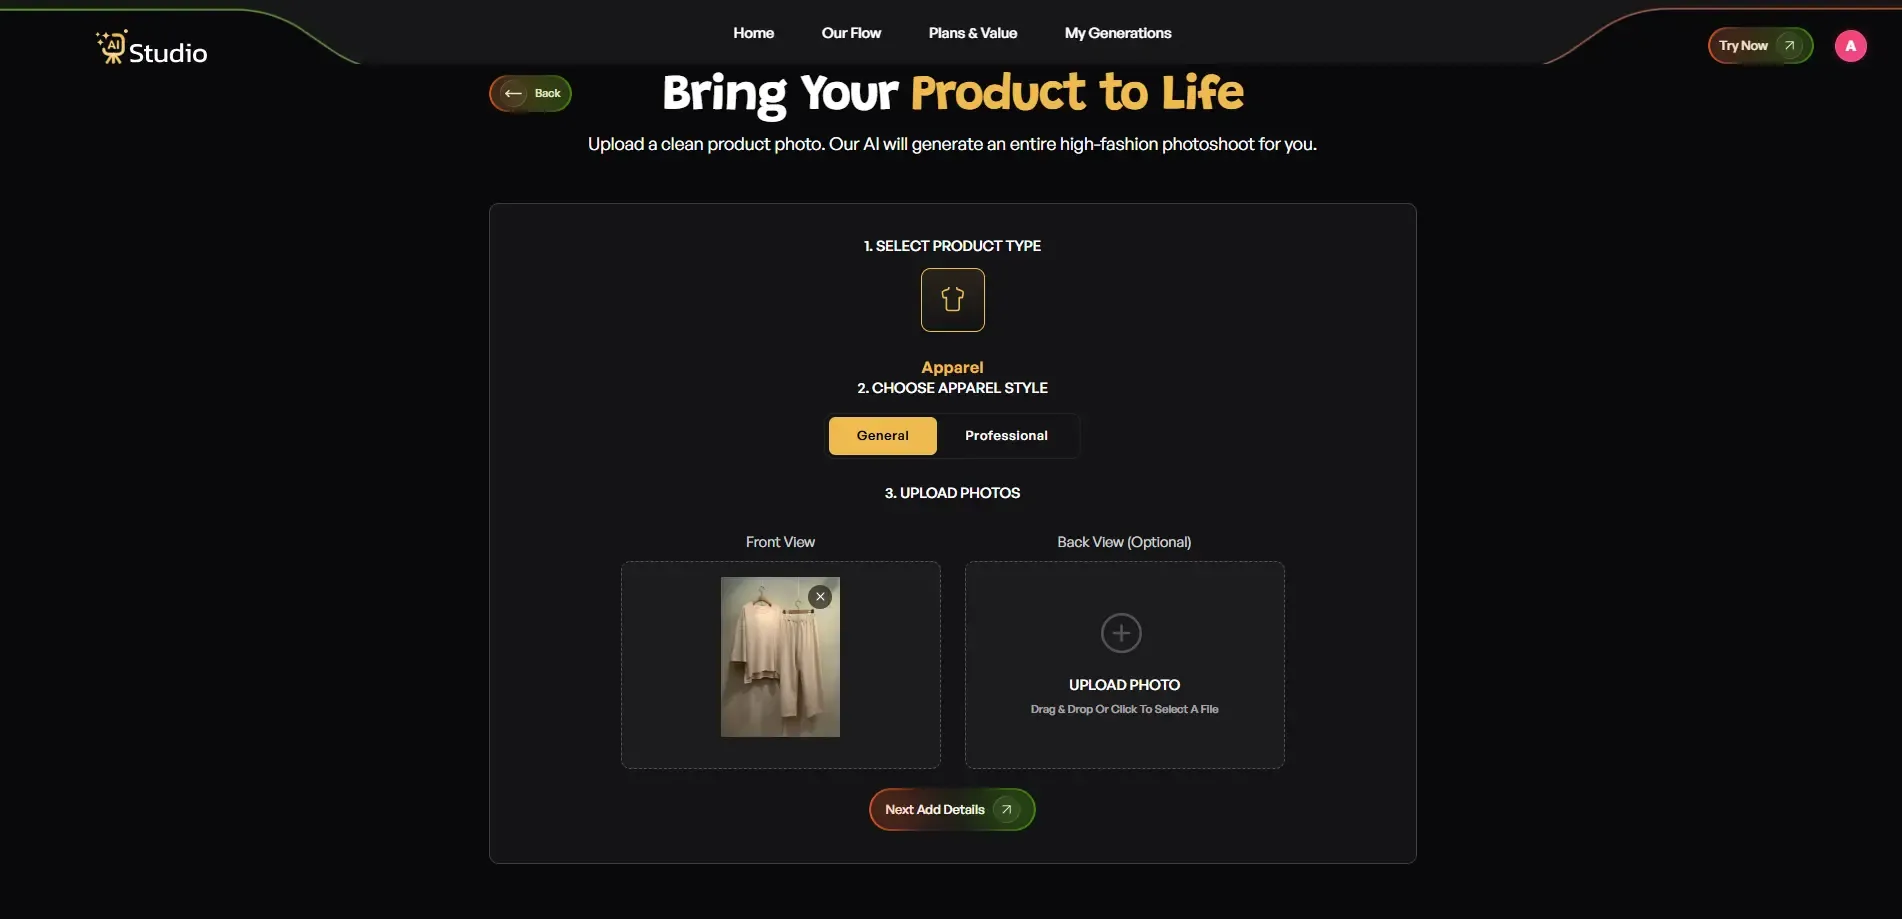
Your source photo should have a plain white or light colored background for the best result. Any phone photo works fine as long as it's in focus and reasonably well lit.
Step 6: Fill In the Final Details
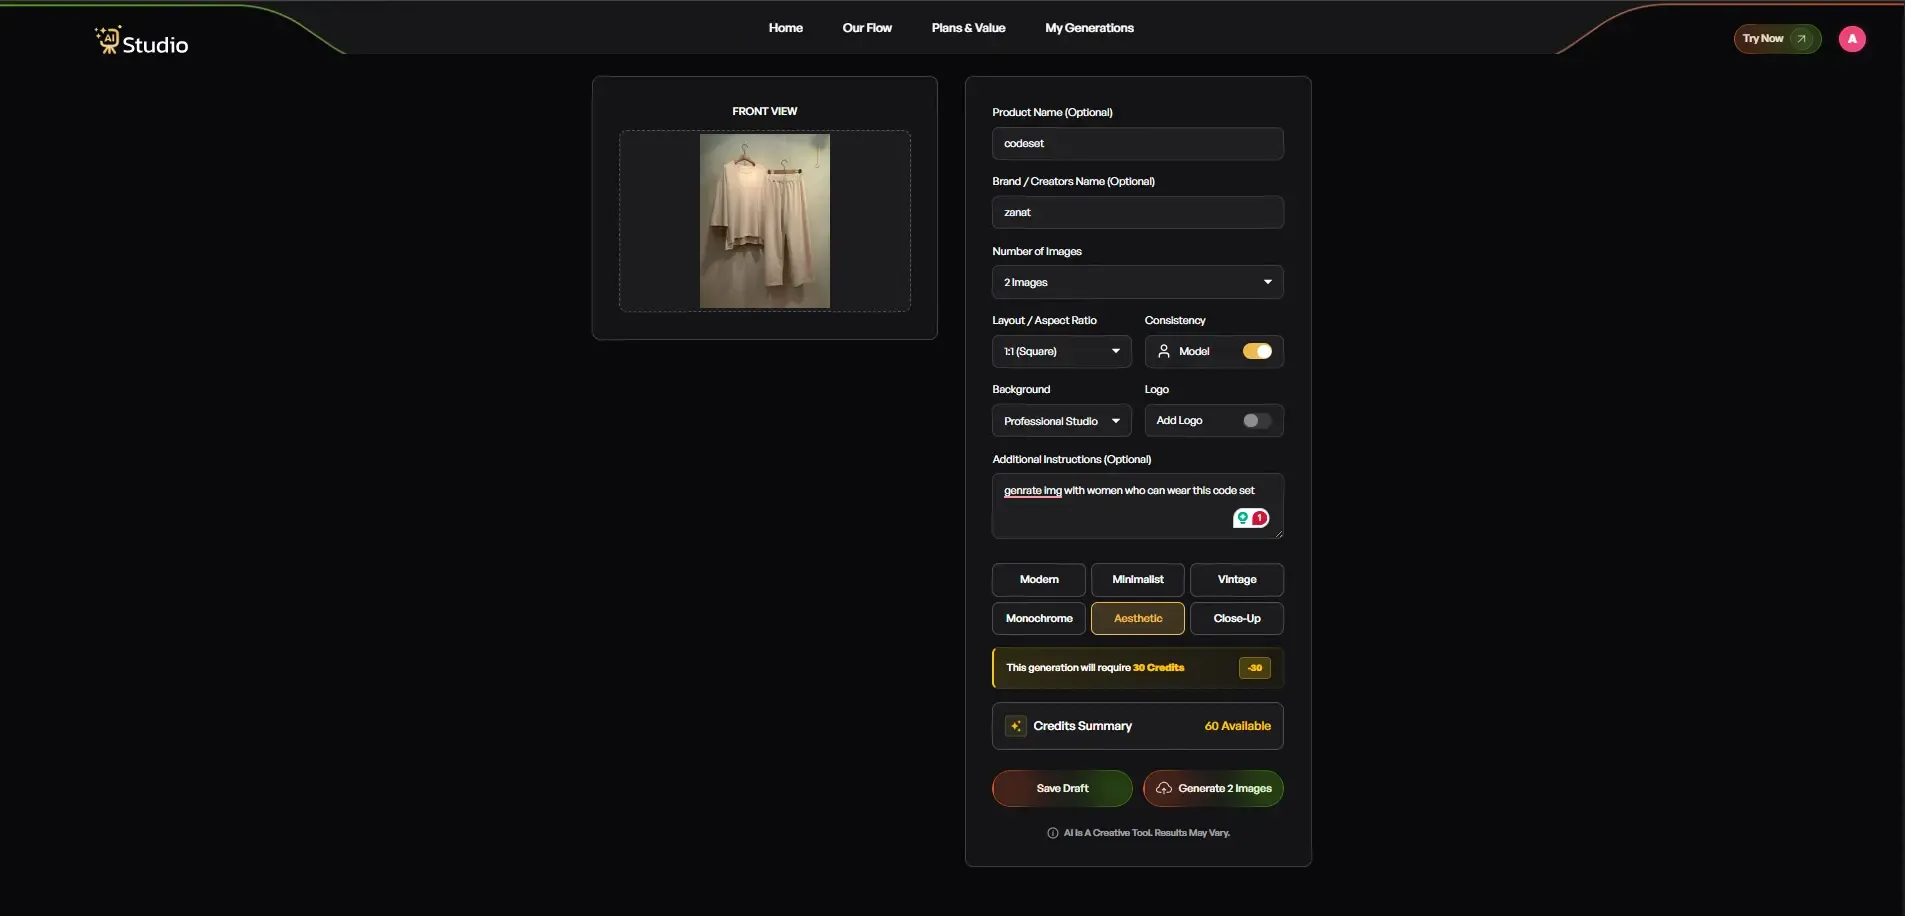
- Add your Product Name and Brand Name (optional, but helps with consistency)
- Set the Number of Images you want generated (2, 4, or more)
- Choose Layout or Aspect Ratio: 1:1 square for Amazon and Instagram, 4:5 for Instagram feed, 16:9 for banners
- Toggle Model Consistency on if you're generating a full catalog and want the same model across every image
- Choose a Background: Solid White works best for Amazon's main image slot, while lifestyle backgrounds suit Shopify and Instagram
- Pick a Style: Modern, Minimalist, Vintage, Monochrome, Aesthetic, or Close Up
- Add a Logo if you want your brand watermark on the image
- Write any Additional Instructions, for example "warm lighting, outdoor setting, focus on product details"
Step 7: Download Your Image
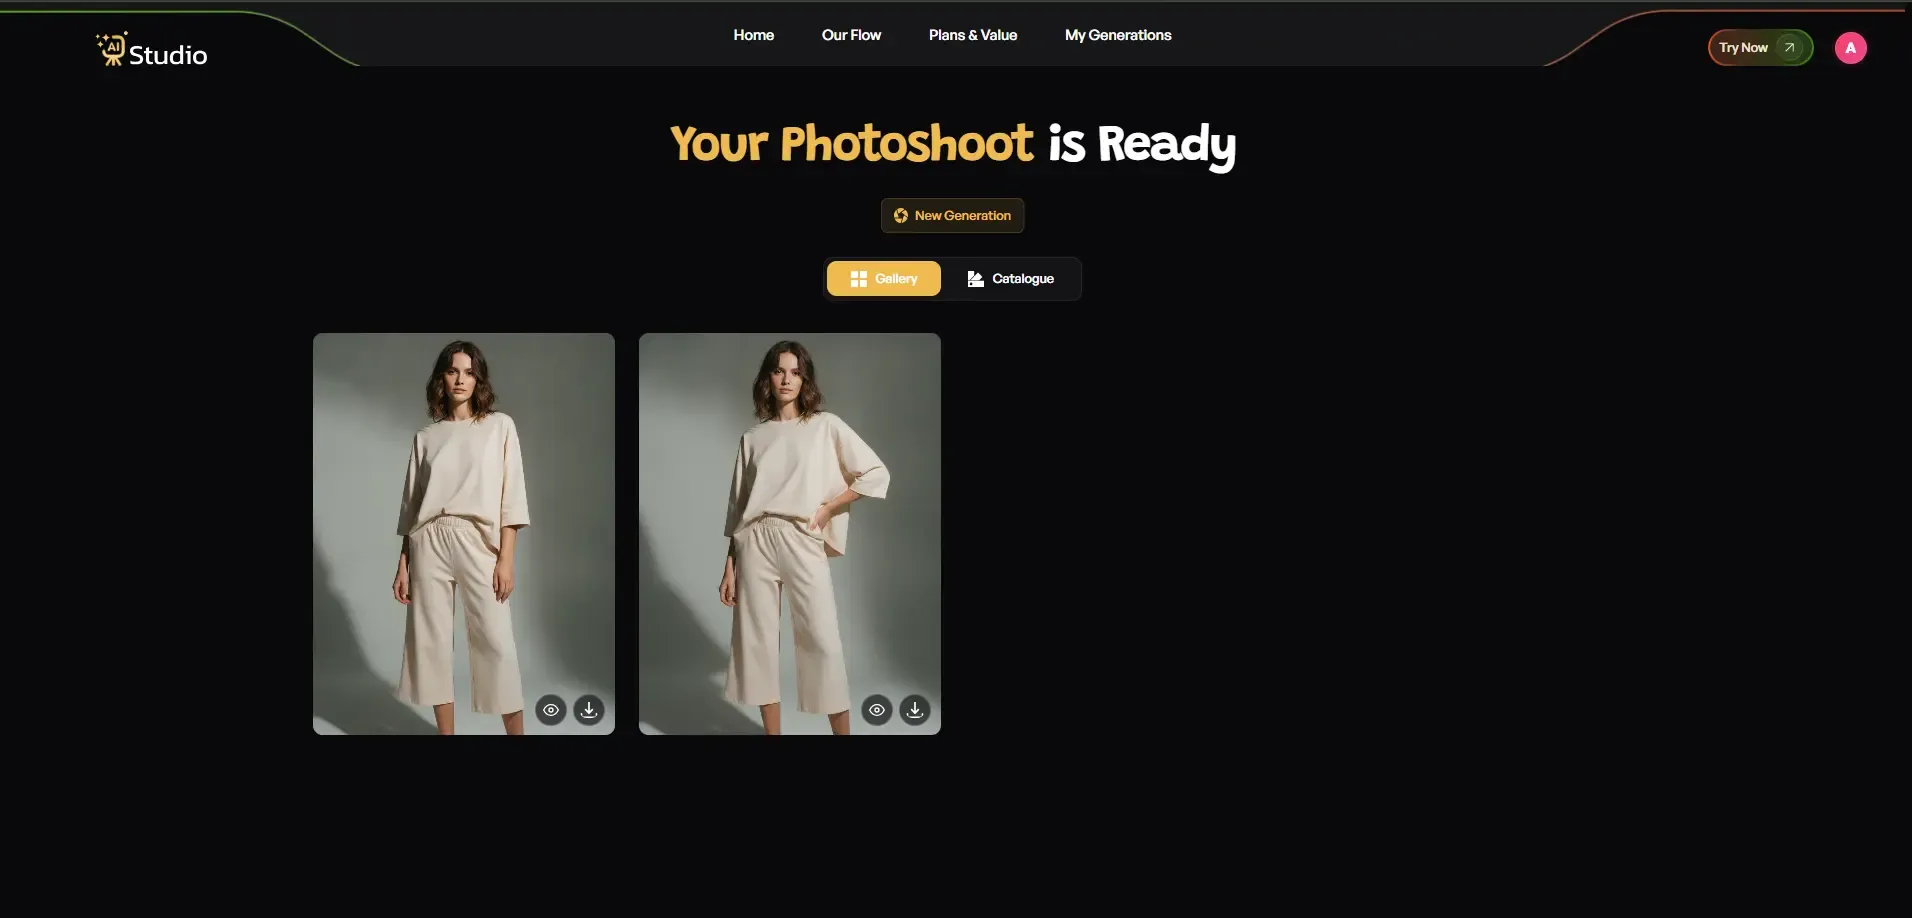
Click generate, and within 10 seconds your image is ready in full resolution, no retouching, no back and forth with an editor. It's ready to go straight onto your Amazon listing, Shopify store, Flipkart catalog, or Instagram page.
Here's how this plays out in real situations:
- A fashion brand uses AI product photography with models to show how a kurta drapes on a person, without booking an actual model.
- A jewelry seller uploads a close, well lit shot and generates a clean, reflective macro style image that highlights the polish and cut without a professional lighting rig.
- A Shopify store batch generates a full homepage banner set in one sitting instead of scheduling a separate shoot.
- An Amazon seller builds a complete 7 image listing stack using AI to generate product images for lifestyle and infographic slots, while keeping one real photo as the main image.
Amazon, Flipkart, and Shopify Image Requirements You Should Know
Before you upload anything in bulk, it helps to know what each platform actually expects. I've seen sellers lose good AI generated images simply because they didn't check the platform rules first.
Amazon Image Guidelines
Amazon wants the main image to sit on a pure white background, with no shadows or odd tint, and the product should cover most of the frame. They also need a minimum resolution that supports the zoom feature, so nothing should look soft or fuzzy. Anything blurry or off brand risks getting suppressed. Tools built for AI photoshoots for Amazon sellers make it easier to stay within these limits.
Flipkart Image Guidelines
Flipkart is a bit more flexible with backgrounds but still expects high resolution images, no watermarks, and photos that accurately represent the product's color and size.
Shopify Image Best Practices
Shopify gives you the most creative freedom since it's your own store. Lifestyle shots, on model photos, and styled backgrounds all work well here, as long as the image loads fast and looks sharp on mobile. Sellers comparing options often look into a Shopify AI image generator tool before deciding on a workflow.
AI Product Photography for Jewelry and Fashion, Where Quality Matters Most
In my experience, jewelry and fine fashion are where AI generated product image quality gets tested the hardest. Reflections on gold or silver, fine embroidery, and fabric texture are small details that make or break the final image.
If you're using high quality AI product photos for jewelry, always zoom in and check the metal reflection and stone clarity before publishing. For fashion, check that the fabric folds look natural and the fit on the model isn't distorted.
I've seen brands use AI Studio to create consistent product images without hiring models, which is especially useful for smaller jewelry and fashion labels that can't afford a recurring shoot every time a new piece launches.
Common Mistakes Sellers Make With AI Product Images
A few mistakes I see again and again:
- Uploading a blurry or poorly lit source photo and expecting a sharp result
- Ignoring platform specific compliance rules before publishing
- Over editing colors so the final image doesn't match the real product
- Publishing in bulk without checking each image individually first
Avoiding these four mistakes alone will put you ahead of most sellers still figuring this out. For a fuller checklist, this guide on AI product photography tips for ecommerce sellers is worth a look.
How to Use Try AI Studio to Improve Product Image Quality
- Works with a single uploaded product photo, no studio setup needed
- Keeps lighting and shadows realistic instead of flat or mismatched
- Generates studio quality product photos in seconds instead of days
- Works across fashion, jewelry, accessories, general ecommerce listings, and ad creatives for social media
- No model required, even for on model fashion shots
- Priced at around ₹600/month, so small sellers don't need to justify a ₹20,000 shoot every time they add a new product
If you want to see how this stacks up against other platforms, check this comparison of AI product photography tools for ecommerce.
Conclusion
Getting good AI generated product image quality isn't about luck. It comes down to starting with a clean source photo, understanding platform rules, and checking your output before publishing. For Indian sellers juggling tight budgets and fast moving catalogs, this approach saves both time and money.
Tools built specifically for ecommerce, like AI Studio, make this even easier by handling the heavy lifting in seconds. If you're still relying only on expensive shoots, it might be time to try a smarter AI photography workflow for small businesses.