


How to Create High Quality AI Product Photos for Jewelry
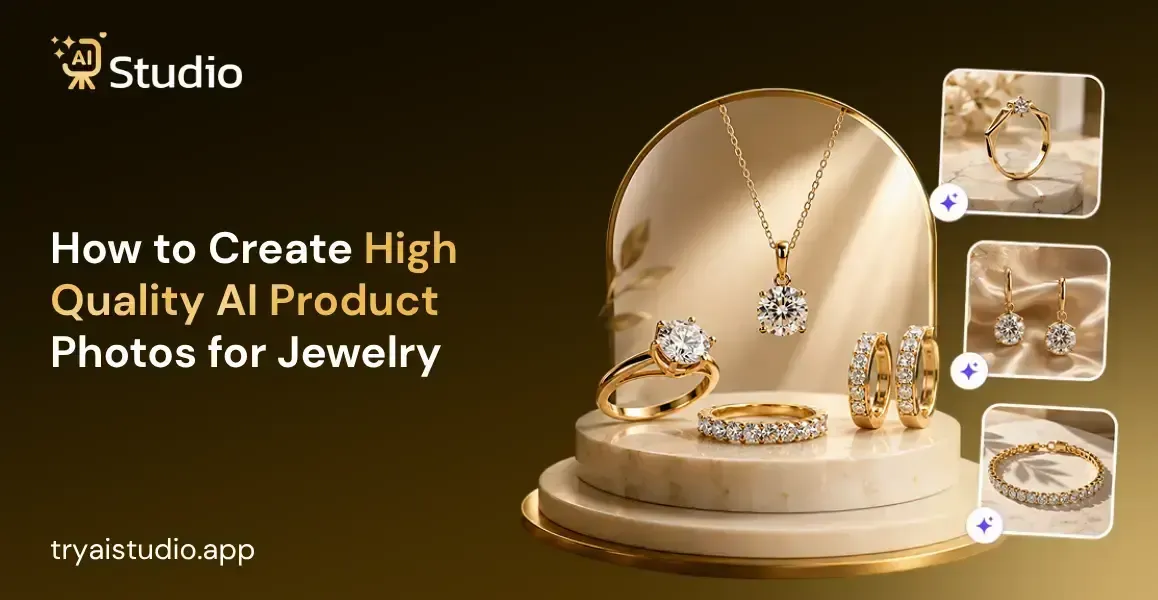
If you sell jewelry online, you probably already know how difficult it is to get a proper product photo. One photoshoot for rings, necklaces, or earrings can end up costing anything from ₹15,000 to ₹50,000, once you add the studio rent, lighting setup, macro lens rental, and the photographer's fee.
And even after all that, the images still might not look "right" on a phone screen. Making high-quality AI product photos for jewelry is now a smarter, quicker, and way more pocket-friendly option that thousands of Indian sellers are already leaning on.
This guide kinda shows you everything you need to know, starting with why jewelry is so hard to photograph, then moving into a clear step-by-step workflow to generate studio-quality jewelry images with AI product photography tools, even if you have zero design background or editing experience.
Why Jewelry Product Photography Is Harder Than It Looks
I have spoken with a lot of small jewelry brand owners in India, and almost all of them tell me the same sort of line, "My product looks way better in real life than in photos, and it seems kinda confusing at first." It isn't because their jewelry is actually bad, no. It is just that jewelry is genuinely one of the hardest product areas to capture properly on camera.
The 4 Challenges That Make Jewelry Photos Difficult
Getting a great jewelry photo is not just about a good camera. Four specific problems make it painful, even for professionals.
Reflections from polished metals.
Gold and silver surfaces behave like mirrors, kind of basically. They grab the camera view, your hands, the studio ceiling, and well, everything else nearby. So a ring that looks amazing in person turns into this bright shimmering blob of light on a photo if there isn't the correct diffused lighting arrangement, plus the polarizing filters.
Microscopic flaws become visible.
The minute you zoom in on a small bit of jewelry, every fingerprint smudge, tiny scratch, and even dust particles start looking way too obvious. A professional retoucher might spend nearly an hour just tidying up one image, not even counting the rest, mainly to erase those little imperfections. And if it's a catalog with 50 pieces, well, that expense stacks up fast, really fast.
Depth of field limitations.
If your camera manages to focus crisply, on the front prong, on a diamond ring, the back part of the band then gets blurry. To keep the whole thing in focus at once, you need a technique called focus stacking, where the photographer takes about 20-30 photos with slightly shifted focal points and then glues them together in software. It sounds simple, but it's tedious, kind of slow, and it needs specialist know-how that most sellers don't really have.
Showing scale and how it looks when worn.
A pendant on a white background kind of gives you no real sense of how it sits or moves around someone's neck. Like you can't properly imagine it on a body. Buyers really need to see the jewelry on an actual person to feel confident enough to purchase, not just trust a clean backdrop. And honestly, hiring a hand model, neck model, or even an ear model for each new collection launch adds up to thousands of rupees in every single shoot, like it's unavoidable.
Here's the real bit: traditional jewelry photography was built for the big brands with big budgets. It was never really meant for independent sellers, and definitely not for small D2C brands trying to roll out a brand new collection on a ₹5,000 kind of budget. This is exactly why Indian brands are switching to AI photography at a rapid pace.
How AI Product Photography Works for Jewelry
Let me explain it in a pretty simple way: AI product photography uses artificial intelligence to automatically take a normal product photo and turn it into something that looks like a professional studio shot. Basically, you skip the studio entirely, and it still looks polished.
You upload just one clear photo of your jewelry piece, and the AI does the rest. It removes the background, then it puts your item into a believable scene, like a white studio, a velvet surface, a marble tray, or even worn on a model. After that, it tweaks the lighting and the shadows so it feels natural, and then you get a download-ready image in seconds, without hassle.
From One Photo to a Full Product Gallery
The real advantage of using an AI product image generator for jewelry is that you sort of go from one single source photo to a whole product gallery, without needing any extra shots at all. It's like you take what you have, then the rest fills in, and somehow the results look deliberate, not random.
Here is what a typical AI workflow looks like:
- You upload a clear smartphone photo of your necklace or ring
- The AI removes the background with precise edge detection, even around fine chains and gemstone prongs
- You choose your output style: white studio background, lifestyle scene, or on-model placement
- The AI generates 2 to 4 variations in seconds
- You download the best one, sized and ready for your Amazon listing, Shopify store, or Instagram post
Free tools such as AI Studio will allow you to do so free of cost at first, while the premium service costs only ₹600 per month. It has been seen that vendors have created an entire jewelry catalogue in a matter of an afternoon, which would take an entire studio day otherwise, costing ₹30,000.
What AI Cannot Do (Honest Expectations)
One thing worth saying clearly: do not type a text description of your jewelry into an AI image generator and expect your real product to show up. That can make a really beautiful ring, but it will not be your ring.
The prong structure, the gemstone cut, and even the band thickness will be invented by the AI. So if customers decide based on that picture, and then receive something that looks different in person, you'll likely get returns and negative reviews.
Always go with the image-to-image workflow: upload a real photo of your jewelry, then let the AI build around it. That's the only way to keep accuracy intact, and also build real buyer trust. You can learn more about how to create product photos with AI using the right workflow so your results always match your actual product.
How to Prepare Your Jewelry Photo Before Using AI
This is the step most guides sort of skip, and somehow it is also the one that separates "average" AI results from ones that are genuinely impressive. The AI just kind of works with whatever you give it, and nothing magical happens without that. So, a stronger source photo means a stronger final image, every single time.
The 5-Point Checklist for a Strong Source Image
Before you upload anything to an AI product photography tool, run through this checklist:
- Clean the jewelry thoroughly. Use a soft cloth or jeweler's cloth to wipe away fingerprints, dust, and smudges. These will be visible in the final image, and AI enhances detail, not hides it.
- Use soft, diffused natural light. Sit near a window with a sheer white curtain. This gives you even, shadow-free light that works well for metals and stones. Avoid direct sunlight, which creates harsh glare.
- Shoot on a plain white or light gray surface. A piece of white paper or cardstock works perfectly. A clean background makes it easier for the AI background remover to detect the edges of your jewelry accurately.
- Keep the piece in sharp focus with no blur. Even on a phone, tap to focus on the jewelry before pressing the shutter. Blurry inputs always produce blurry AI outputs.
- Use the highest resolution setting on your phone. Most modern smartphones shoot at 12MP or higher. Use that setting. Larger files give the AI more detail to work with.
What Happens When Your Source Photo Is Poor
Think about it like this: the AI is kinda like a super-skilled photo editor. It can do incredible things with a solid image, but if you give it a dark, blurry mess with clutter everywhere, the outcome will show that, plain and simple.
I have seen sellers upload jewelry photos that were poorly lit and taken on a dim fabric background, then later complain that the AI results looked weird. But honestly, the tool wasn't the problem. It was the source image. Spend like two extra minutes setting up a clean, well-lit shot first before you upload it, and you'll usually see a really dramatic improvement in the final output. These AI product photography tips for ecommerce sellers go even deeper if you want to sharpen your source image game further.
Step-by-Step: How to Create High Quality AI Product Photos for Jewelry
This is the part where everything kind of comes together. Below is the exact process to make top-notch AI product photos for jewelry using AI Studio. It takes less than 10 minutes, and you don't need any technical skills at all.
Step 1: Create a Free Account and Log In
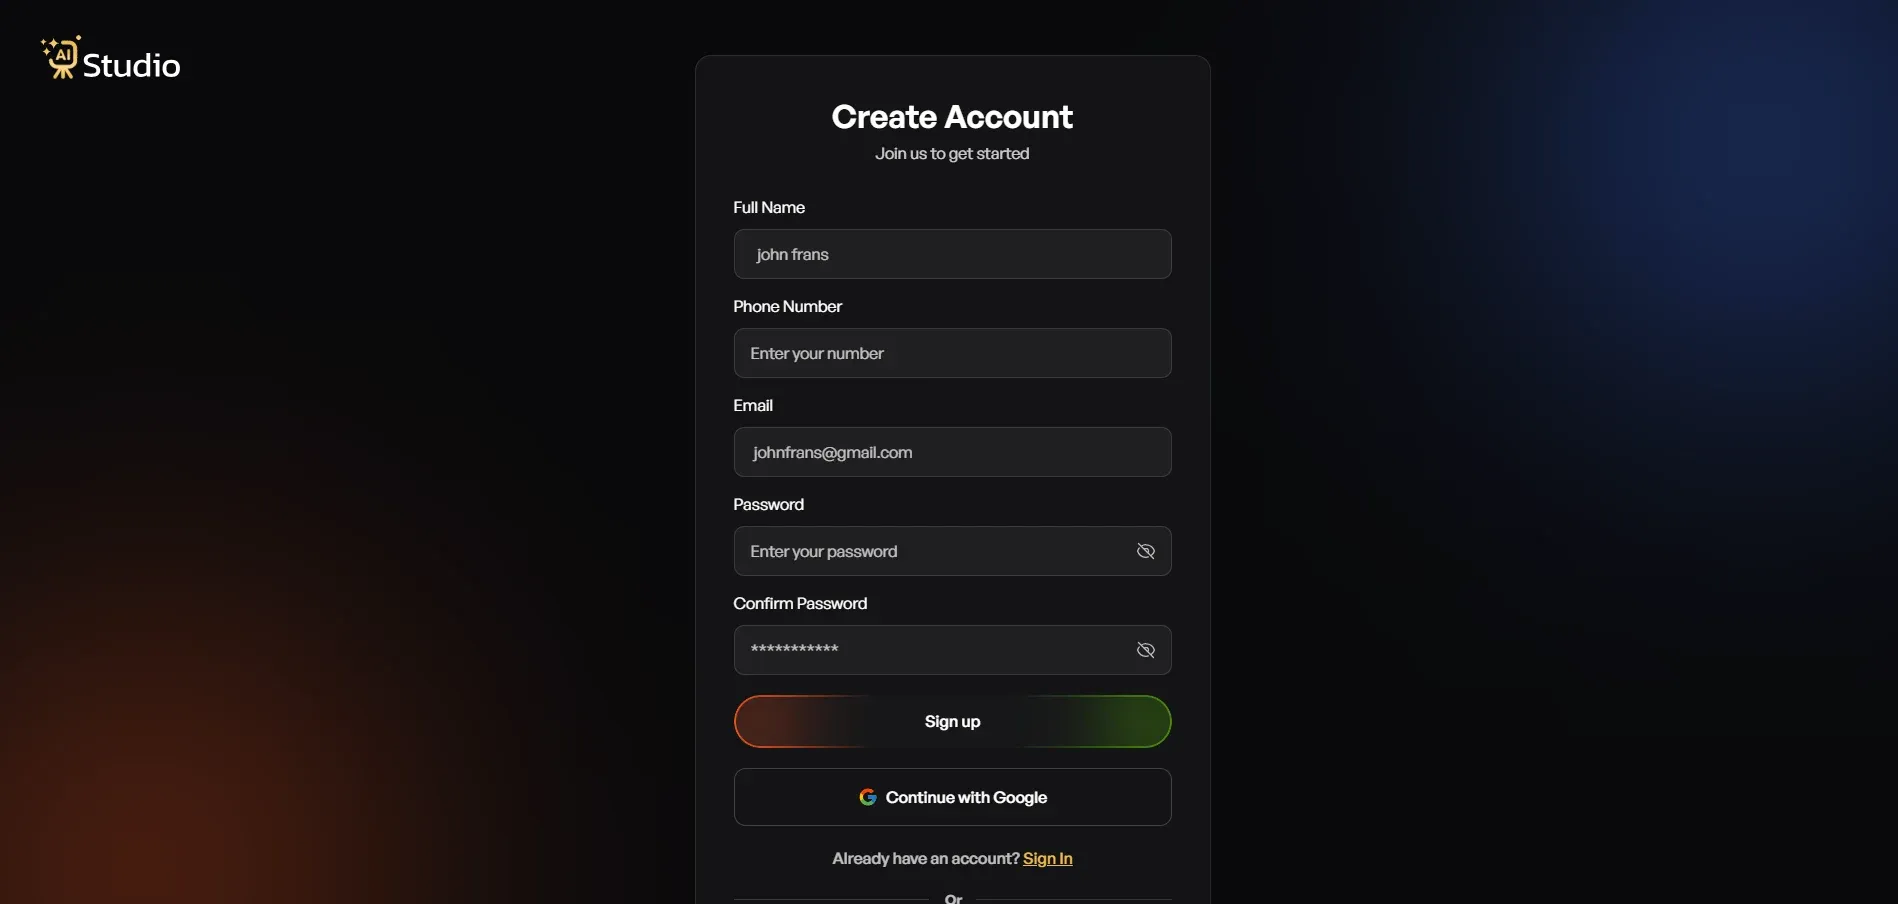
Head over to AI Studio, make a free account, basically quickly. You don't need to add a credit card to get going. After you log in, the dashboard pops up right away, like instantly, no delay.
With the free trial, you get plenty of time to try the tool using your jewelry products before you even think about a paid plan. And if you're selling jewelry on Amazon, Flipkart, or Shopify, that free setup is honestly more than enough to put together your first batch of listing images.
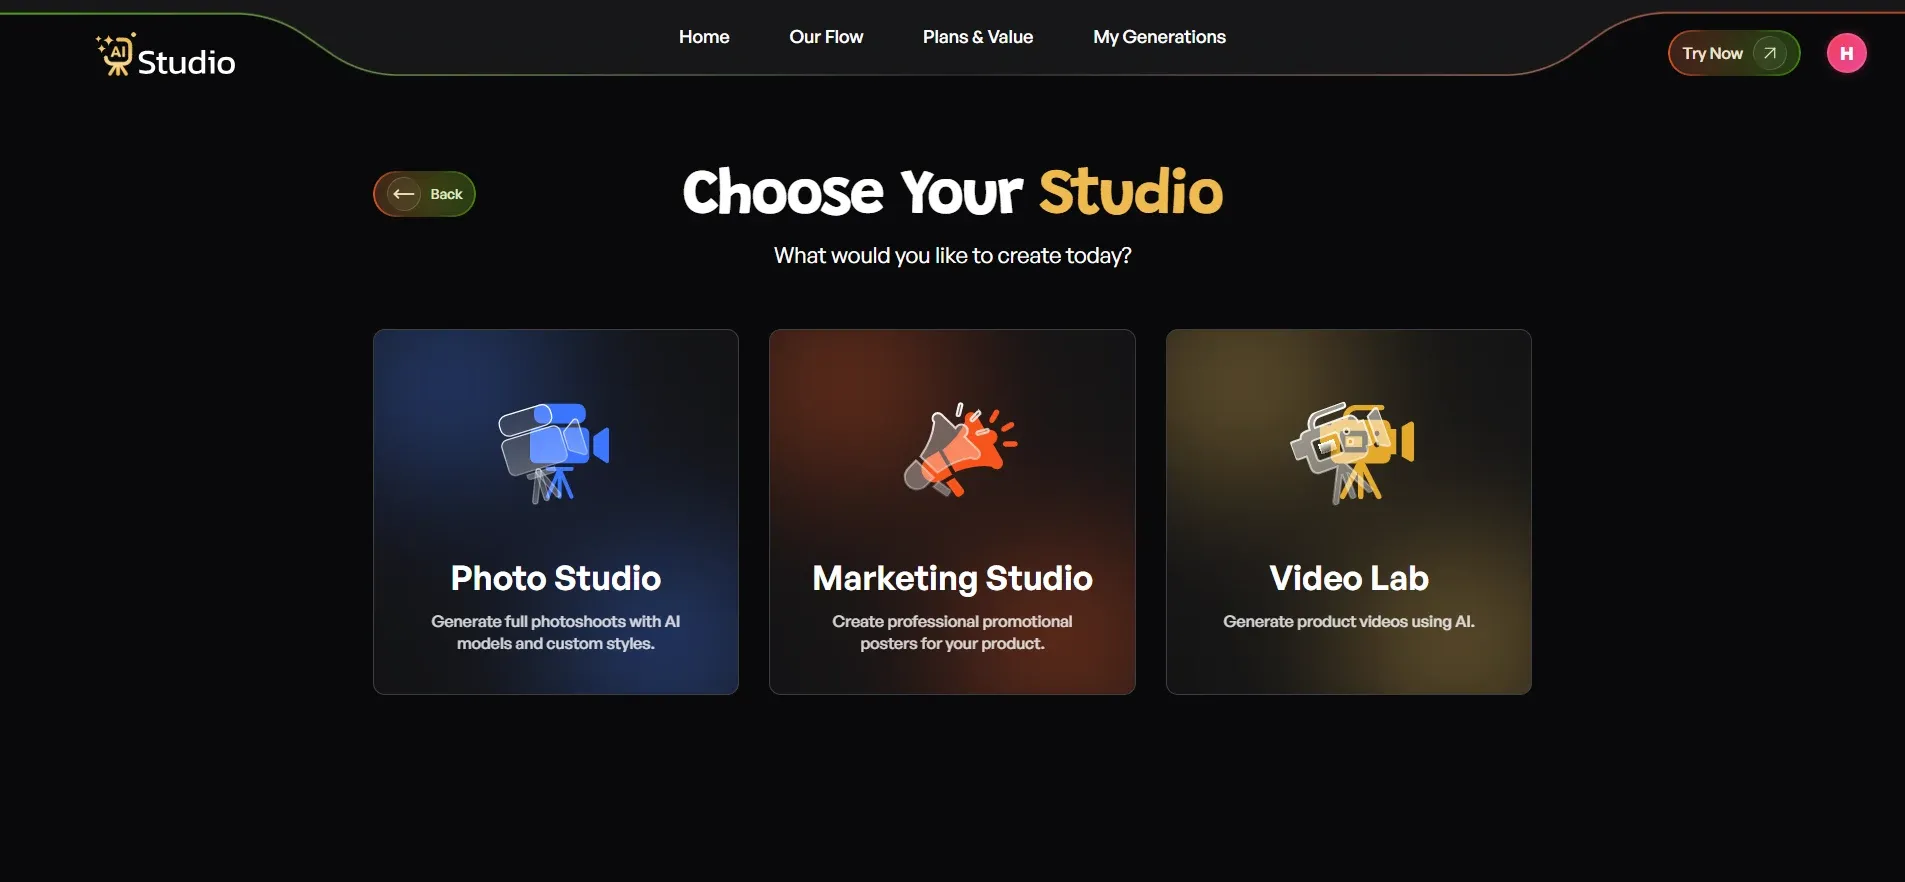
Step 2: Choose Your Studio
In the dashboard area, you will see three options: Photo Studio, Marketing Studio, and Video Lab.
For jewelry product photos, pick Photo Studio. This is where the AI backgrounds get made, model shots are set up, light adjustments are done, and the style settings live. The other spaces work well, those are meant more for marketing creatives and video content.
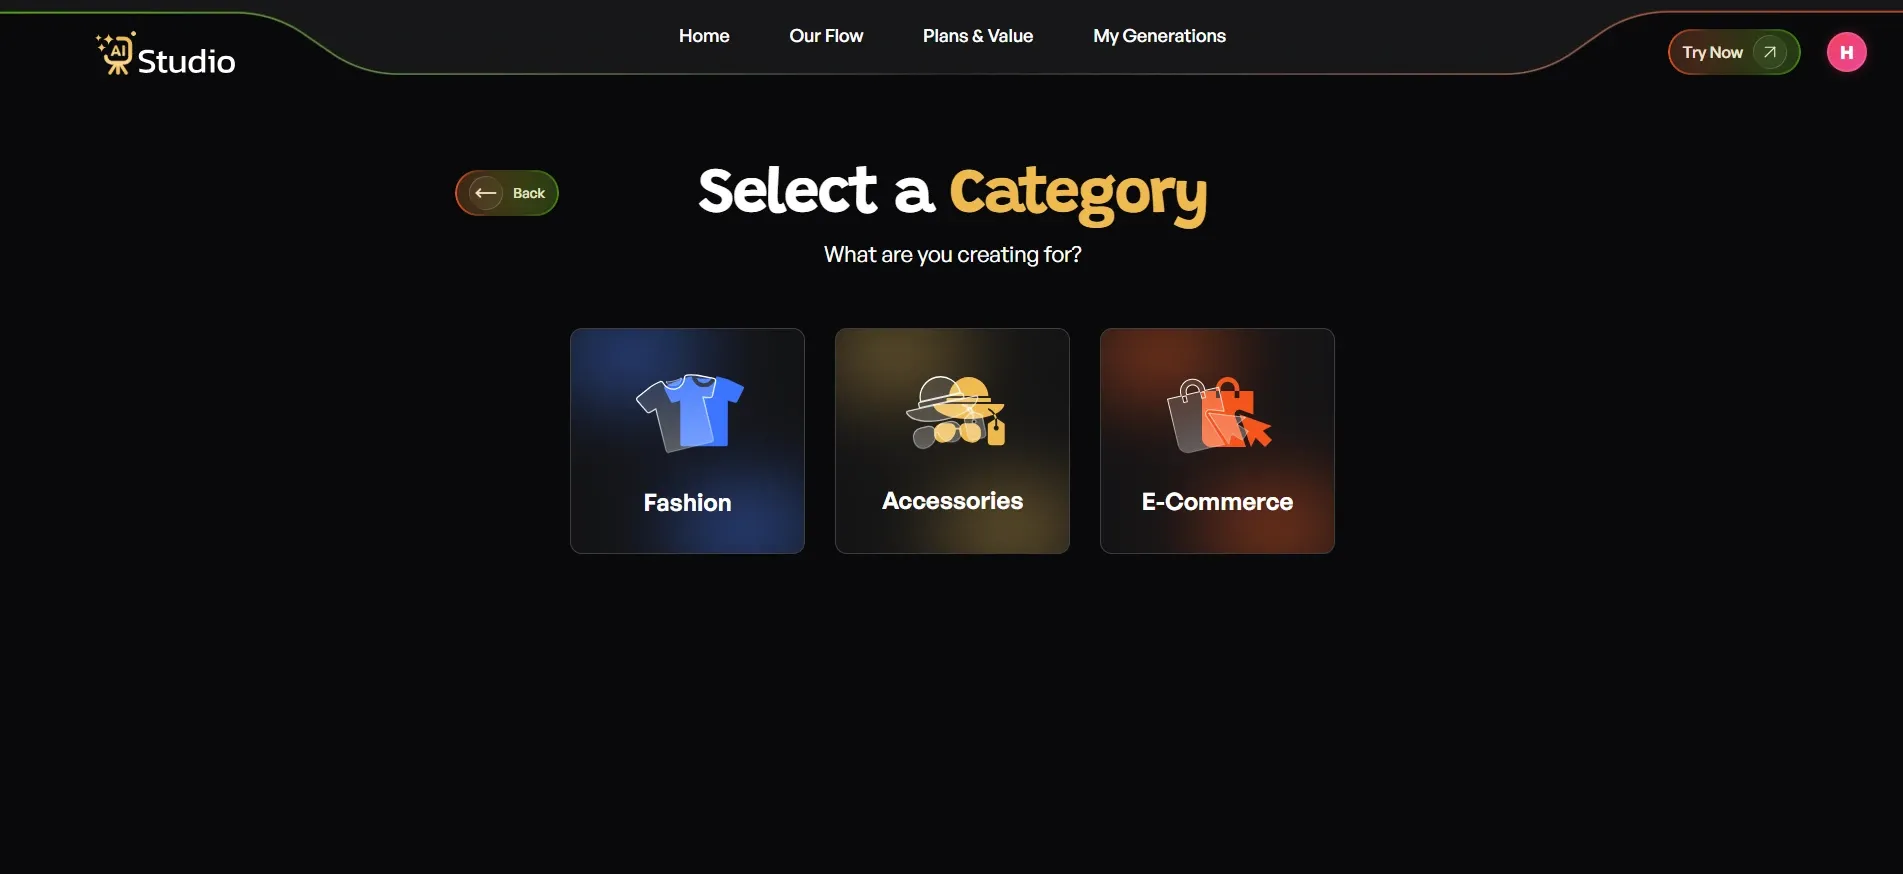
Step 3: Select Your Category
After entering Photo Studio, you will be asked: "What is your creation for?"
You'll end up seeing three categories: Fashion, Accessories, and E-Commerce, yes, just like that.
For jewelry sellers, go with Accessories. Once you pick the main category, you will be asked for the target audience subcategory: Women, Men, or Kids. This is the thing that tells the AI which kind of model to generate when it places your jewelry on a person.
Jewelry-specific tip: Pick the right category; it actually matters more than most people ever think. Like if you are selling an engagement ring, and you select Women, the AI will set it on the correct hand, with the right skin tone and proportion. But if you choose the wrong category, then everything gets a bit weird, like the ring ends up in an awkward spot in the final image, even if the product is the same.
Step 4: Select Your Sub Category
Under Accessories, you will now pick your specific product type, like Jewelry, watches, bags, Belt, Perfume, and a few others.
Go with Jewelry.
This part matters because different jewelry categories need slightly different AI placement logic too. For example, a necklace needs to sit and drape in a pretty natural way around a neck, not just "hover" there. A ring needs to stay on a finger, with the right angle, and yes, that little tilt counts. Earrings, on the other hand, should hang from the ear at the proper spot, not too high, not too low. Then the sub-category choice basically tells the AI which rules to apply, exactly.
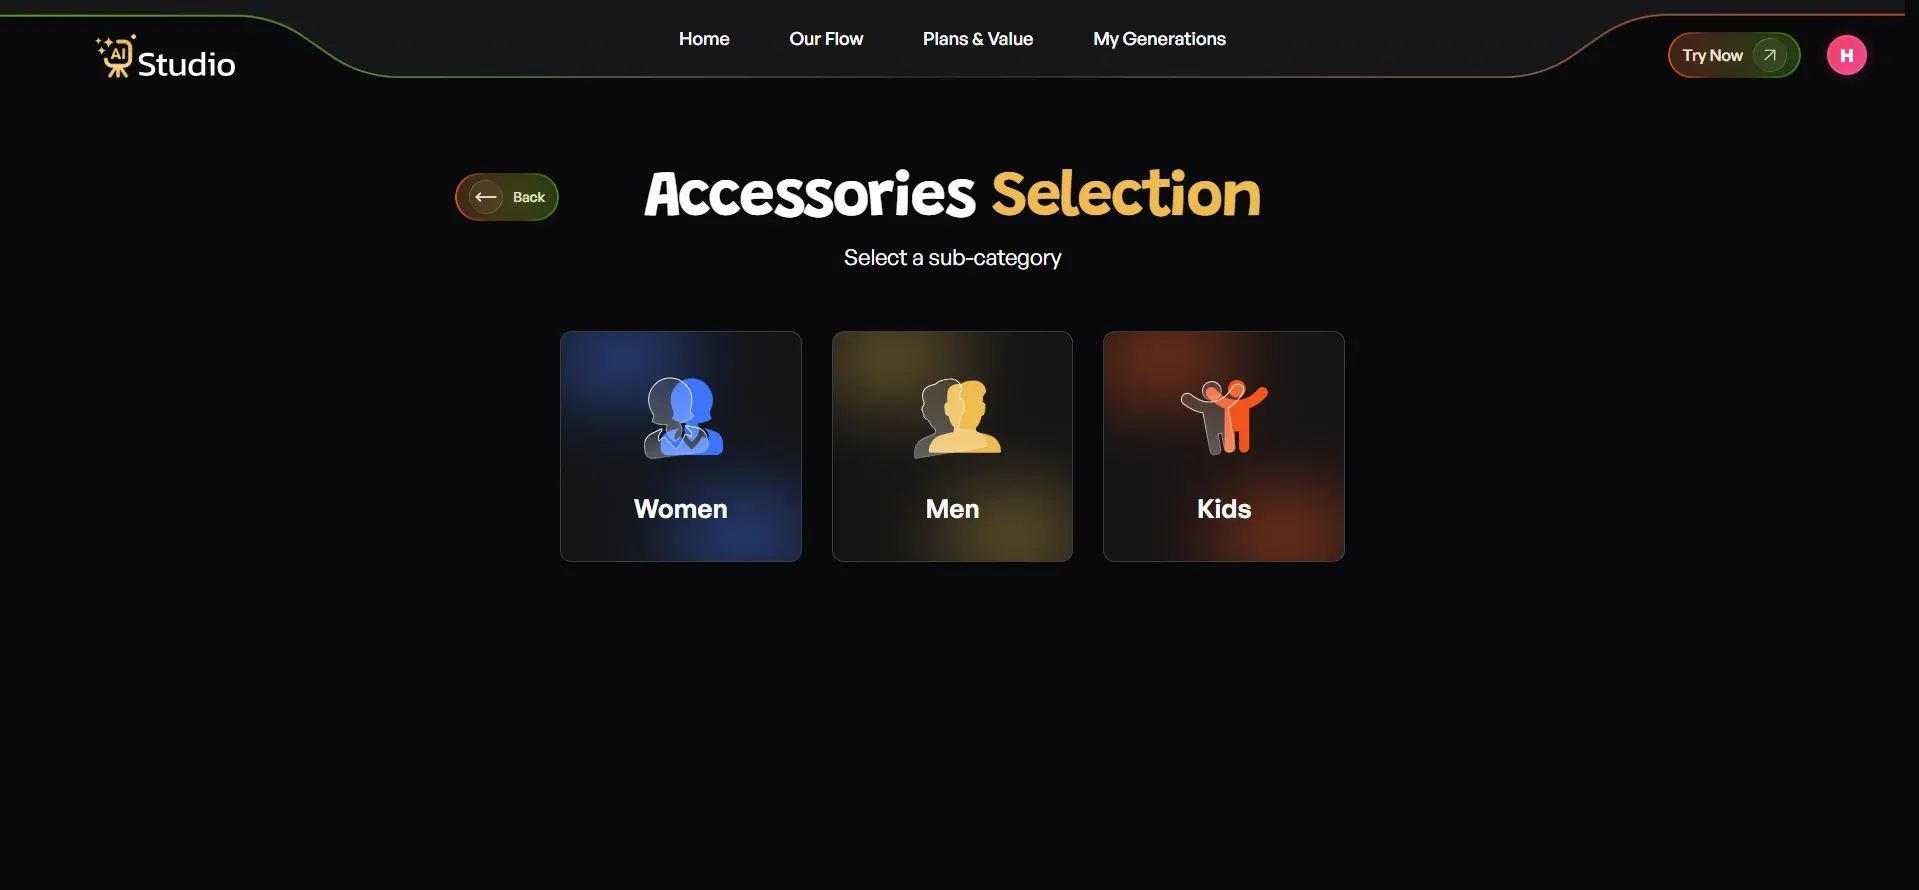
Jewelry-specific tip: Selecting the right sub-category stops those common AI hiccups, like a ring looking somehow oversized on the hand or a necklace ending up sitting a bit too low on the chest. Don't skip this step, and don't pick a generic option either.
Step 5: Upload Your Jewelry Photo
Now upload your product image.
- Primary Image (required): Upload a clear, front-facing photo of your jewelry piece. This is your main source image.
- Additional Image (optional): If you have a second angle of the piece, add it here. This is especially helpful for necklaces and bracelets where the clasp or chain detail matters.
For the best results, your photo should meet the checklist from the previous section: a clean piece, soft light, white background, and sharp focus.
Click Next: Add Details when your image is uploaded.
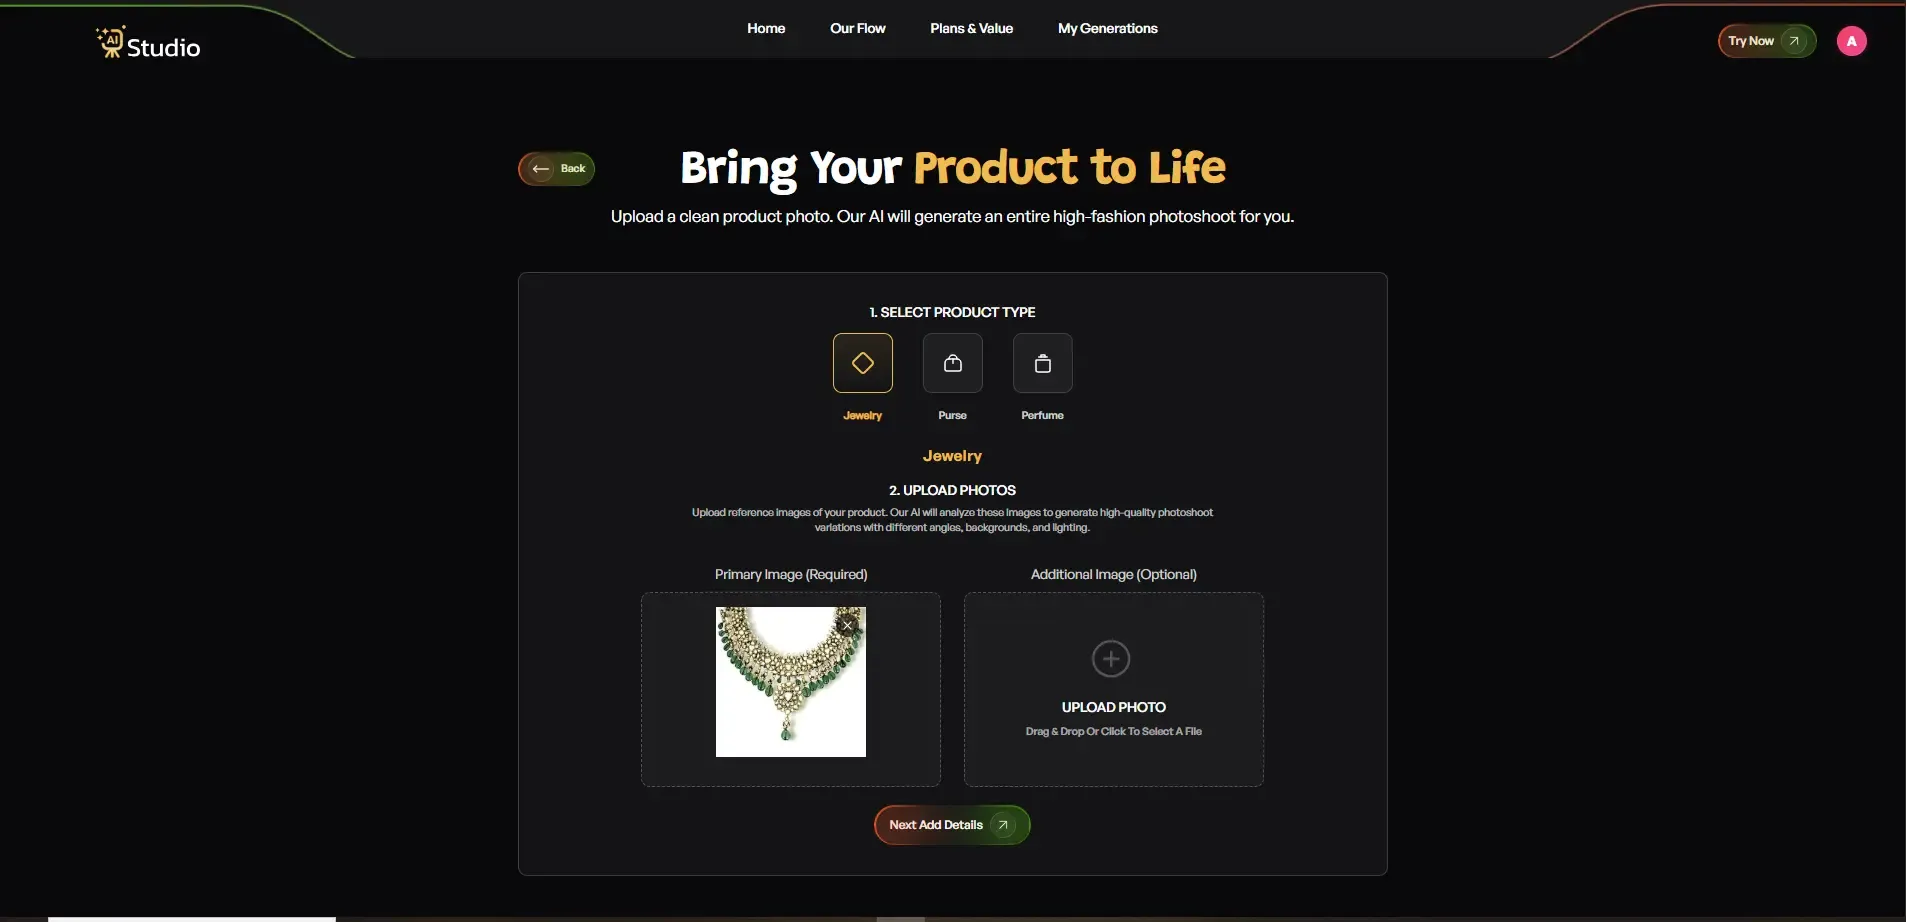
Jewelry-specific tip: AI product photography tools kind of amplify whatever they get back from you. If your source picture is out of focus or has bad lighting, the result will look the same blurry thing, no matter how advanced the tool claims to be. And honestly, spending just two more minutes on the original photo makes a noticeable difference in the finished image quality.
Step 6: Fill In the Final Details
This is where you customize your output. Here is what each setting means for jewelry sellers:
| Setting | What to Do for Jewelry |
|---|---|
| Product Name / Brand Name | Add your brand name for catalog consistency |
| Number of Images | Generate 4 images to compare different looks |
| Layout / Aspect Ratio | 1:1 for Amazon and Etsy, 4:5 for Instagram, 16:9 for banners |
| Model Consistency Toggle | Turn ON if creating a full catalog to keep the same model across all images |
| Background | White for Amazon and Flipkart listings; velvet, marble, or linen for Shopify and Instagram |
| Style | Minimalist or Close-Up works best for most jewelry types |
| Additional Instructions | Write something like: "Soft warm lighting, close-up of ring on hand, luxury feel" |
Once everything looks right, click Generate Images.
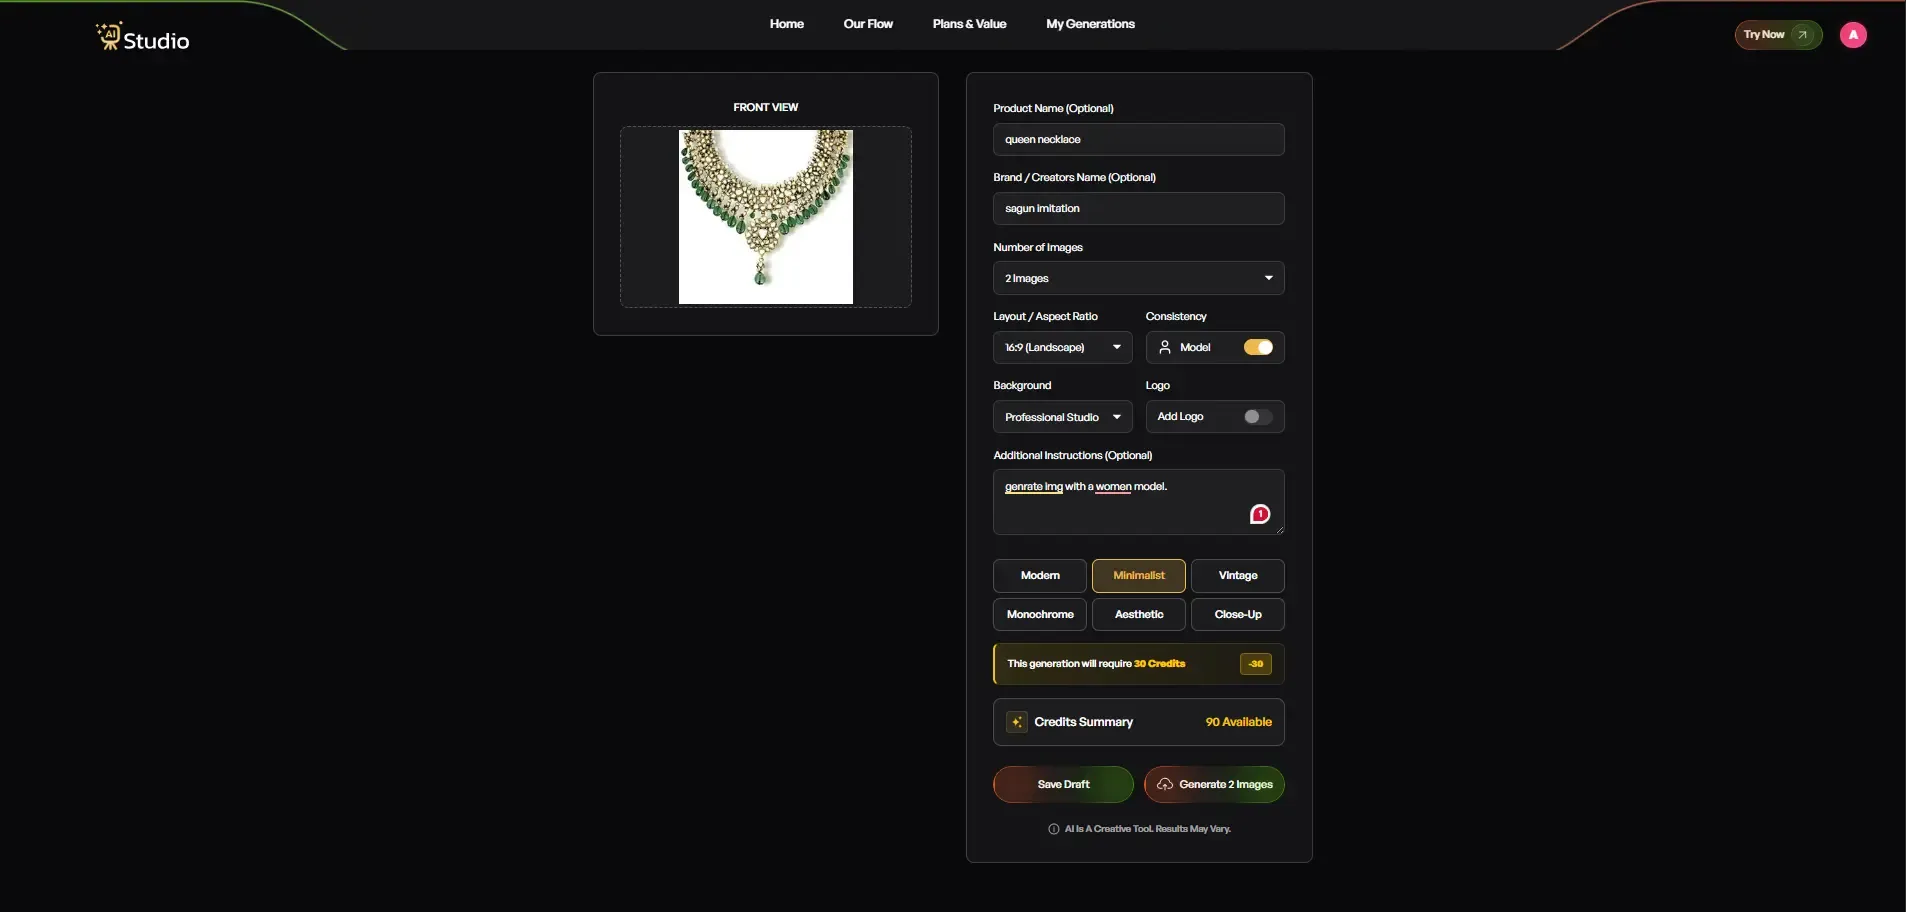
Jewelry-specific tip: For gold jewelry, the Warm or Aesthetic style setting kinda pulls out the richness of the metal, like it's right there. For silver and platinum, Minimalist or Monochrome tends to give a cleaner, more premium vibe, without all the extra fuss. For gemstone pieces, like rubies, emeralds, or stuff in that family, the close-up style really helps you catch the stone detail best, in a way that feels more intimate.
Step 7: Download Your Image
In about 10 seconds, your result is ready.
Your jewelry item will show up on a virtual model, or be placed inside a professional studio setting, depending on what you pick. When you download, grab the image in the highest resolution possible.
It's ready to use for your Amazon listing, Shopify store, Etsy shop, or Instagram page. No retouching at all. No back and forth with a photographer, no lingering wait.
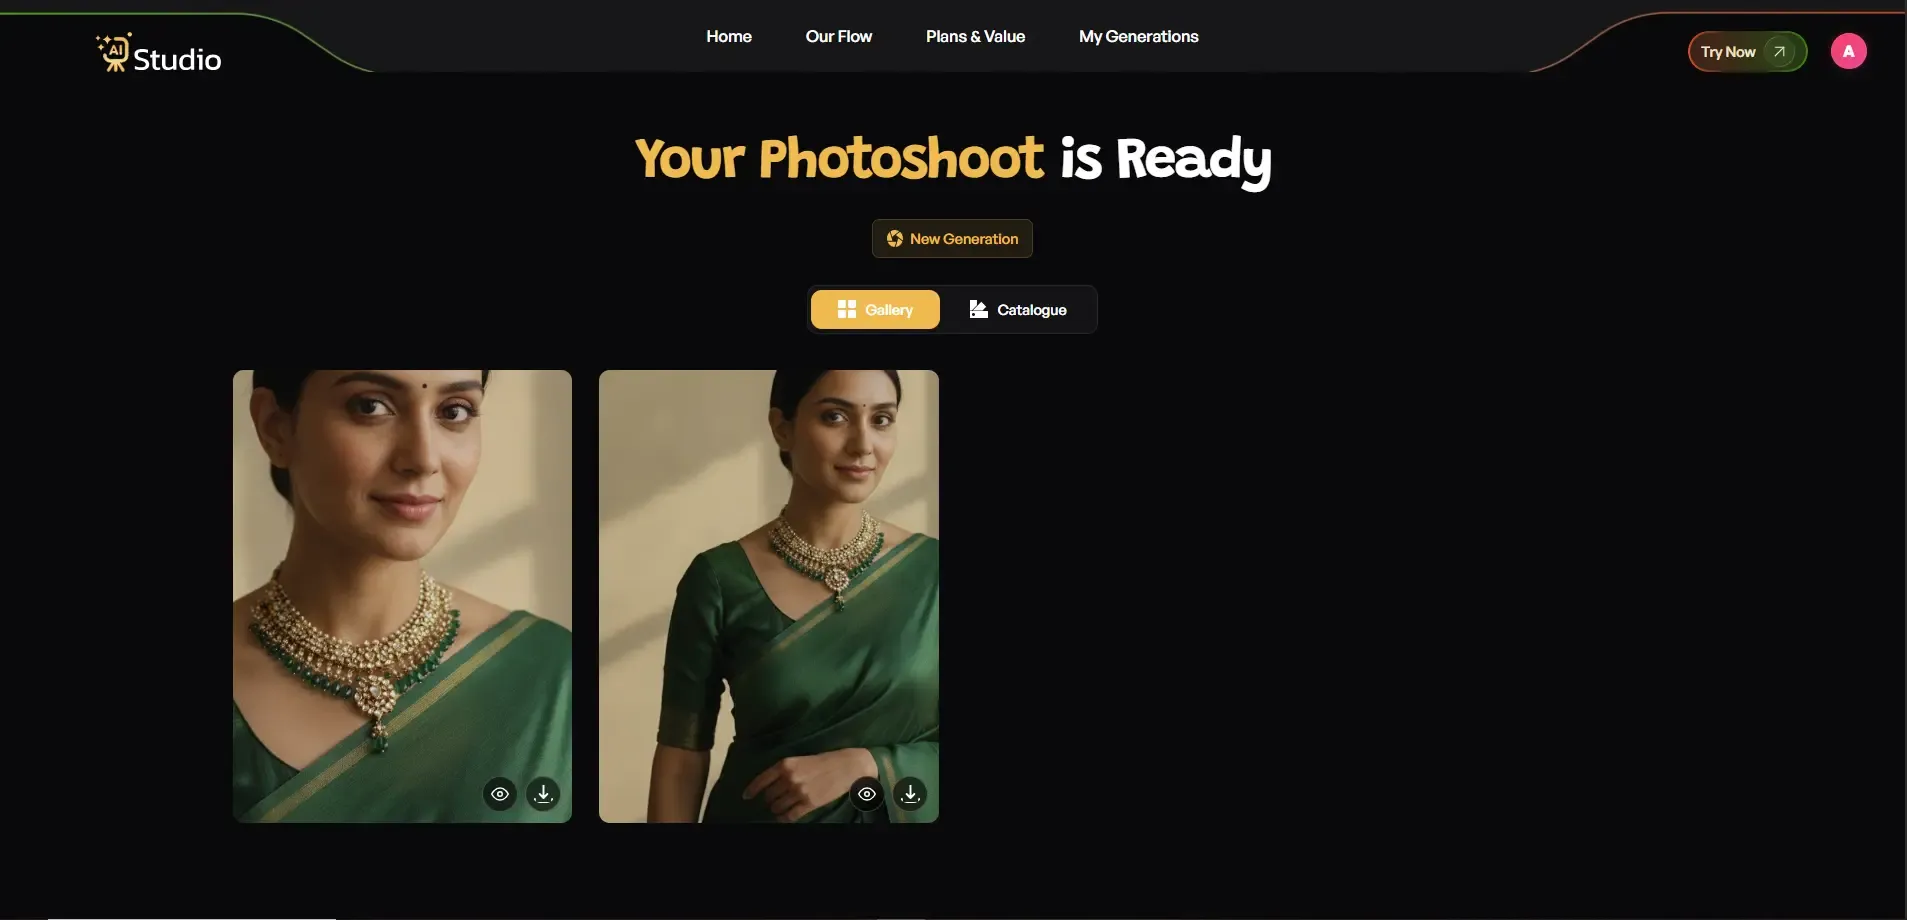
Jewelry-specific tip: Before you download, check two things. First, make sure the jewelry piece in the AI image matches your real product exactly, like don't just "kinda" match it. If the AI changes the shape of a gemstone or the band thickness, regenerate it. Second, look at the lighting direction too. Shadows should drop in the same direction across all your catalog images for a consistent, professional look; that's the whole point.
Which Image to Use Where (Platform Guide)
| Platform | Image Style | Aspect Ratio |
|---|---|---|
| Amazon / Flipkart | White background, product fills 85% of the frame | 1:1 (min 1000x1000px) |
| Shopify / D2C Website | Lifestyle scene (marble, velvet, or linen backgrounds) | 1:1 or 4:5 |
| Instagram Feed | Clean lifestyle or on-model shot | 4:5 portrait |
| Meta / Facebook Ads | High contrast, bold background | 1:1 or 16:9 |
| Etsy | Lifestyle shot with warm, artisanal feel | 1:1 or 4:5 |
If you are specifically selling on Amazon, this guide on AI product photography for Amazon sellers will walk you through the exact image specs and listing requirements in more detail.
Quick Recap: The 7 Steps
- Create a free account at tryaistudio.app
- Choose Photo Studio from the dashboard
- Select Accessories as your category
- Choose Jewelry as your sub-category
- Upload a clean, well-lit photo of your jewelry piece
- Set your background, style, aspect ratio, and model preference
- Generate and download your studio-quality jewelry photo
Best Free AI Tools for Jewelry Product Photography in 2025
There are several AI product photography tools available today. I have tested quite a few of them. Here is an honest comparison focused on what matters most for jewelry sellers. You can also check out this full breakdown of the best AI tools for ecommerce product photography if you want a wider comparison beyond jewelry.
| Tool | Free Plan | Best For | AI Models Available |
|---|---|---|---|
| AI Studio (tryaistudio.app) | Yes, generous free tier | All jewelry types, full ecommerce workflow | Yes |
| Photoroom | Limited (watermark on free images) | Background removal and batch processing | No |
| Claid.ai | 10 free generations | Precise background swaps, lifestyle scenes | Limited |
| SellerPic | Limited | On-model jewelry placement | Yes |
For a lot of Indian jewelry sellers who are just starting, AI Studio is kinda the best shot. It's the only tool on this list that actually gives a truly usable free tier, lets you generate AI models specifically for jewelry, and it also runs across Amazon, Flipkart, Shopify, and Instagram, with no watermarks showing on the free plan.
The ₹600 per month paid plan is easily the most budget-friendly product photography AI option for small business folks. Like, people who used to spend ₹20,000 to ₹30,000 per photoshoot are now managing their whole visual catalog with AI Studio, for way less, kind of at a fraction of the earlier cost.
And if you're dealing with bulk AI product image processing for a big jewelry catalog, AI Studio is also steadily handling batch generations, so the style stays the same, the lighting stays consistent, and even the model holds up across hundreds of SKUs.
AI vs. Traditional Jewelry Photography: Which Should You Use?
This question comes up a lot. Here is a clear, honest answer. For a deeper dive into both sides, this detailed look at AI product photography vs traditional shoots covers the tradeoffs in full.
| Factor | AI Photography | Traditional Studio |
|---|---|---|
| Cost | Free to ₹600/month | ₹10,000 to ₹50,000 per shoot |
| Speed | Under 10 seconds per image | Days from booking to final edit |
| On-model shots | Yes, instantly with AI models | Requires hiring hand or neck models |
| Detail accuracy | High with a good source image | Highest (with specialist equipment) |
| Consistency at scale | Very high across the full catalog | Difficult and expensive to maintain |
| Best for | Sellers with 10 to 1,000+ SKUs | Premium brands with large budgets |
Here's the honest take, kinda: if you run an independent jewelry shop, a D2C brand in the early growth stage, or a small business managing your own listings, AI versus traditional product photography isn't really a debate. AI wins on cost, pace, and accessibility, and that's the big thing.
Traditional photography still matters for ultra-premium brands where every single image has to look flawless, down to the tiniest details. But for most sellers trying to build a solid product listing on Amazon or Shopify, AI-made product images quality is already good enough to trade blows with studio work, and frankly, it's often more uniform.
The sellers I've seen who switch from traditional shoots to AI product photography for ecommerce rarely, if ever, switch back.
Conclusion
Making high-quality AI product photos for jewelry is not really hard anymore, and it's also not overly expensive. If you have a proper source image and a tool like AI Studio, you can get from a raw phone photo to a platform-ready product image in less than 10 minutes. No need for a studio booking, no photographer, no model fees either.
For Indian ecommerce sellers who are watching budgets closely, this change is kinda big. Cleaner visuals lead to more clicks, more confidence, and higher sales on Amazon, Flipkart, Shopify, and Etsy. The best part is that the tools are free to start. The learning curve is minimal. And honestly, the results speak for themselves. If you are ready to get started, generate product photos with AI instantly and see the difference for yourself.