


Photo Editing AI for Ecommerce Sellers: Best Tools to Use in 2026
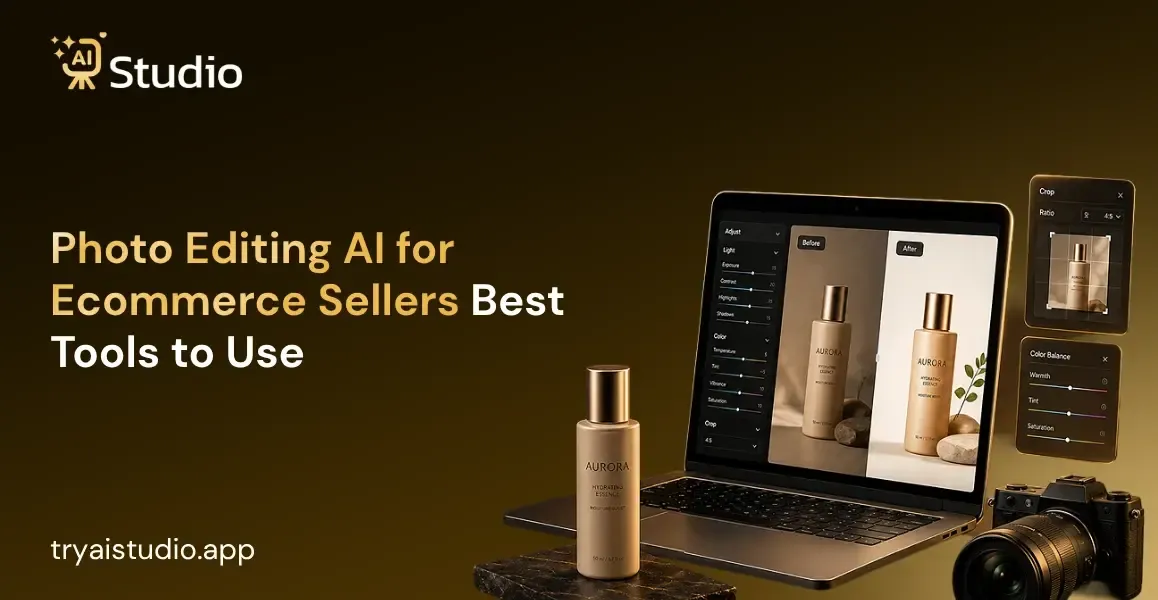
I've seen many sellers struggle with product photos, and the problem is usually the same. You find yourself in the same situation as most small businesses - you have the product and a Shopify store ready to go, but your photos look hastily put together because they were. To book a proper photoshoot in India, you would have to spend between 10,000 to 50,000 rupees, and that's before finding a model and a studio.
This is where photo editing ai comes in, to rescue small-time sellers who lack the resources of big companies, which is why this tool is invaluable. If you want to see how this shift is playing out across the industry, our piece on why AI product photography changes everything is a good place to start. In this guide,
I am going to discuss what photo editing ai tools are capable of, which ones are worth your time, and how to edit photos like a pro using only your phone.
What Is Photo Editing AI and How Does It Work?
Let me try to break it down simply for you. Photo editing ai is basically a piece of software that utilizes artificial intelligence to automatically edit, improve, or even replace your product images. The software takes the hard work out of photo editing by doing most of the tedious or time-consuming tasks, such as removing unwanted objects or shadows, with the touch of a button or a few short text prompts. If you're curious about the exact mechanics, we've broken it down in how an AI photo generator actually works.
A regular image editor would require a designer to manually cut out an object, fix any blemishes, or edit shadows that are polluting your product's appearance in the picture.
An artificial intelligence image editor, on the other hand, has already been trained to know the desired outcome of your edited image by being exposed to hundreds of thousands of similar images. So, when you upload your image into the software, it detects the object and automatically applies the necessary edits to make it look its best. You can read more about this process in our guide to the artificial intelligence image editor behind these tools.
How AI Photo Editing Differs From Manual Editing
Here is the reality. Manual editing depends entirely on the skill of the person doing it, and it takes time, sometimes hours for a single image. AI editing works differently:
- It works in seconds instead of hours
- It does not require any design training
- It gives consistent results across hundreds of product photos
- It can generate new backgrounds, not just clean up existing ones
For a seller managing fifty or a hundred SKUs, this difference is not small. It is the gap between spending a weekend editing photos and having your entire catalog ready before lunch. We cover this scaling advantage in more detail in the benefits of AI product photography.
Photo Editing AI vs Traditional Product Photography
A question we often get from people who are debating is a photographer a worthwhile investment is the one below "Should I try an AI option or go with a pro photographer?" Let's talk about both options and why they can be valuable. For a deeper side-by-side breakdown, check out AI product photography vs traditional shoots.
Cost Comparison
A traditional product photoshoot in most Indian cities comes with certain expenses that add up considerably. The cost of the studio, the photographer's fee, hiring a model (in case of clothing or jewelry), and editing charges put together take a lot of money. For a D2C brand that needs 20 products to be shot, it can cost anything between Rs. 25000 to Rs. 40000 easily.
With product photography ai, the math looks very different. Many tools offer plans starting around ₹600 per month, and some even offer a free trial to test things out before you commit. That is the cost of a single product photo in a traditional shoot, covering your entire catalog for a month. Sellers on a tight budget often find this comparison useful when reading about affordable product photography for Indian sellers.
Turnaround Time Comparison
| Method | Typical Time | Typical Cost |
|---|---|---|
| Traditional studio shoot | 2 to 5 days | ₹10,000 to ₹50,000 |
| AI photo editing tool | 10 seconds to a few minutes per image | ₹600/month onwards |
This is not to say that traditional photography does not have its merits; we will get to that shortly in this article. However, for the average small-scale seller, speed and budget are of utmost importance, and in that regard, it is hard to beat the value proposition of AI versus traditional product photography.
Best AI Tools for Product Photography and Ecommerce Listings
There is a lot to choose from these days, and it can be overwhelming to decide what suits your particular purpose. Let me help you through the maze based on my experience. If you want a curated shortlist, our roundup of the best AI tools for product photography in ecommerce breaks down several options.
General-purpose editors such as Canva, Adobe Firefly, or Picsart are perfect for minor photo editing tasks such as deleting unwanted objects in photos or tweaking colors and filters. Canva is great for people who do any photo editing for their social media posts and want to keep the process simple and automated. For sellers who want a wider comparison, this comparison of AI product photo apps is worth a look.
What to Look For in an AI Product Photography Tool
Before picking any ai product image generator, check for these basics:
- Does it support your product category (jewelry, fashion, accessories, general goods)?
- Can it generate backgrounds that match Amazon and Flipkart image guidelines?
- Is the pricing in INR and affordable for your scale?
- Does it offer consistent quality across large batches of images?
- Can it handle both flat lay products and on-model style images without needing a real photoshoot?
If a tool checks most of these boxes, it is worth testing with a free trial before committing to a paid plan. You can see what a genuinely good output looks like in our notes on AI generated product images quality.
How to Edit Product Photos With AI (Step-by-Step)
Let me show you how this actually works in practice, using a simple phone photo as the starting point. You do not need any prior editing experience for this. Start by visiting AI Studio's homepage to see the full range of tools before you begin.
Step 1: Create a Free Account and Log In
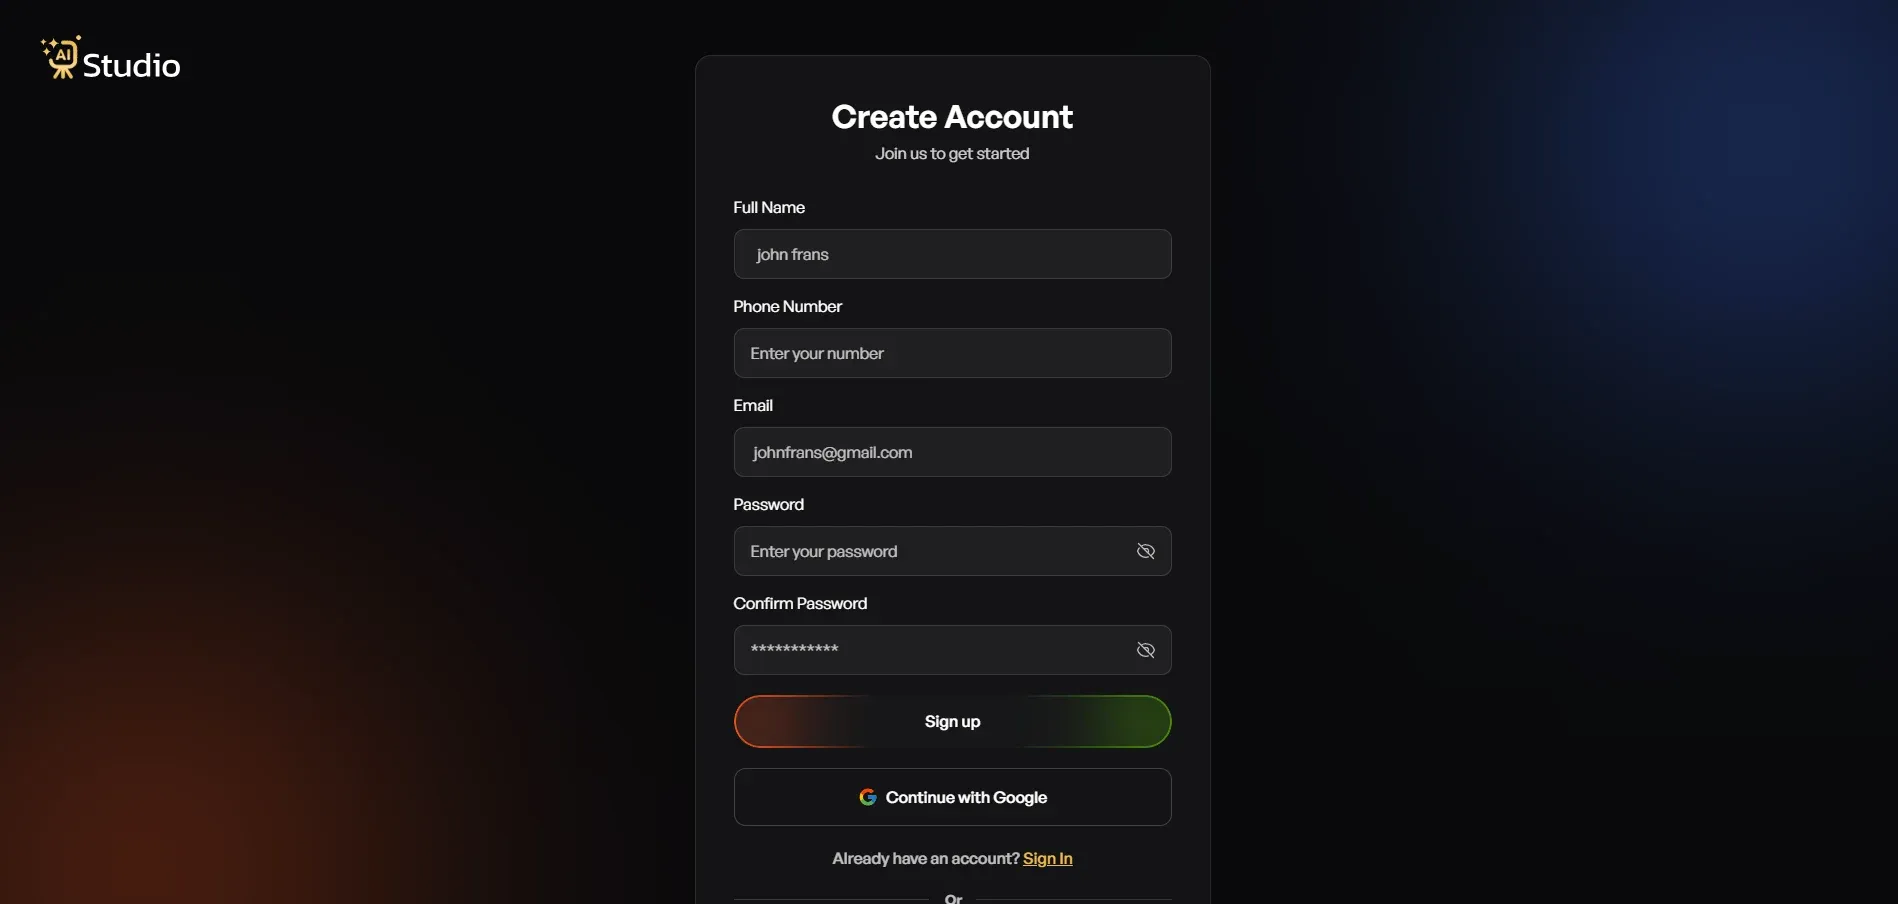
Go to AI Studio's website and sign up, no credit card needed to get started. Once you log in, your dashboard opens up and you're ready to go.
Step 2: Choose Photo Studio
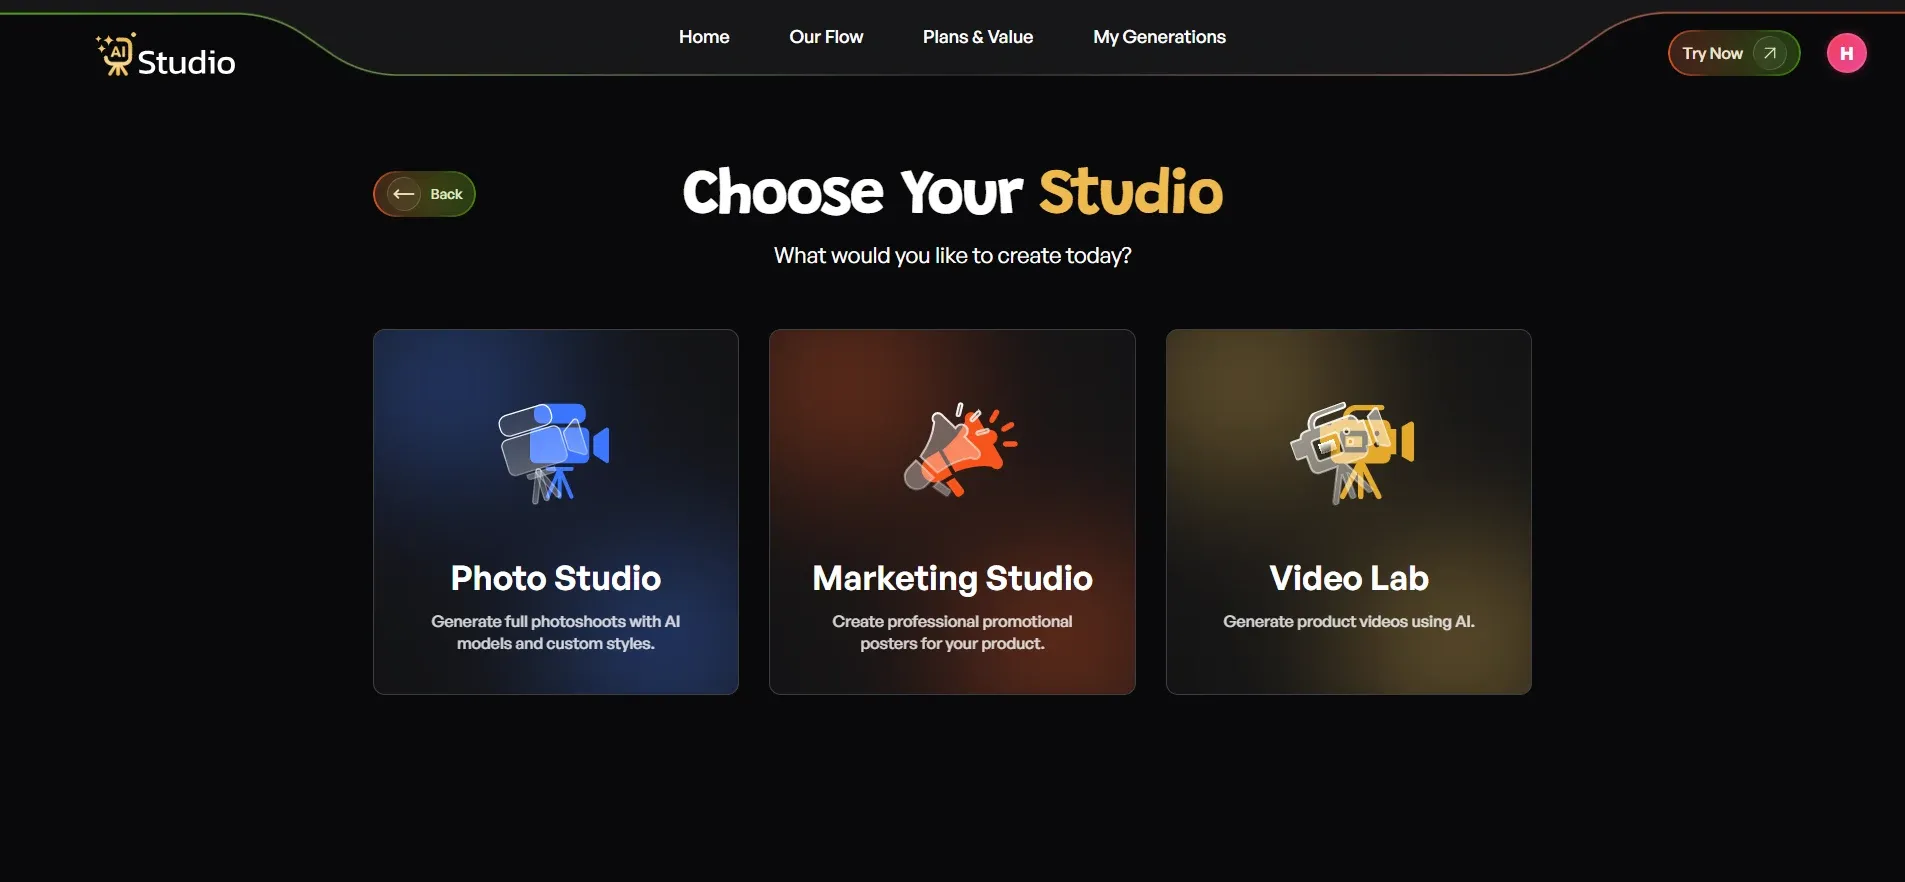
Inside the dashboard, you'll see options like Photo Studio, Marketing Studio, and Video Lab. For editing a simple product photo, pick Photo Studio, since this is where your image generation and editing happens. If you eventually want to promote the finished images, the Marketing Studio is worth exploring too, and for reels or product videos there's a dedicated video generation tool as well.
Step 3: Select Your Category
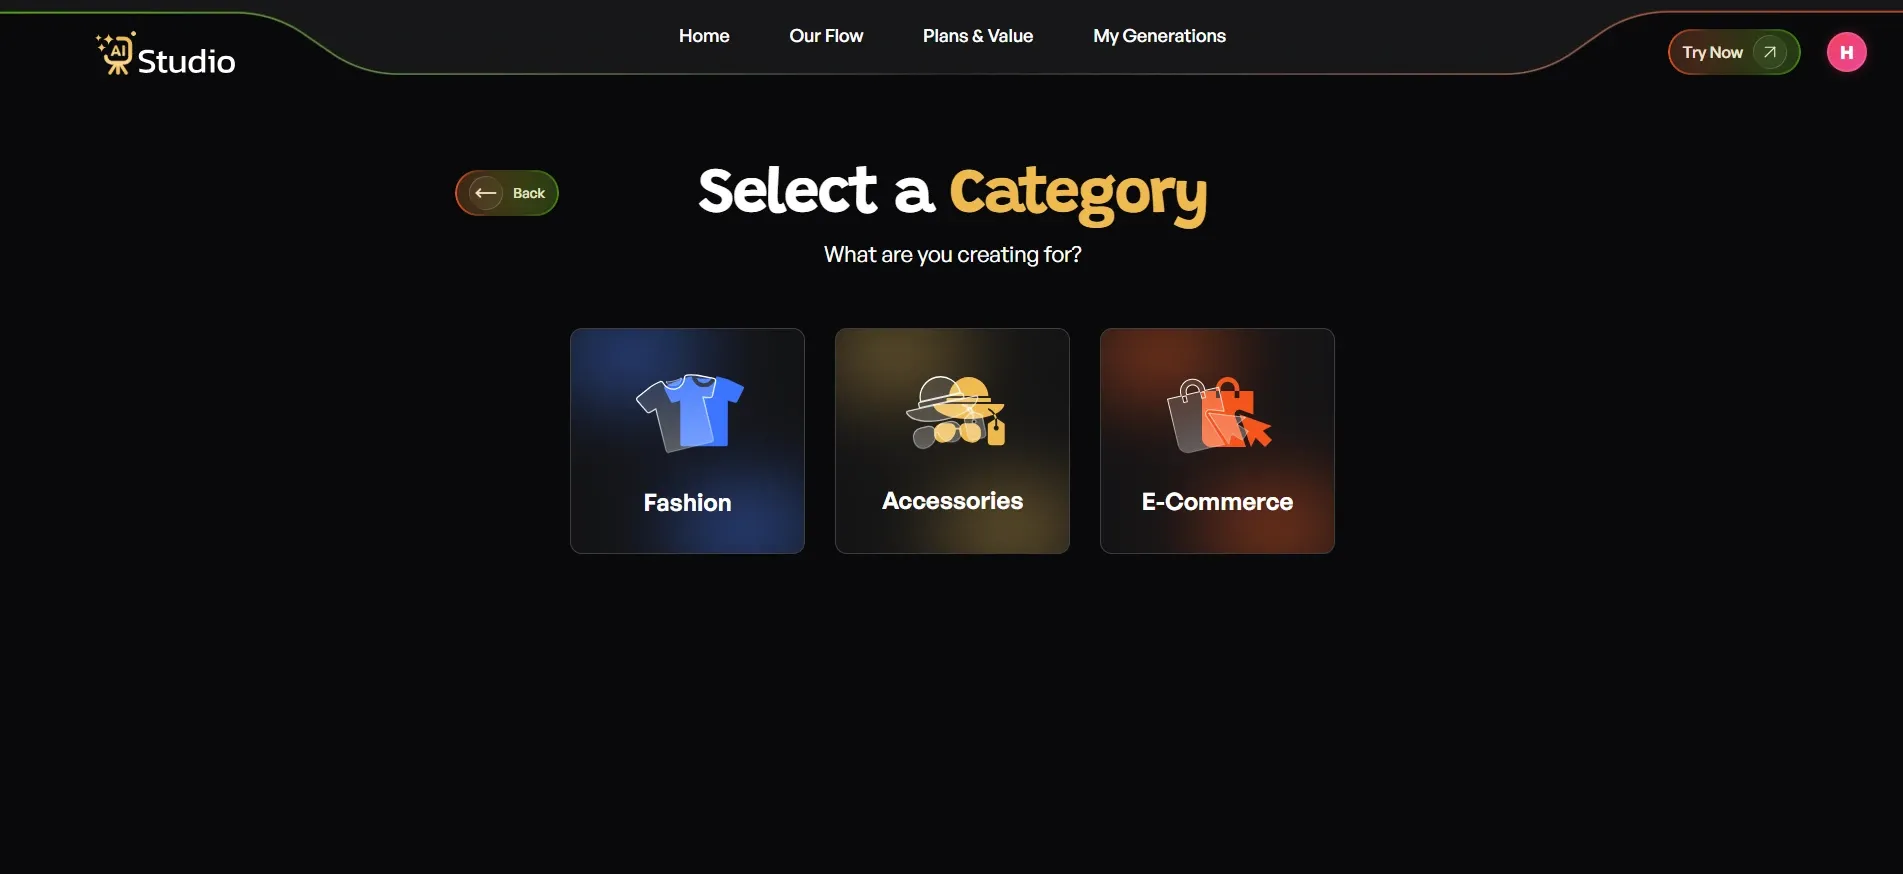
You'll be asked what your creation is for: Fashion, Accessories, or E-commerce.
- Choose Fashion for clothing like kurtas, t-shirts, dresses, or ethnic wear.
- Choose Accessories for watches, jewelry, bags, belts, or sunglasses.
- Choose E-commerce for general listings like electronics, home goods, or beauty products.
If you pick Fashion or Accessories, you'll also select Women, Men, or Kids so the AI knows what type of look to generate for your product. Not sure which option fits your catalog? The choose your studio page walks you through it.
Step 4: Upload Your Product Photo
Select your specific product type, for example kurta, watch, or necklace.
- Upload a Primary Image, a clear, front facing photo of your product (required).
- Add a second image if you have another angle (optional, but recommended).
- Keep the background plain white or light colored for the best result, or clean it up first with a background remover tool. Our guide on the AI background remover and product stager explains this step in detail.
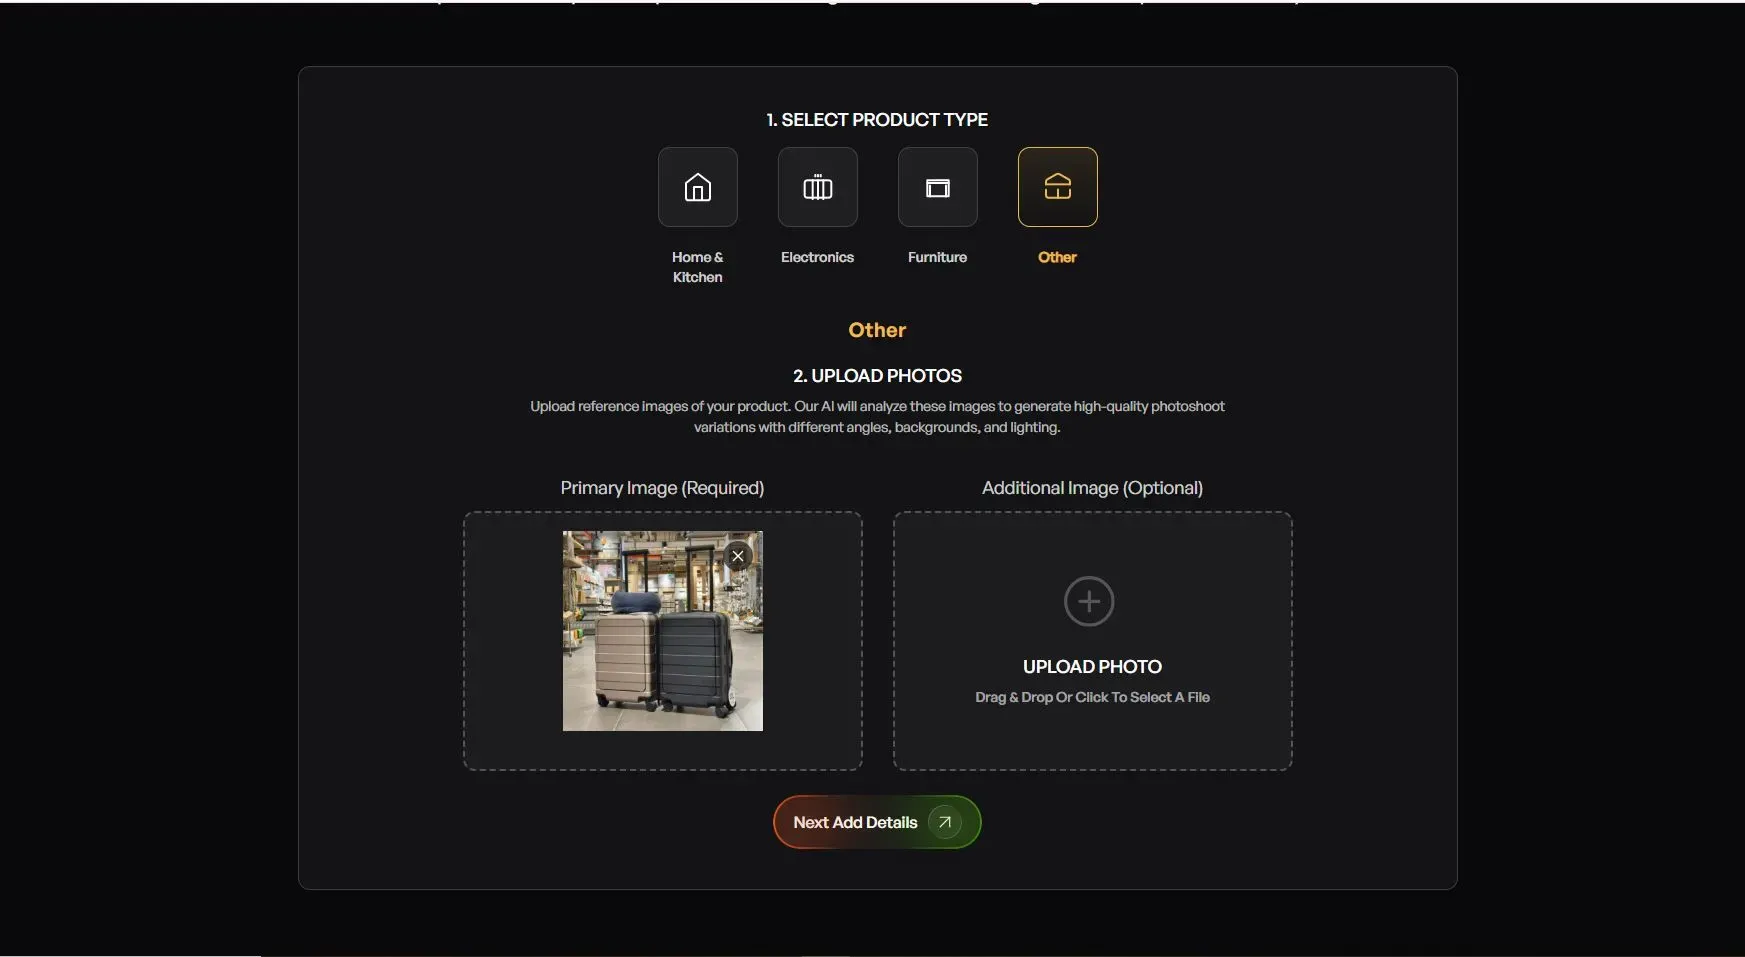
Any phone photo works fine as long as it's in focus and reasonably well lit, ideally near a window with natural light.
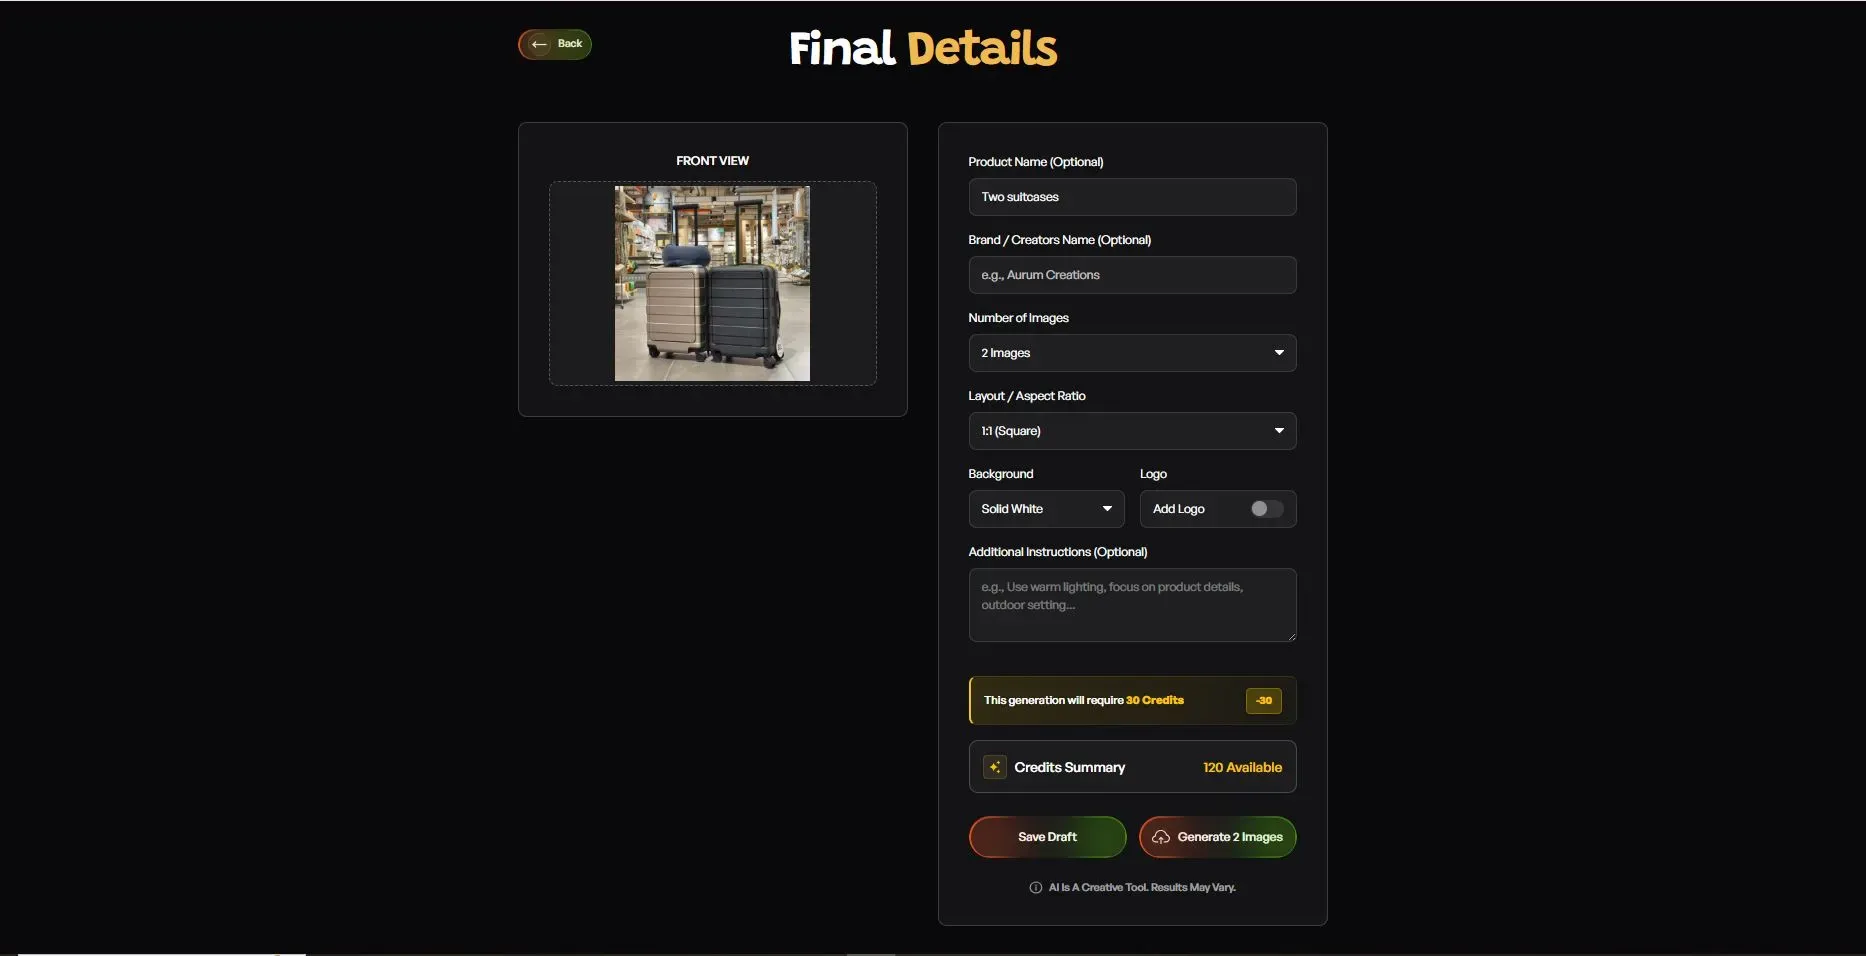
Step 5: Fill In the Final Details
- Add your Product Name and Brand Name (optional, but helps with consistency).
- Set the Number of Images you want generated, 2, 4, or more.
- Choose your Layout or Aspect Ratio, 1:1 square for Amazon, 4:5 for Instagram feed, 16:9 for banners.
- Toggle Model Consistency on if you're generating a full catalog and want the same look across every image.
- Choose a Background, plain white works best for Amazon's main image slot, while lifestyle backgrounds suit Shopify and social media. For more on this, see our piece on the AI background generator for ecommerce product photography.
- Pick a Style, Modern, Minimalist, Vintage, Monochrome, Aesthetic, or Close Up.
- Add a Logo if you want your brand watermark on the image.
- Write any Additional Instructions, for example warm lighting, outdoor setting, or focus on product details.
Step 6: Download Your Image
- Click generate, and within about 10 seconds your image is ready in full resolution.
- No manual retouching and no back and forth with an editor. Check that resolution meets platform requirements.
- Amazon generally needs a minimum of 1000 pixels on the longest side. If you sell there specifically, our guide on AI product photography tools for Amazon sellers covers the exact specs.
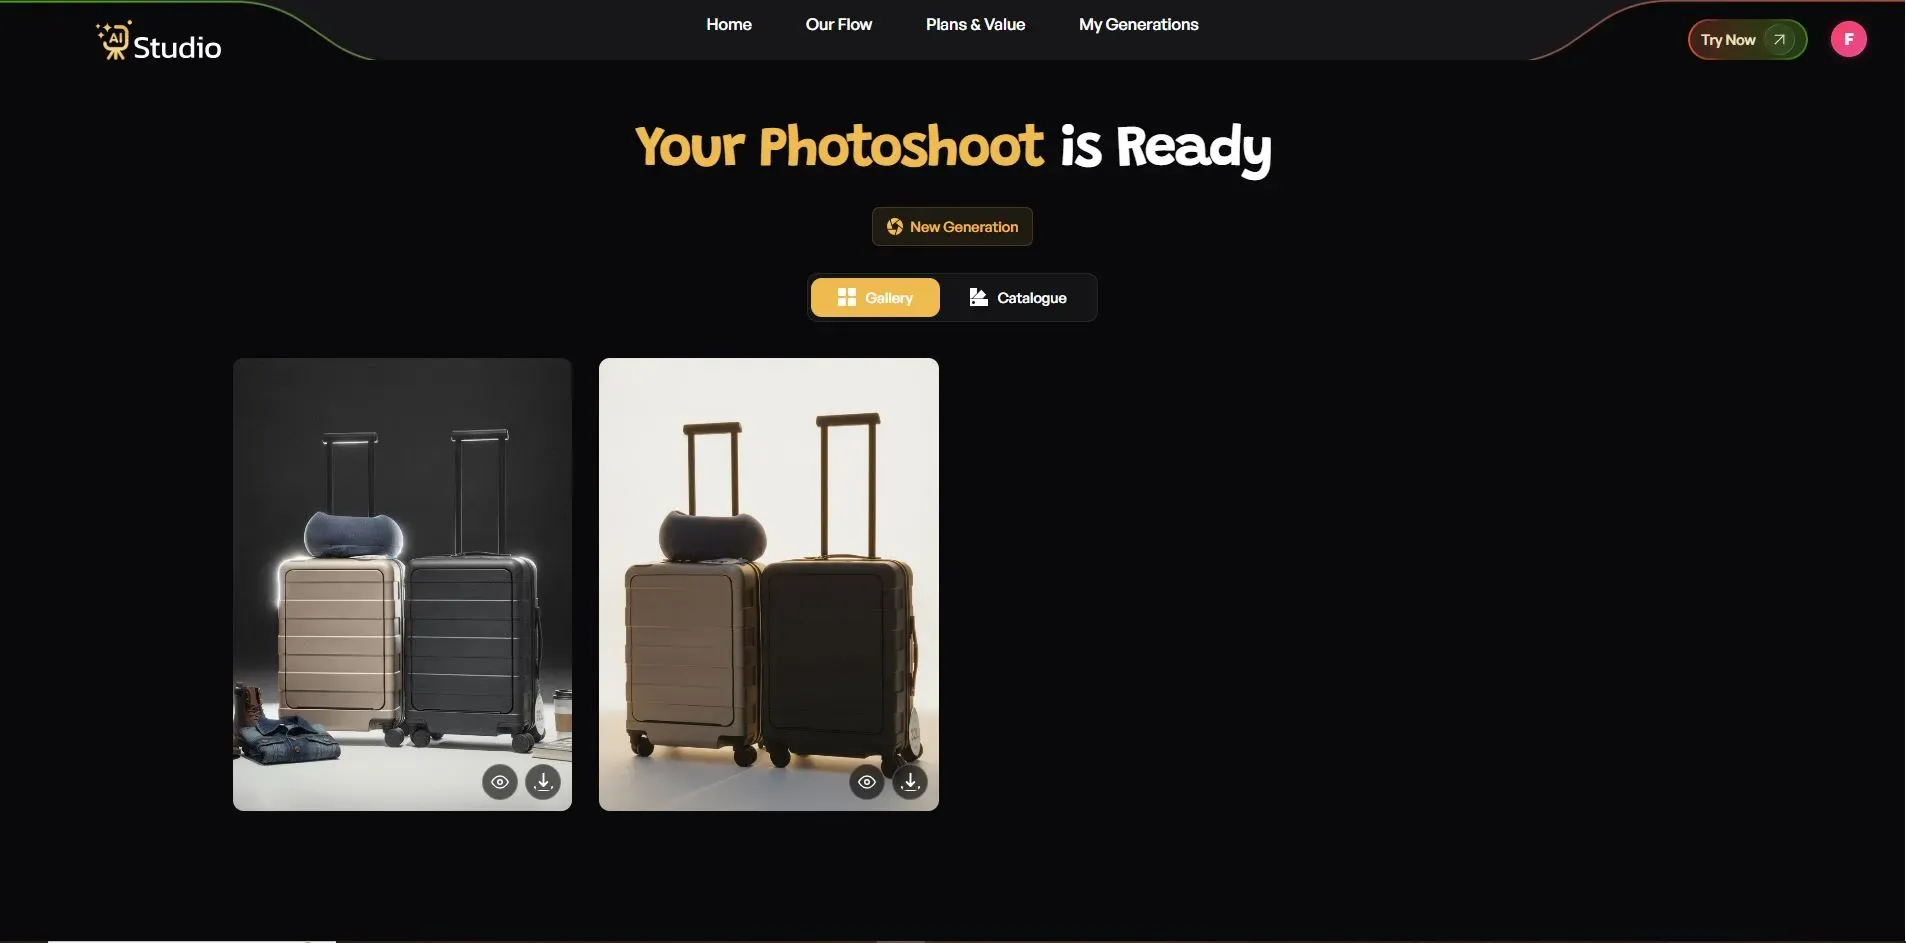
Your image is ready to go straight onto your Amazon listing, Shopify store, or Flipkart catalog. One thing sellers often miss is Amazon's white background requirement for the main listing image. If your photo has any shadow, texture, or off-white tone in the background, it can get flagged during review. Most good ecommerce photo background remover AI tools handle this step automatically, but it is worth double checking before you upload your final listing images.
If you sell on multiple platforms, it also helps to prepare a couple of versions from the same source photo. Most automated product photography solution tools let you generate several background styles from a single upload in one sitting, so you are not repeating the entire process for every platform. Shopify sellers in particular may want to look at the best Shopify AI image generator tools for product photography.
How to Edit Product Photos With AI (Quick Walkthrough)
Here is the walkthrough, step by step, from a rough phone photo to a listing-ready image:
- Take a clear phone photo. You do not need professional lighting, just make sure the product is visible and well lit, ideally near a window with natural light.
- Upload the photo to your AI tool. Most tools, including AI Studio, let you upload directly from your phone or desktop in a few seconds. For a full walkthrough, see how to create product photos with AI.
- Choose your background style. Depending on the platform you are listing on, pick a plain white background for Amazon compliance, or a lifestyle background for your Shopify store and social media.
- Let the AI generate the final image. This usually takes around ten seconds, and you often get a few variations to choose from.
- Check resolution and download. Amazon requires a minimum resolution, generally 1000 pixels on the longest side, so confirm your exported image meets this before uploading.
One thing sellers often miss is Amazon's white background requirement for the main listing image. If your photo has any shadow, texture, or off-white tone in the background, it can get flagged during review. Most good ecommerce photo background remover AI tools handle this automatically, but it is worth double checking before you upload your final listing images. If you'd rather skip a studio altogether, our guide on how to create product photos without a photoshoot is a good next read.
A question I get asked a lot is simply, how does AI photo generator work behind the scenes? You do not need to understand the technical side to use these tools, but knowing the basics helps you trust the output. The AI has been trained on a huge number of product images, so it recognizes shapes, edges, and lighting patterns.
When you upload your photo, it isolates your product from the background, pixel by pixel, and then constructs a new background or scene while maintaining realistic lighting and shadow directions, which is why the results look natural rather than cut and pasted. This is also why so many Indian brands are switching to AI photography instead of booking traditional shoots.
Common Mistakes Sellers Make With AI Photo Editing
In my experience, sellers who are new to these tools tend to run into a few avoidable problems. Here are the ones I see most often. For a broader checklist, our post on AI product photography tips for ecommerce sellers pairs well with this section.
- Over-editing the image. It is tempting to make everything look extra bright or extra sharp, but this often makes the product look fake. Buyers notice when a photo looks unnatural, and it can actually hurt your trust and conversion rate rather than help it.
- Ignoring platform-specific rules. Amazon, Flipkart, and Shopify all have slightly different requirements for main image backgrounds, resolution, and allowed content. Using the same AI-generated image everywhere without checking these rules can lead to listing rejections.
- Using unrealistic lighting or shadows. Some AI tools generate backgrounds that do not match the lighting direction of the actual product photo. This creates a subtle mismatch that customers might not consciously notice, but it can make the image feel slightly off.
- Skipping quality checks before bulk upload. If you are editing fifty images at once, always spot check a handful before uploading the entire batch. One bad setting can affect your whole catalog.
- Choosing a tool based on price alone. I understand budget matters a lot for small sellers, but the cheapest option is not always the right one. Some free tools produce lower resolution output that fails Amazon's image requirements, which means you end up redoing the work anyway. It is worth checking image quality before committing your entire catalog to one platform, even if that means starting with a free trial first.
- Not keeping a consistent style across the catalog. If your product photos use different background tones, angles, or lighting styles from one listing to the next, your store can look disorganized even if each individual photo looks fine. Buyers pick up on this inconsistency more than sellers realize, and it can quietly affect trust and conversion. Our product photography tips for sellers covers this in more depth.
Avoiding these mistakes is not complicated, it just takes a few extra minutes of attention before you hit publish on your listings. A little consistency and quality checking goes a long way toward making your store look established, even if you are just getting started.
Is AI Photo Editing Right for Your Store?
Here is my two cents, since I believe neither blindly embracing AI-powered tools nor rejecting them in favor of traditional photography is a fair choice in most circumstances.
If you are a small business owner, a D2C founder working on a shoestring budget, or simply a listing optimizer with a growing catalog looking to do more with less, utilizing AI and spending on product photography services is a logical move. Getting high-quality images of your product with a few clicks of a button saves both time and money by eliminating the need to schedule an appointment with a professional photographer. This is exactly why AI product photography works so well for small businesses.
At the same time, if you have a flagship product or collection, plan to launch a campaign around it, or need particular imagery that only a professional shoot can deliver, traditional product photography continues to be the perfect solution. For listings that need that extra polish either way, high-converting ecommerce images using AI is a useful read.
Conclusion
Product photography does not have to suck up your budget and timelines anymore. Photo editing ai has fundamentally changed the paradigm for small businesses and D2C brands, reducing cost and time spent on catalog creation while allowing them to maintain high quality. No more expensive shoots and long hours spent editing each photo.
Whether you're editing just one mobile phone photo or hundreds of SKUs, there are solutions designed specifically to help you get the job done faster and cheaper. And if you're convinced, trying out one such product, like AI Studio, on your next product photo might just be the easiest way to see for yourself. You can also browse our free AI product image generator options if you want to test the waters before committing to a paid plan.