


Product AI Image Generator: Create Studio Quality Photos in Seconds
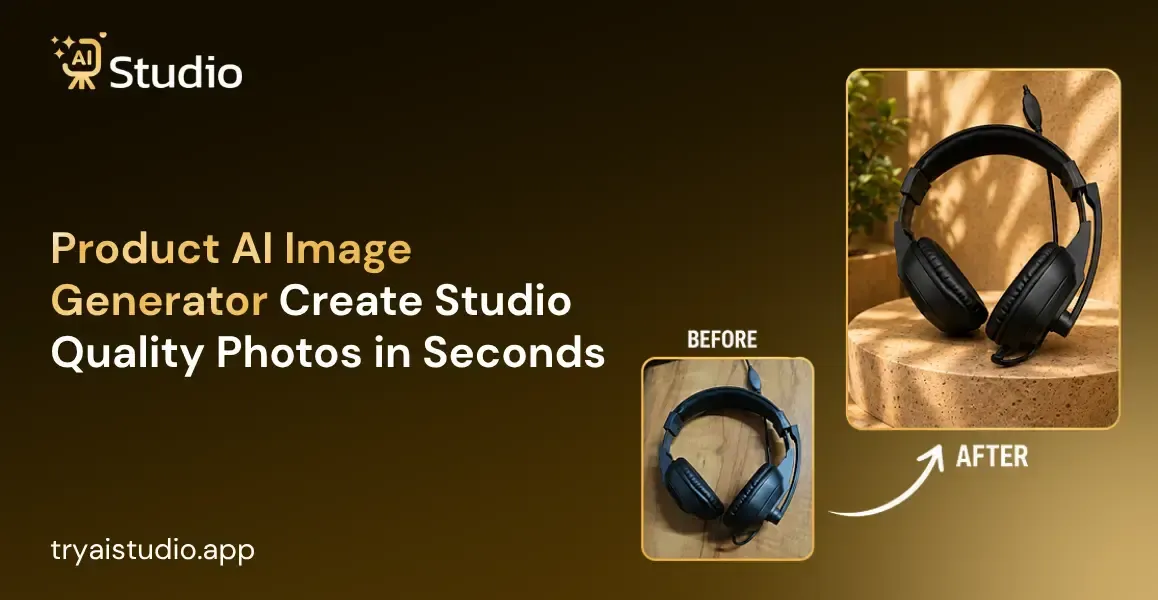
A product AI image generator can help you create high-quality product images that you can use for your Amazon, Flipkart, or Shopify listings. The best part is there's no need for a professional photoshoot or a studio.
Most Indian sellers are in a constant hurry to upload their new listings on e-commerce websites. If you have 20 products to list this week, and a good quality photoshoot will cost you anywhere between INR 15,000 and INR 40,000 and take 3 to 4 days to get the images ready, you know what I'm getting at.
I can understand the frustration of multiple Indian sellers who came to me in similar situations.
In this blog, you're going to learn about an easy solution to this problem. I will give you a brief introduction to what a product image AI generator is, how it stacks up against a regular photoshoot, and how exactly you can use it to take pictures of your products.
If you're interested in actually trying it out, you can use tryaistudio.app's product image generator and create your first image in a matter of seconds.
What Is a Product AI Image Generator and How Does It Work
Here are some of the key differences about how this works from the ground up, without getting too technical. Once you upload your product image, the AI image editor recognises the product based on its contours, colours and other features, and then places it in a new background or environment, which could be any style you want.
This is different from other photo editors as it knows exactly what the product looks like from all angles, so it can cast realistic shadows and highlights and place the image seamlessly into any background. Here's how an AI photo generator works behind the scenes, and it's how you get such realistic results with this AI product photography tool.
Why Indian Ecommerce Sellers Are Switching to AI Product Photography
I've worked with hundreds of sellers across various categories, and there are three issues that come up again and again. First, studio shootings tend to be prohibitively expensive, anywhere from 10,000 Rupees to 50,000 Rupees, depending on where you live and who's doing the shoot.
Second, there's the headache of coordination required. You have to book a studio, maybe get models, and then remember to wait while they edit all your photos. And third, there's the issue of consistency. Because different photographers or studios might be doing different kinds of shots, you can end up with varying levels of quality in your photos for different products. That's a big part of why Indian brands are switching to AI photography.
Here's a quick look at what sellers usually deal with before switching:
- Studio shoots costing thousands of rupees per session
- Delays of 3 to 7 days for editing and delivery
- Photos that don't match in tone or background across product listings
- Extra cost every time a new product needs to be shot
Product photography AI tools remove most of these problems because everything happens on your laptop or phone, usually within minutes.
AI Product Image Generator vs Traditional Studio Photography
| Factor | Traditional Studio | AI Product Image Generator |
|---|---|---|
| Cost per shoot | ₹10,000 to ₹50,000 | Starting around ₹600/month |
| Turnaround time | 3 to 7 days | Under 10 seconds per image |
| Same look across products | Depends on the photographer | Same style every time |
| Redo or changes | Extra charges usually apply | Instant, just generate again |
| Model booking needed | Yes, for fashion shoots | Not required |
Let's compare this directly, because numbers usually explain things better than opinions. This AI product photography versus traditional photography comparison is why many people ask what the difference is between AI-generated images and traditional product photography. Of course, professional product photography still has its place in the industry for large-scale advertising campaigns, but when it comes to day-to-day use, such as updating listings, restocks, and product photography for new items, an automated solution is much more convenient and affordable.
As for the quality of images provided by AI, in my experience, the technology has improved significantly in the last few years. The images generated by the early versions of such programs were often too obvious, but the current versions can provide very realistic pictures that would be difficult to distinguish from a professional photoshoot, at least in terms of commerce.
Free vs Paid AI Product Image Generators, Which One Should You Choose
This is a question that we get asked hundreds of times, so here is our honest opinion.
But they do have their limits. For example, most free online AI photo editor tools offer only a few images before you have to pay. You will also see a logo mark in the corner and only 2 to 3 background options.
You can use paid tools to generate bulk images, which is essential if you are trying to list dozens of products. You will also notice that there are more background options, higher image resolution, and some even offer to place your product on a model without a photoshoot.
A few things to keep in mind when comparing:
- Free tools usually limit the number of monthly images you can make
- Paid plans remove the logo mark and give you higher quality downloads
- Bulk sellers save more time with paid tools since many photos can be made together
- Keeping the same look across your brand is easier with a paid plan since you can save your favourite style
When a Free Tool Is Enough vs When to Upgrade
If you're a small seller with just a handful of projects, a free AI product image generator might cover your needs for now. But if you're listing regularly, running ads, and handling more than 10 to 15 products, that free plan tends to fall short pretty fast. This is a common turning point for AI product photography for small businesses looking for affordable paid options that make great sense.
Some tools, such as AI Studio, offer plans starting around ₹600 a month, which works out to be far cheaper than even a single traditional photoshoot.
I've seen more brands switch to AI Studio because it makes product images with the same look every time, without hiring models or booking a studio, and the monthly cost fits easily into a small business budget.
How to Use an AI Product Image Generator for Amazon, Flipkart and Shopify Listings
What I would like to show you here is the exact process that I carry out in AI Studio, giving you insight into the steps and demonstrating how the various elements influence the result of your own image. It will take less than 10 minutes, and you do not need any previous knowledge of AI tools.
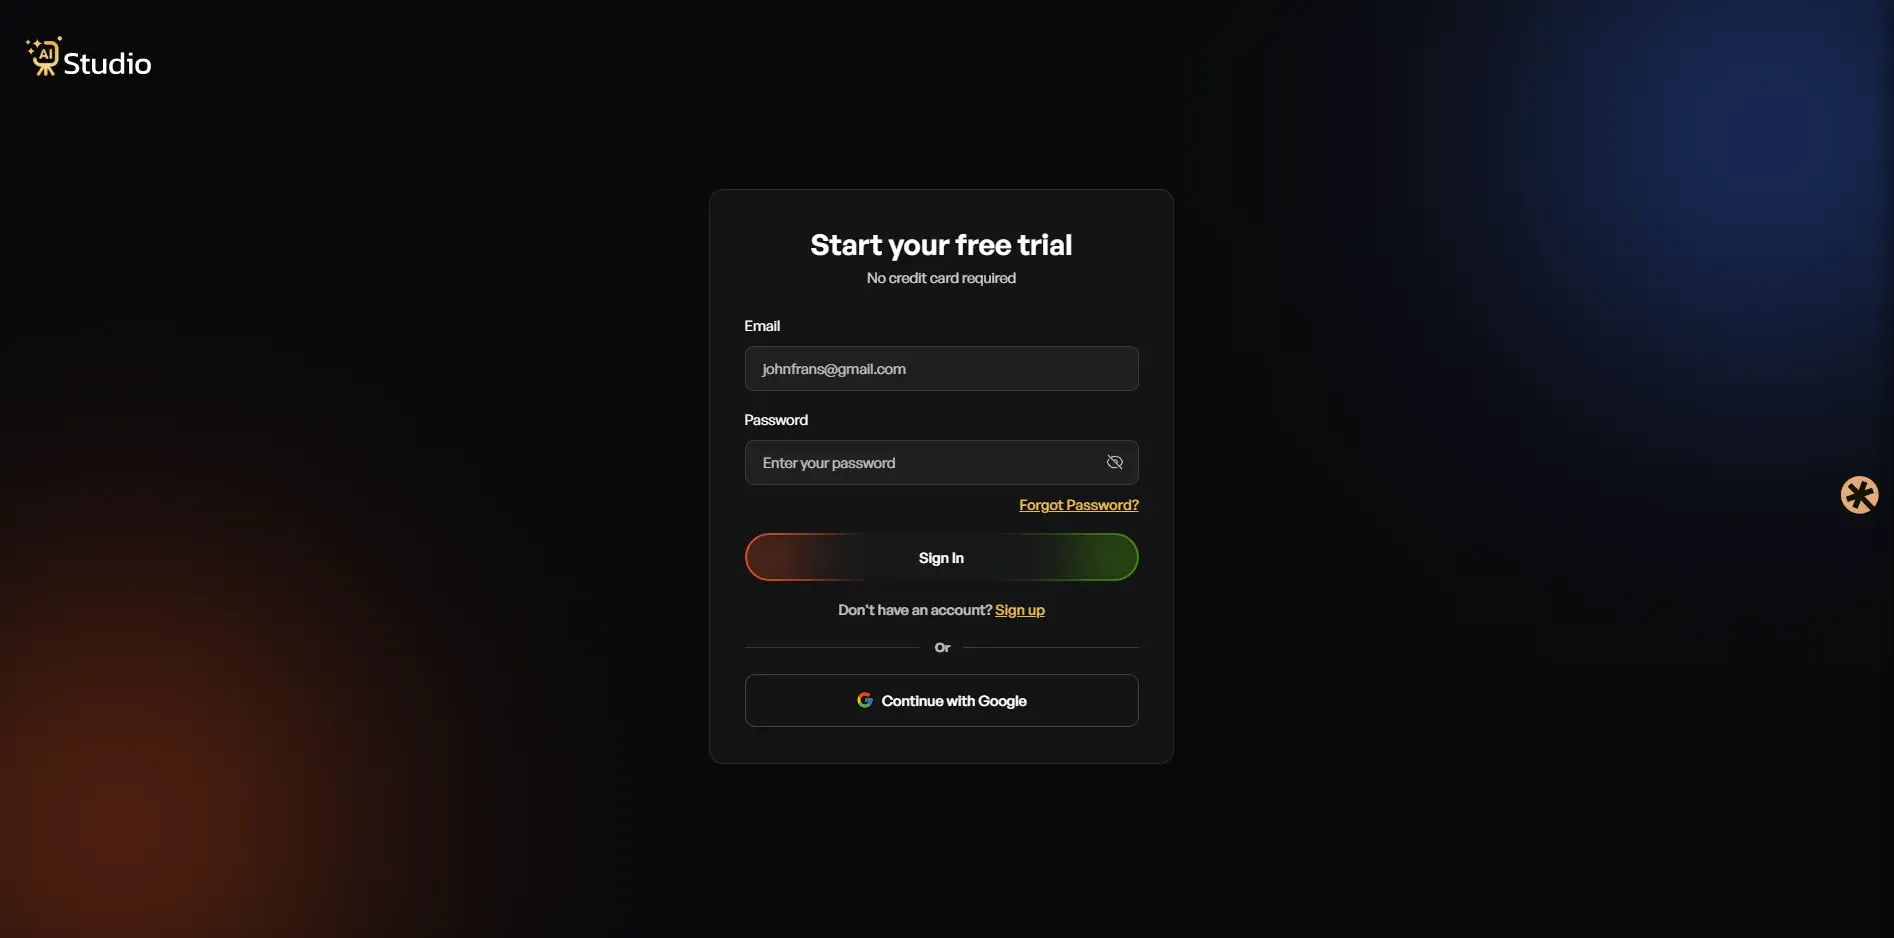
Step 1: Create a Free Account and Log In. Log in to tryaistudio.app and sign up, no card details needed to get started. Once you log in, your dashboard opens up, and you're ready to go.
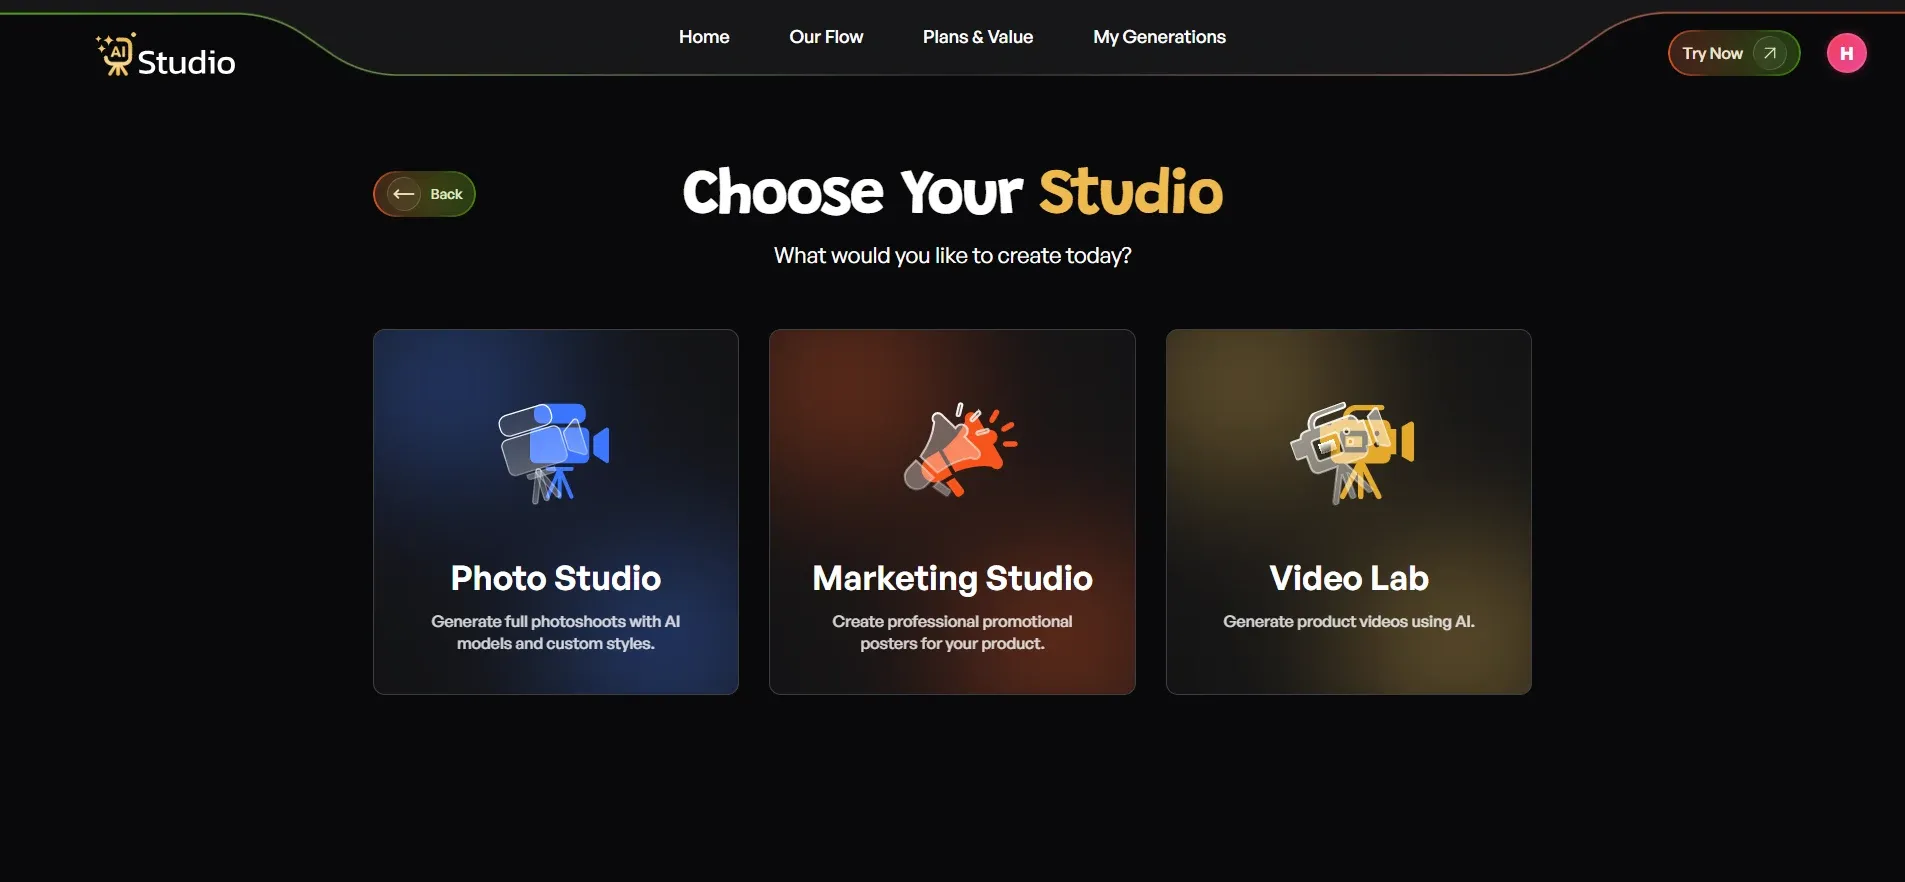
Step 2: Choose Your Studio. Inside the Photo Studio dashboard, you'll see three options: Photo Studio, Marketing Studio, and Video Lab. For product image AI work, pick Photo Studio, since this is where all your image-making happens.
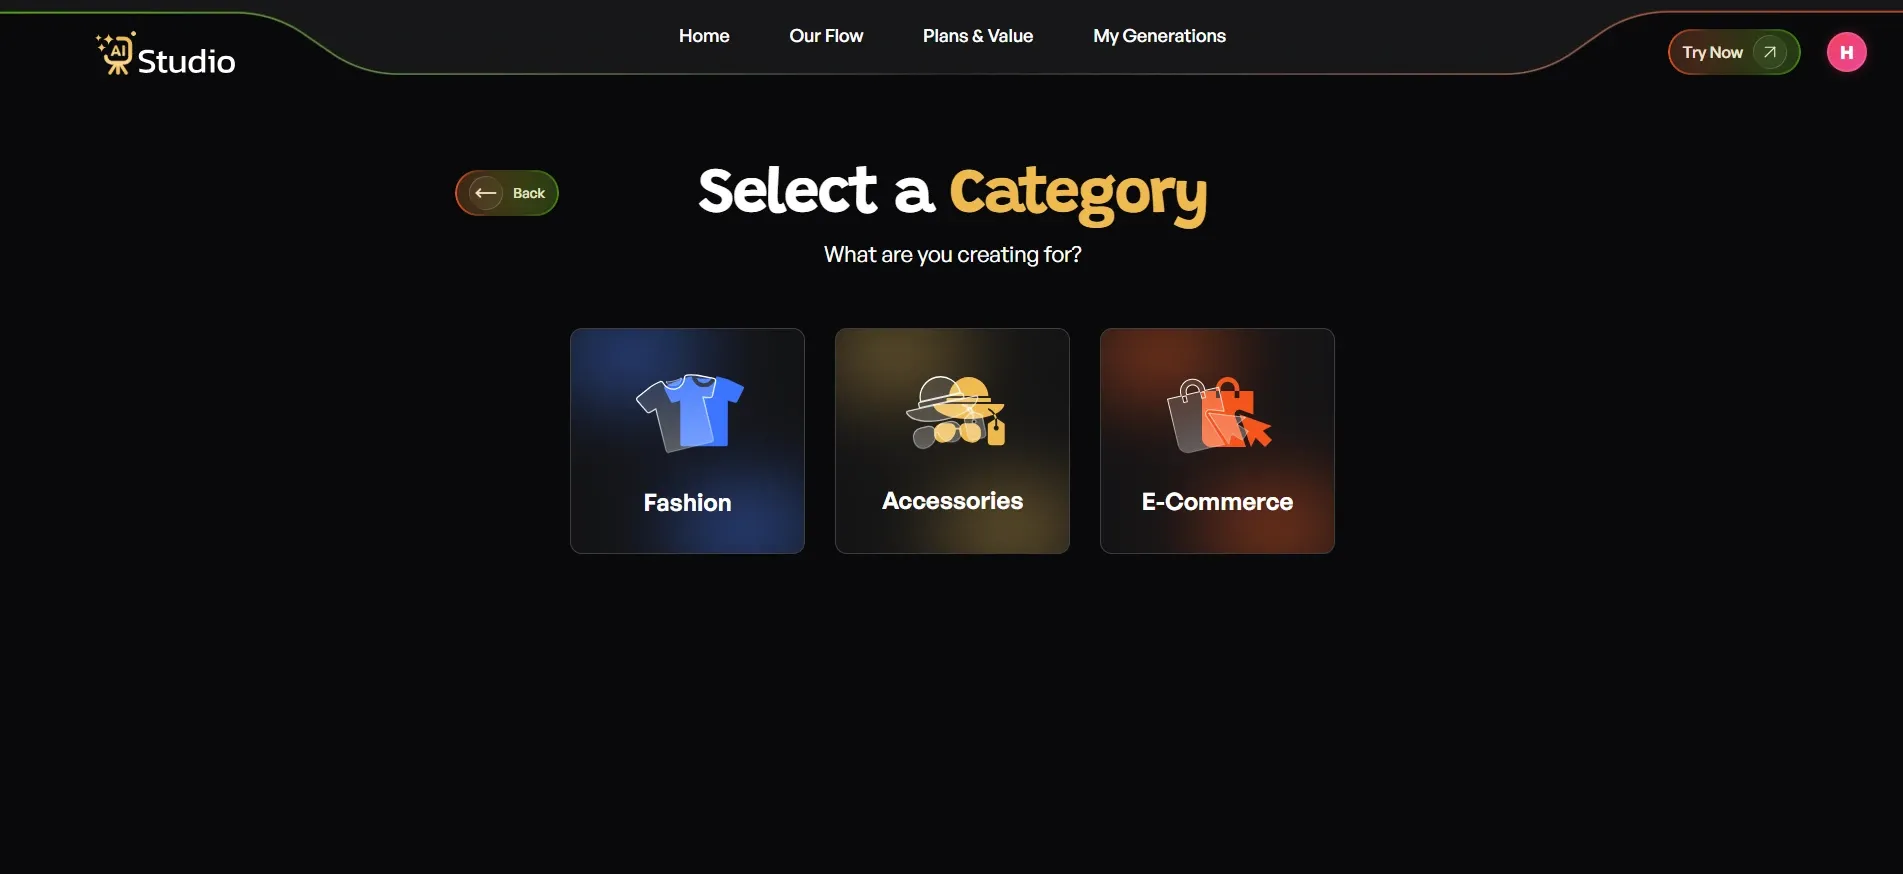
Step 3: Select Your Category. Next, you'll be asked what your photo is for. Pick the one that matches your product:
- Choose Fashion if you're selling clothing like kurtas, t-shirts, dresses, or ethnic wear
- Choose Accessories if you sell watches, jewelry, bags, belts, or sunglasses
- Choose E-commerce for general product listings like electronics, home goods, or beauty products
Once you pick Fashion or Accessories, you'll also be asked to choose Women, Men, or Kids, so the AI knows which type of model to show for your product.
Step 4: Upload Your Product Photo. This is the step that decides most of your final quality.
- Pick your exact product type; for accessories, this could be Watch, Belt, Perfume, and so on.
- Upload a Primary Image, a clear, front-facing photo of your product; this is required.
- Add a second image if you have another angle; this is optional but helpful for accessories.
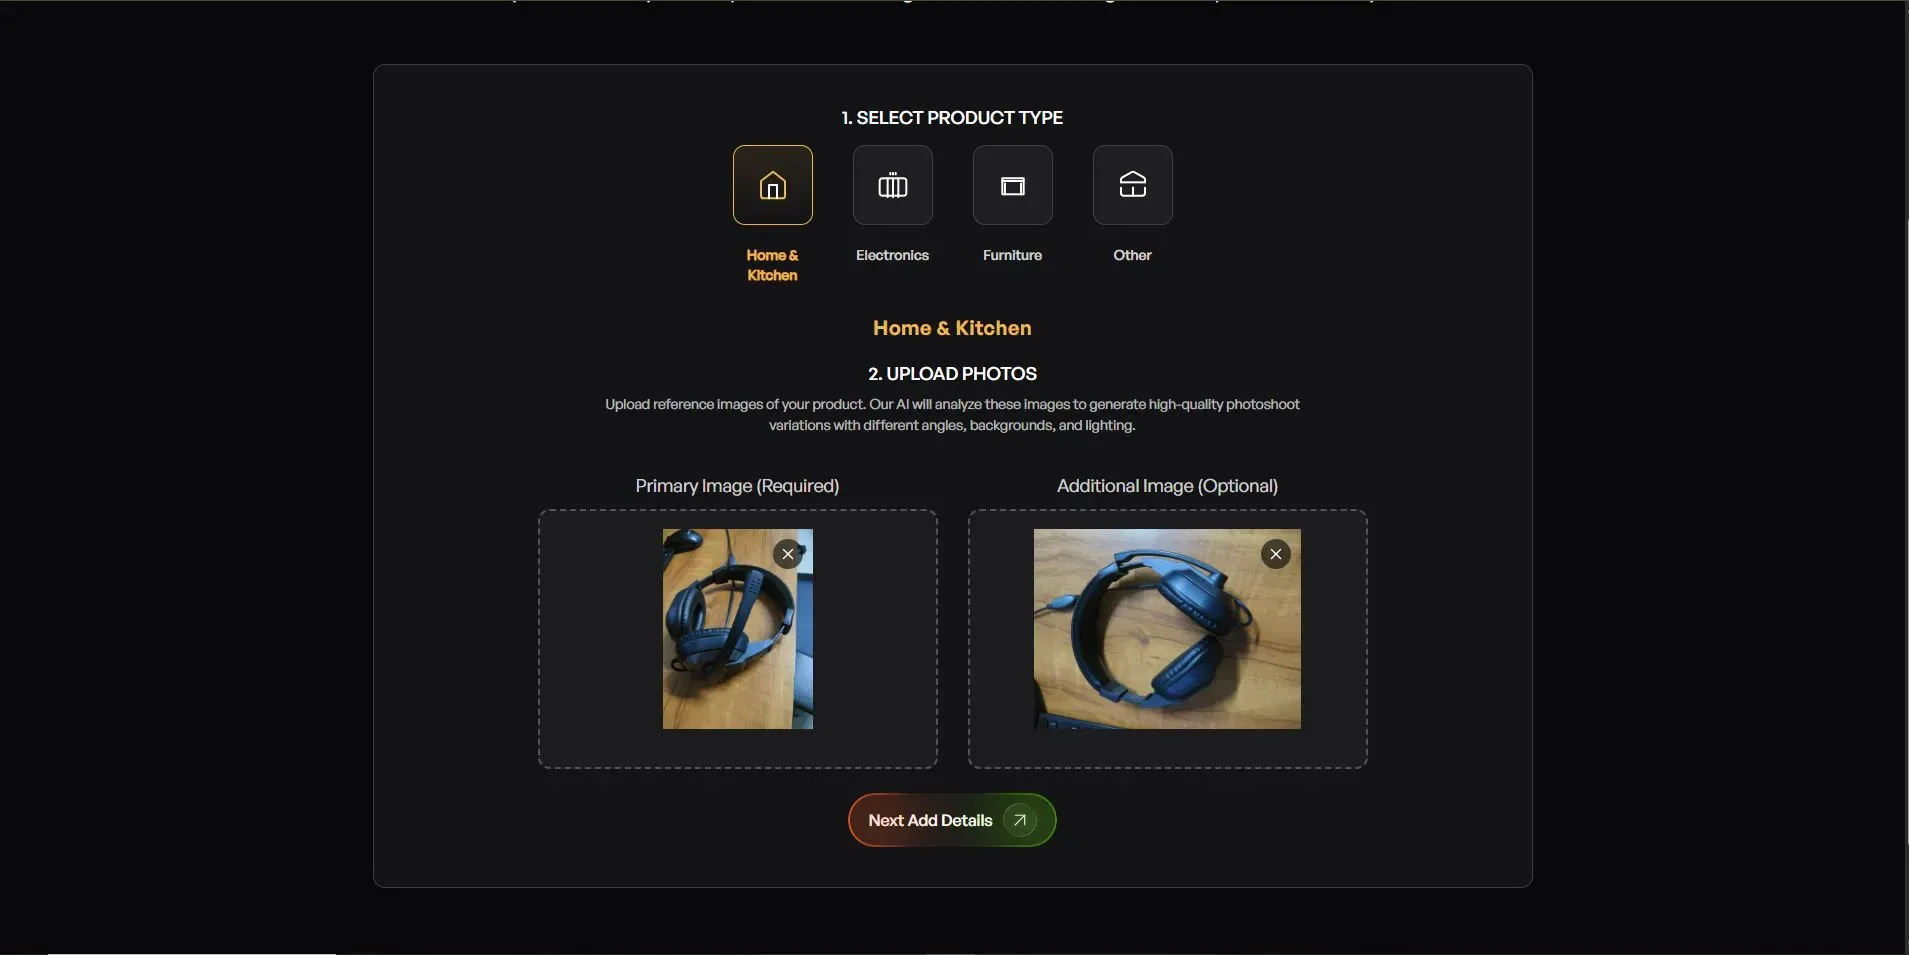
Your source photo should have a plain white or light coloured background for the best result. Any phone photo works fine as long as it's in focus and has decent light.
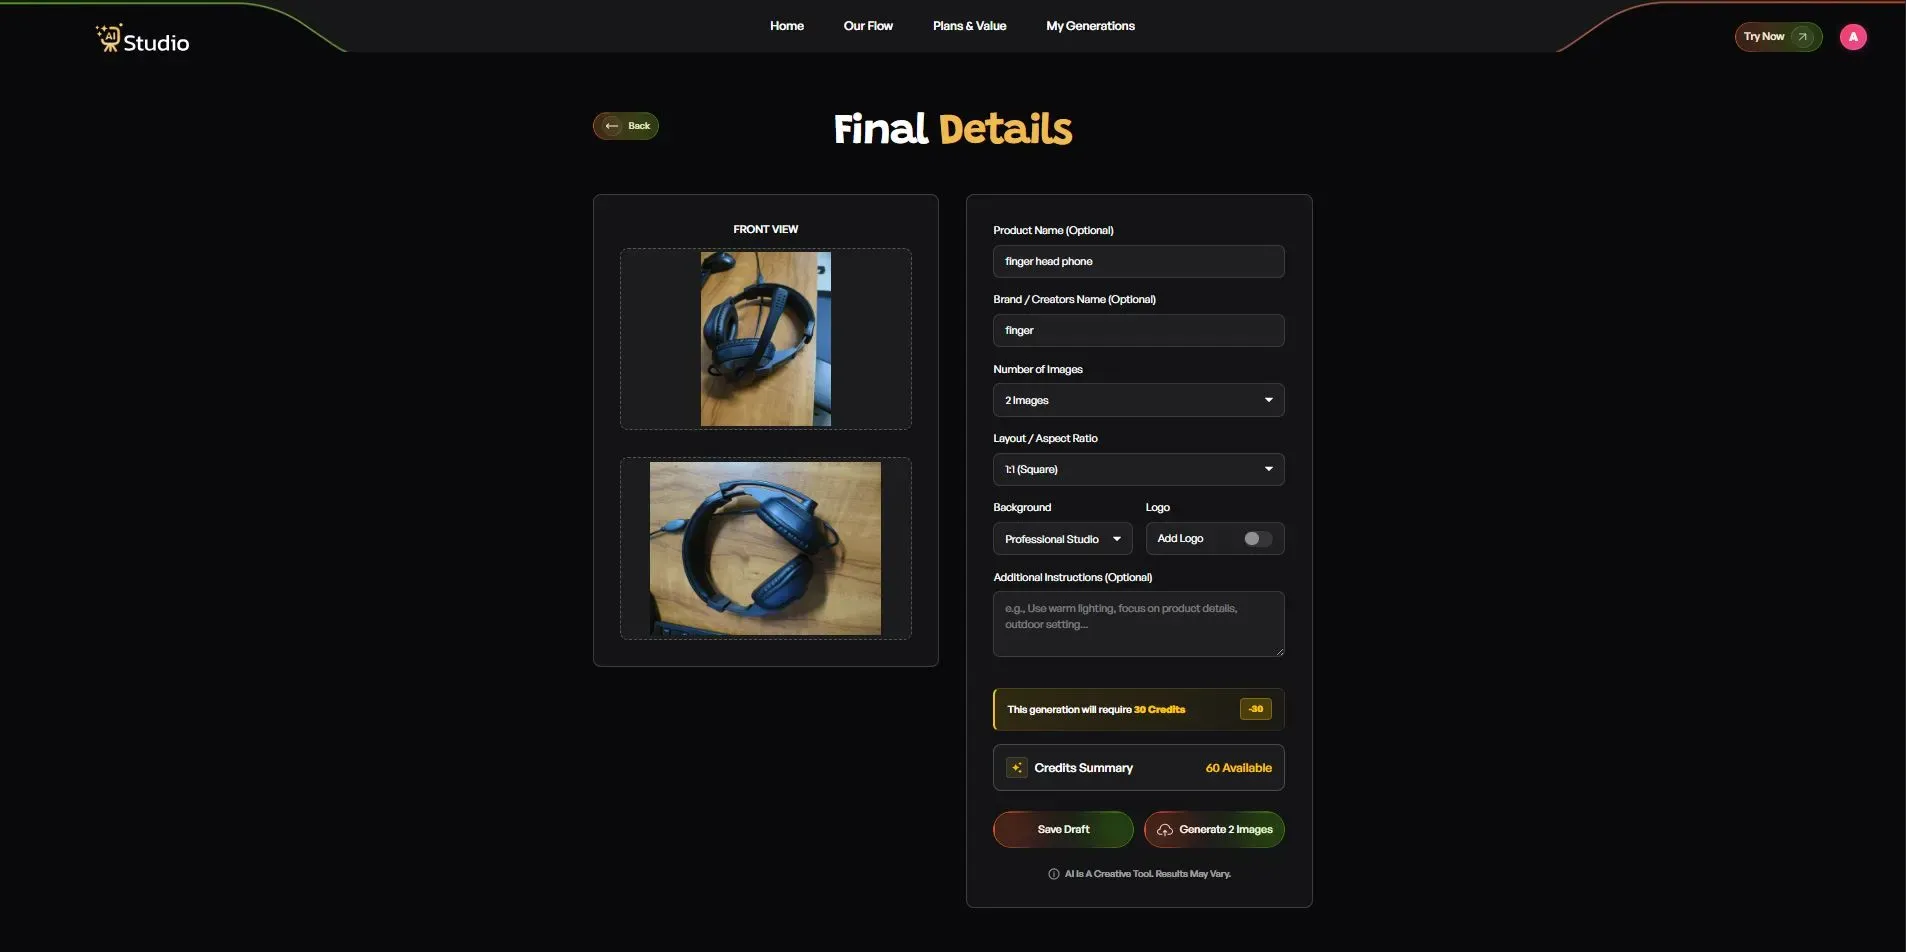
Step 5: Fill In the Final Details. This is where you set the final look to match your platform and brand.
- Add your Product Name and Brand Name; optional but helps keep things consistent
- Set the Number of Images you want: 2, 4, or more
- Choose the Layout or Shape: 1:1 square for Amazon listings and Instagram, 4:5 for Instagram feed, 16:9 for banners
- Turn on Model Consistency if you're making a full product list and want the same model in every photo
- Choose a Background: Solid White works best for Amazon's main image spot, while lifestyle backgrounds suit a Shopify store and Instagram
- Pick a Style: Modern, Minimalist, Vintage, Monochrome, Aesthetic, or Close Up
- Add a Logo if you want your brand mark on the image
- Write any Extra Instructions, for example, warm lighting, outdoor setting, focus on product details
Step 6: Download Your Image. Click Generate, and within 10 seconds your image is ready in full quality, no editing needed, no back and forth. It's ready to go straight onto your Amazon listing, Shopify store, Flipkart page, or Instagram post.
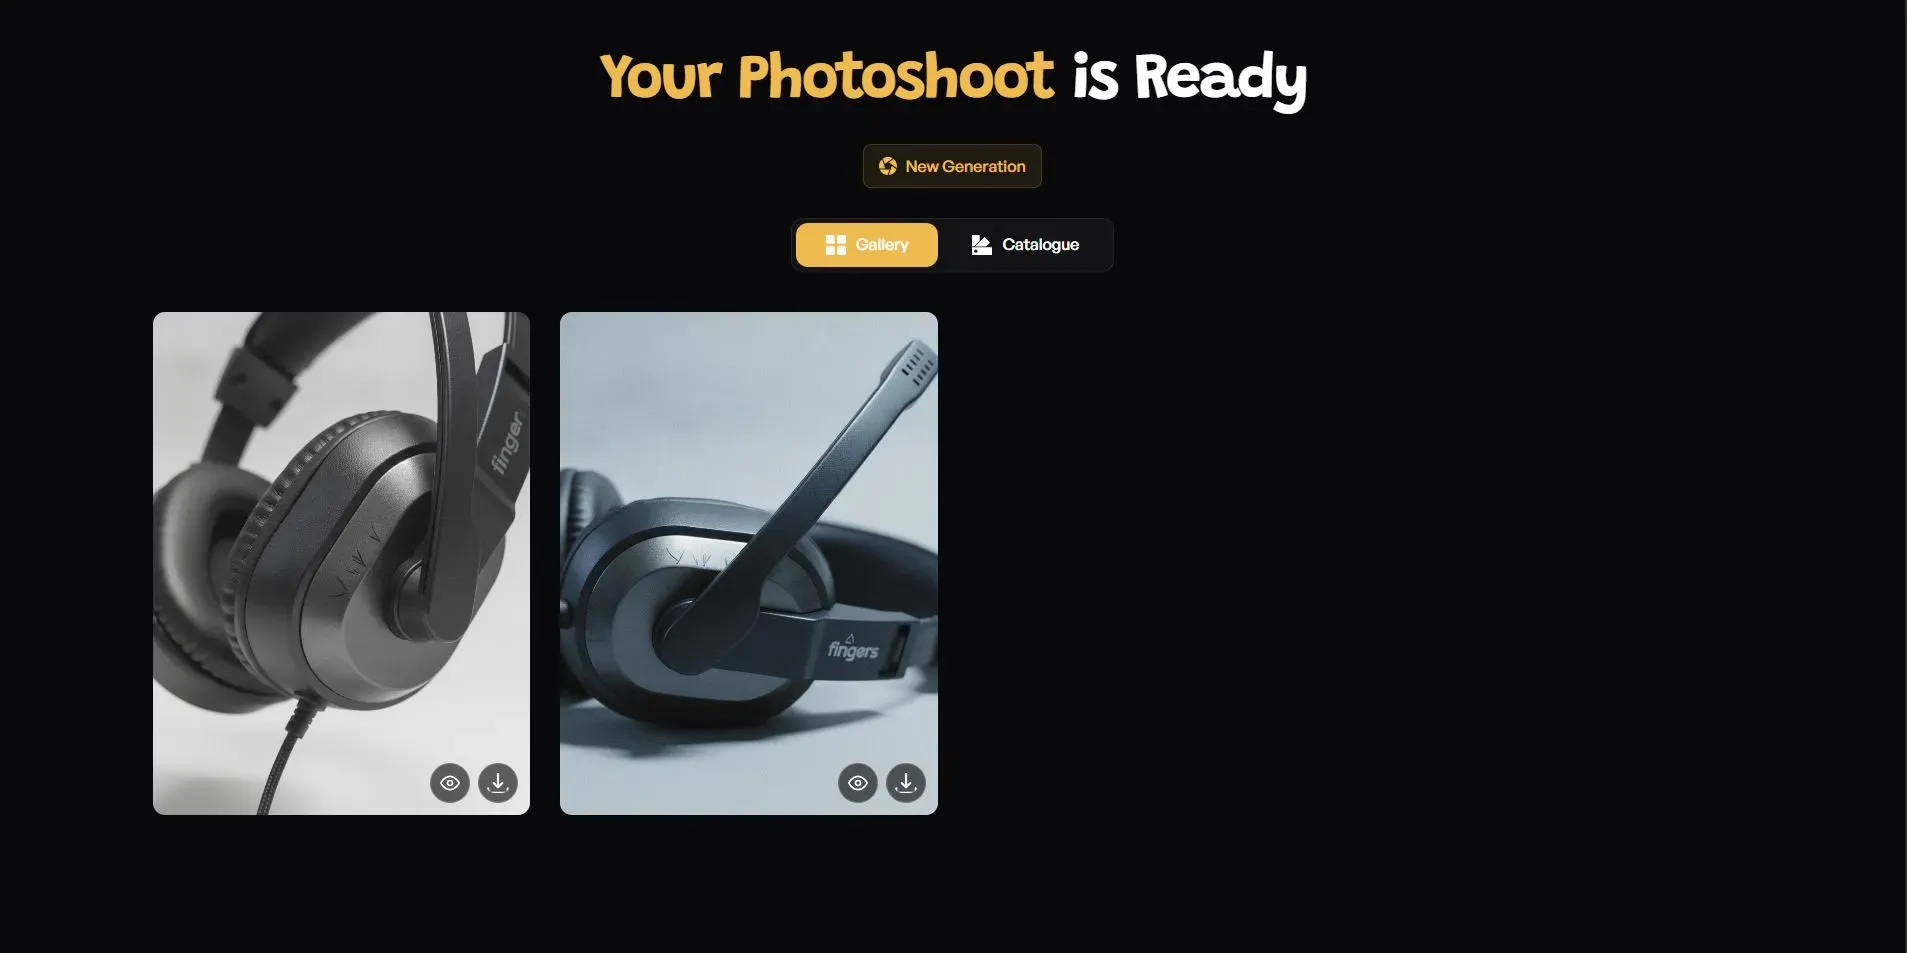
This basic flow works whether you're making photos for an e-commerce AI photo generator on Amazon or setting up a fresh Shopify store.
Tips to Get Studio-Quality Results Every Time
Here's the reality: the best tool doesn't give great results if the source photo is poor. Here are a few simple AI product photography tips that I always share with sellers.
Just start with good light on your original photo; even natural daily light near a window works well. Now shoot against a plain surface if possible; the AI gives a cleaner base to work with. Make a few versions and pick the one that looks most natural instead of settling for the first result. Now keep the product in focus; a blurry source photo tends to carry that blur into the final image.
These small habits make a real difference. Sellers using the best AI tools for product photography often get their best results because they take a few extra seconds to shoot a clean base photo before uploading.
Conclusion
A product AI image generator changes how Indian sellers handle product photography. It cuts down costs, saves days of waiting, and keeps your images looking studio quality without a photographer across cities and countries without spending more on shoots. Use the TryAI Studio app's generator and make your first studio photo in seconds.